
You will need: keys «at 15» (two), end head «at 32», pliers, wrench for wheel nuts, mounting blade, hammer, barb.
1. Remove mudguards and crankcase protection (see Removal and installation of mudguards and engine crankcase protection).
2. Drain the gearbox oil (see Checking the level, topping up and changing the oil in a manual transmission and the working fluid in an automatic transmission).
3. Remove the wheel (see Wheel replacement).
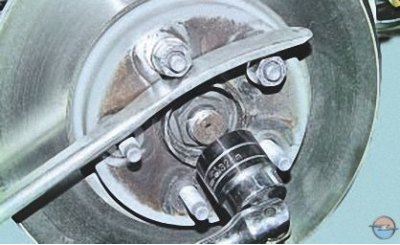
4. Loosen the front hub nut..
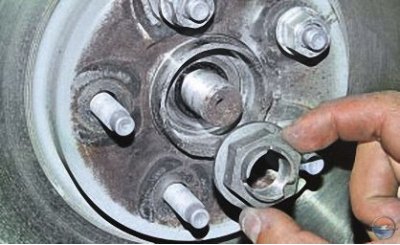
5.... and unscrew the nut.
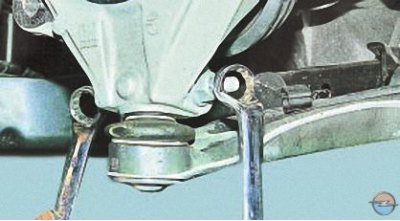
6. Unscrew the nut of the coupling bolt of the terminal fastening of the pin of the ball joint of the front suspension strut to the steering knuckle..
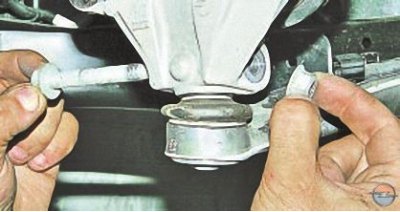
7.... and remove the bolt.
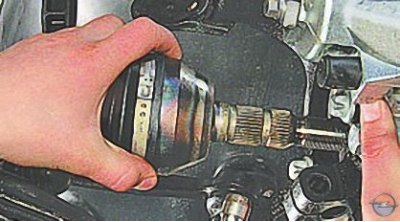
8. Move the shock absorber strut a little to the side and remove the shank of the outer constant-velocity joint from the hub.
Note. If it is not possible to remove the hinge shank with the force of your hands, knock it out of the hub with light blows of a hammer through a barb or soft metal drift.
Attention! Make sure that the Tripod drive shaft does not protrude from the inner joint housing, as this may damage the joint.
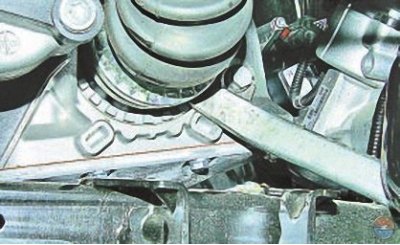
9. With the mounting blade resting on the gearbox housing, press the drive inner joint out of the side gear and remove the front wheel drive assembly.
Note. The gap between the inner hinge housing and the gearbox housing is very small, it is impossible to immediately insert the end of the mounting blade completely into it. After inserting the pointed part of the mounting blade into the gap, with gentle hammer blows along the blade, drive its end deep into the gap and move the hinge body away from the crankcase with it like a wedge until the retaining ring of the hinge shank comes out of the axle shaft gear. Then finally push the hinge shank out of the gear with a spatula.
Attention! When using a mounting spatula when pressing the inner joint out of the gear of the half shaft of the gearbox, do not damage the gearbox housing and the joint.
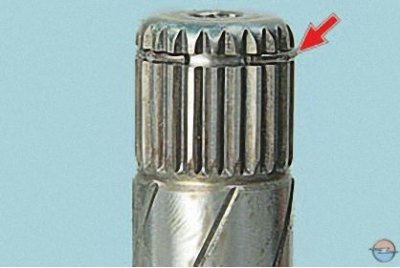
Replace the inner joint shank retaining ring with a new ring each time the actuator is removed from the vehicle, otherwise the actuators may spontaneously disengage from the transmission while driving.
10. The second drive is removed in the same way.
11. To install the drive, first insert the splined shank of the outer joint housing into the wheel hub and screw the hub nut until it stops without fully tightening it.
12. Then insert the splined shank of the inner joint housing into the axle shaft seal and turn the drive shaft slightly so that the splines of the joint shank and the axle gear are aligned.
13. Pull down the front suspension arm and with a sharp movement of the shock absorber strut with a steering knuckle, press the drive into the axle shaft gear until the drive is fixed with the retaining ring.
14. With a sharp jerk at the steering knuckle, try to pull out the shank of the Lebro-type internal joint from the side gear. If this succeeds, repeat the installation of the hinge into the gear. If the second attempt does not lead to the desired result, replace the inner joint shank retaining ring.
Attention! The test described for the Tripod type joint is carried out almost similarly, however, trying to pull the joint shank out of the side gear should be applied by applying force to the joint body, and not to the steering knuckle, otherwise the joint may be damaged.
15. Install the removed parts in the reverse order of removal.
16. Install the car on the wheels, removing it from the supports, and tighten the hub nuts to a torque of 300 Nm.
17. Tighten wheel nuts (see Wheel replacement).
18. After installing all the parts, fill the gearbox with oil (see Checking the level, topping up and changing the oil in a manual transmission and the working fluid in an automatic transmission).
19. Install mudguards and crankcase protection (see Removal and installation of mudguards and engine crankcase protection).
Visitor comments