
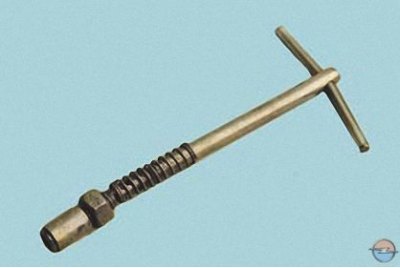
In addition, there are for sale prefabricated manual valve holders.
In addition, you will need: lapping paste, kerosene, weak spring, passing through the valve seat hole along the outer diameter.
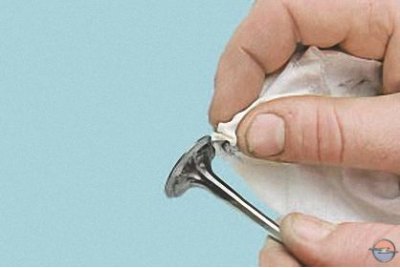
1. Clean the valve from carbon deposits.
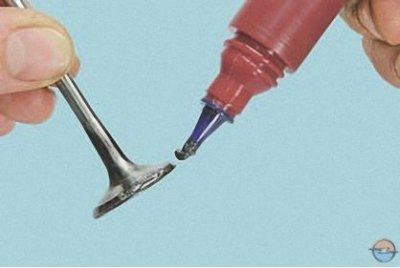
2. Apply a thin, continuous layer of lapping paste to the valve face.
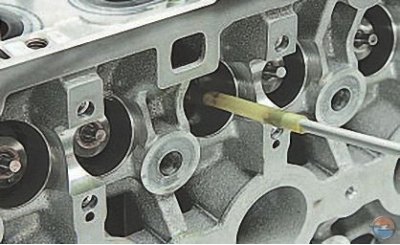
3. Place a pre-selected spring on the valve stem and insert the valve into the guide sleeve from the combustion chamber side, lubricating the valve stem with a layer of graphite grease.
Note. Graphite grease prevents the guide bush from getting abrasive from the lapping paste into its holes, and facilitates the rotation of the valve during lapping.
4. Place a valve lapping tool on the valve stem (or with some tightness a rubber tube to connect the valve to a reversible drill).
5. Turning on the drill at the minimum speed (in reverse mode) or rotating fixture (in case of manual lapping) alternately in both directions for half a turn, lap the valve, periodically pressing it to the seat, then loosening the pressing force.
Note. In the absence of any device, you can grind the valve with an eraser, pressing and turning the valve with it. Loosen the pressure of the valve by pressing on the end of its rod with the other hand.
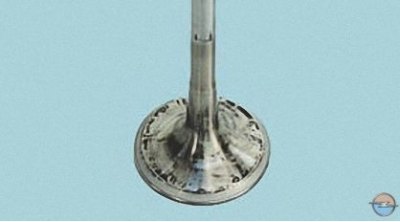
6. Grind the valve until a matte gray continuous monophonic belt appears on its chamfer, at least 1.15 mm wide for the inlet valve and 1.35 mm for the exhaust valve, while..
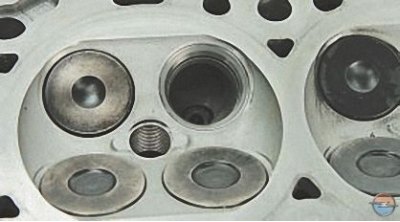
7.... after lapping, a shiny belt with a width of at least 1.5 mm should also appear on the valve seat.
8. After lapping, thoroughly wipe the valve and seat with a clean cloth and rinse to remove any remaining lapping paste. Check the tightness of the valve, for which install it in the head with springs and crackers. Then put the head on its side and pour kerosene into the channel that is closed by the valve. If kerosene does not seep into the combustion chamber within 3 minutes, the valve is tight.
Visitor comments