OpelBook.ru
Cars AvtoVAZ Cars Mitsubishi Cars BMW Cars Mercedes Cars Nissan Cars Toyota Cars Chevrolet
English Русский
Български
Беларускі
Український
Српски
Hrvatski
Română
Polski
Slovenský
Magyar
 |  Sitemap  |  Contacts  |    


Main Astra Corsa Insignia Kadett Omega Vectra Zafira Others Articles
Astra F (1991-1998, petrol) Astra G (1998-2004, petrol) Astra G (1998-2004) Astra H (2004-2009) Astra J (2009-2015, petrol)
  • Main
  • Astra
  • Astra J
  • Chassis
  • Front suspension
  • Removal and installation the front suspension subframe

Removal and installation the front suspension subframe (Opel Astra J)

            0

You will need: keys "8", "13", "18", "21", flat-blade screwdriver.

1. Brake the vehicle with the parking brake and install the anti-rollback stops ("shoes") under the rear wheels.

2. Loosen the wheel nuts.

Caution! Loosen and tighten the wheel nuts only when the vehicle is on the ground.


3. Raise and support the front of the vehicle. Completely remove the mounting nuts and remove the wheels.
3. Raise and support the front of the vehicle. Completely remove the mounting nuts and remove the…


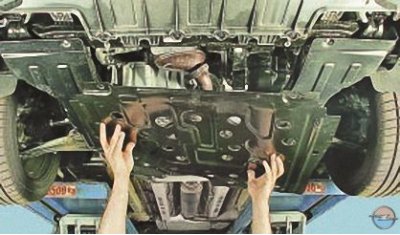
4. Remove the engine crankcase guard (see Removal and installation mudguards and engine crankcase protection).

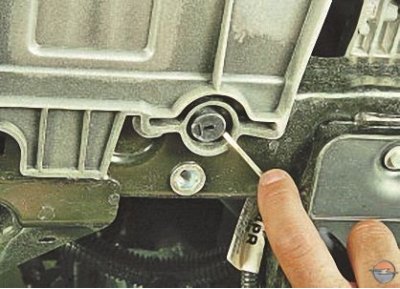
5. Remove the engine splash guards (see Removal and installation mudguards and engine crankcase protection).
5. Remove the engine splash guards (see Removal and installation mudguards and engine crankcase…


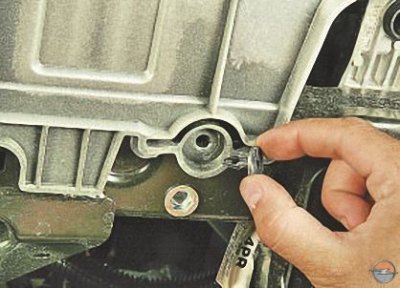
6. Pry it up with a screwdriver…

6. Pry it up with a screwdriver…


7. …and remove the four pins securing the front bumper mudguard to the subframe.
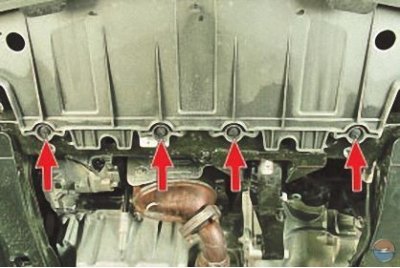


7. …and remove the four pins securing the front bumper mudguard to the subframe.


Note: This is how the pins that secure the front bumper mudguard to the subframe are located.

Note: This is how the pins that secure the front bumper mudguard to the subframe are located.


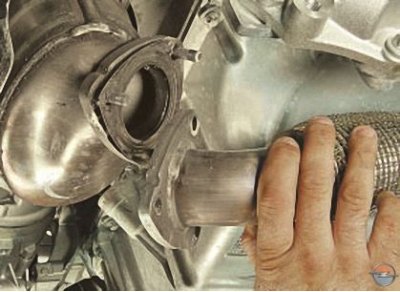
8. Remove the exhaust pipe (see Replacing the inlet pipe).
8. Remove the exhaust pipe (see Replacing the inlet pipe).


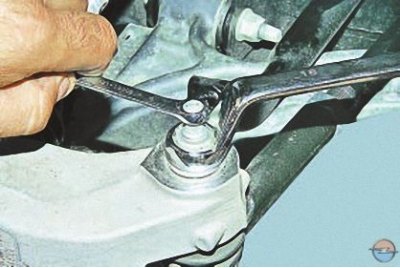
9. Loosen the nut securing the outer tie rod end joint pin to the steering knuckle, holding the pin with a second wrench to prevent it from turning…
9. Loosen the nut securing the outer tie rod end joint pin to the steering knuckle, holding the pin…


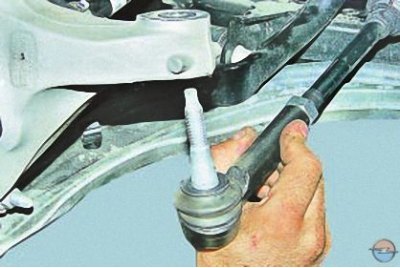
10. …and remove your finger from your fist.
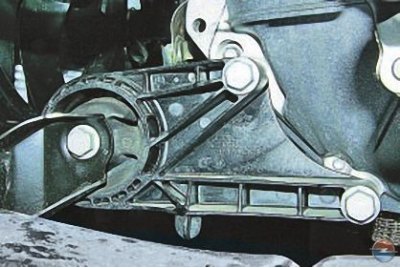


10. …and remove your finger from your fist.


11. Remove the front…
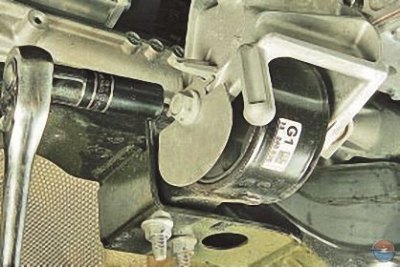
11. Remove the front…


12. …and the rear supports of the power unit suspension (see Replacing the powertrain suspension mounts).
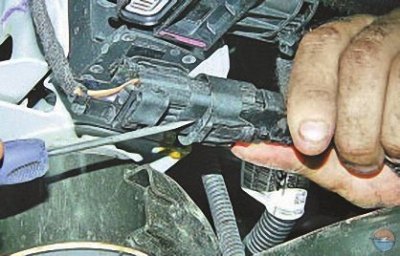
12. …and the rear supports of the power unit suspension (see Replacing the powertrain suspension…


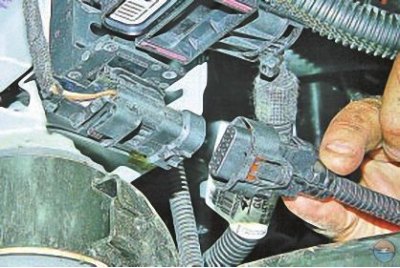
13. Press the latch..

13. Press the latch..


14. …and disconnect the wiring harness connector from the electric power steering connector.
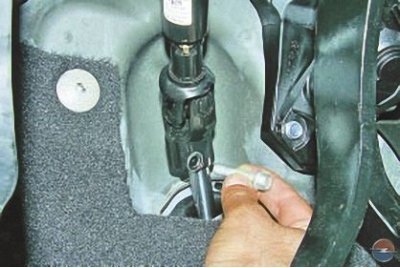


14. …and disconnect the wiring harness connector from the electric power steering connector.


15. In the car interior, under the instrument panel, unscrew the tie bolt securing the intermediate shaft of the steering column to the steering gear shaft pinion.
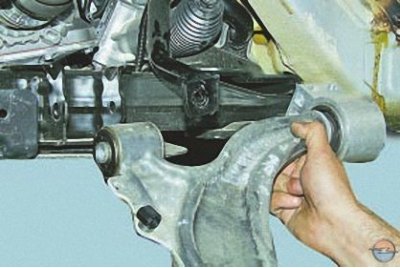
15. In the car interior, under the instrument panel, unscrew the tie bolt securing the intermediate…


16. Remove the front suspension arms (see Replacing the front suspension arm).

Note: The subframe can be removed together with the front suspension arms by disconnecting their ball joints from the steering knuckles. However, if you are removing the subframe for replacement, it is more convenient to remove the arms directly on the car.
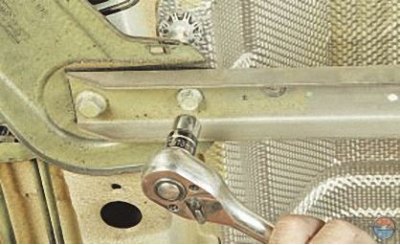

Note: The subframe can be removed together with the front suspension arms by disconnecting their…


17. Remove the four body reinforcement mounting bolts…
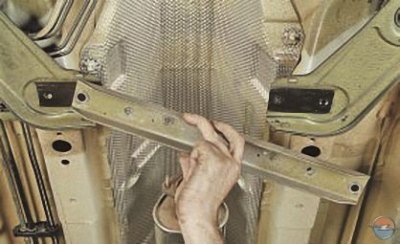


17. Remove the four body reinforcement mounting bolts…


18. …and take it off.
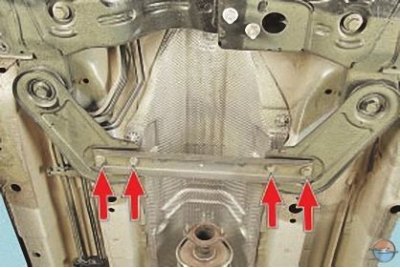
18. …and take it off.


Note: This is how the body reinforcement mounting bolts are located.
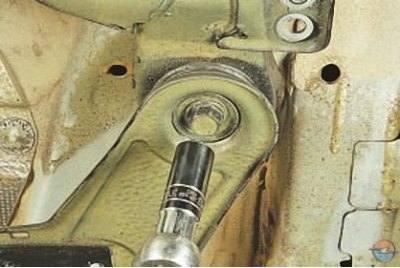

Note: This is how the body reinforcement mounting bolts are located.


19. Remove the bolts securing the rear brackets to the subframe…
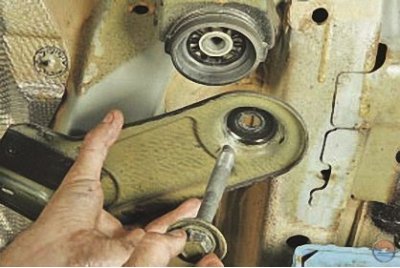
19. Remove the bolts securing the rear brackets to the subframe…


20. …and remove both brackets.
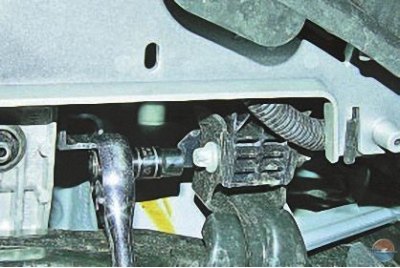


20. …and remove both brackets.


21. Remove the bolt securing the front bumper to the subframe bracket…
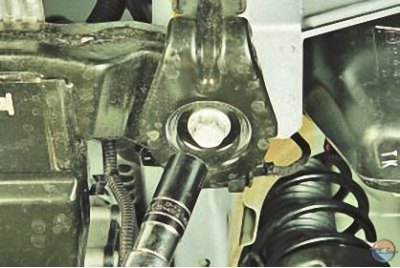
21. Remove the bolt securing the front bumper to the subframe bracket…


22. …and the bracket to the subframe.
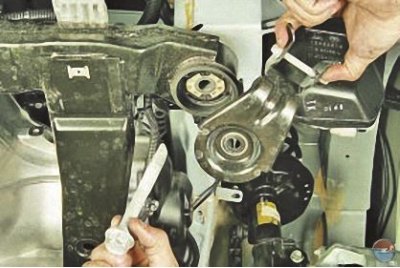
22. …and the bracket to the subframe.


23. Remove the bracket. Remove the second bracket in the same way.
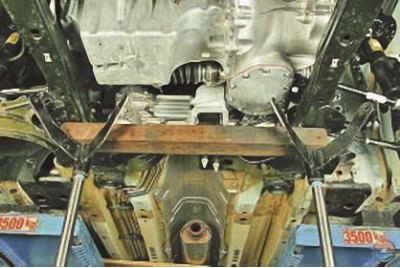
23. Remove the bracket. Remove the second bracket in the same way.


24. Remove the front subframe assembly with the steering gear, electric power steering and stabilizer bar by lowering it down and simultaneously disconnecting the intermediate shaft of the steering column and the steering gear pinion shaft. If necessary, remove the stabilizer bar (see Replacing the front suspension stabilizer bar components), steering mechanism (see Replacing the steering gear) and levers (see Replacing the front suspension arm), if they were not removed before removing the subframe.


25. Install the parts in the reverse order of removal. Tighten the bolts to the specified torque.

26. Check and, if necessary, adjust the wheel alignment angles in a workshop with special equipment.


This article is available at russian, bulgarian, belarusian, ukrainian, serbian, croatian, romanian, polish, slovak, hungarian
Checking the article: Trifonova Emilia

Share information:

Previous articles
Opel Astra J: Front suspension
Next articles

Replacing the front wheel hub
Removal and installation the steering knuckle
Replacing the front suspension stabilizer bar components
Replacing the front suspension arm
Replacing the ball joint of the front suspension shock absorber
Replacing the upper support of the front suspension shock absorber strut
Checking and adjusting wheel alignment angles


See similar ones from other Opel car manuals:
▶ Front Suspension Subframe — Removal and Installation Opel Zafira A (1999-2005, petrol)
▶ Removal and installation the front control arm of the… Opel Corsa C (2000-2006, petrol)
▶ Front suspension Opel Insignia A (2008-2017)
▶ Front suspension Opel Kadett E (1984-1995)
▶ Front suspension strut — removal and installation Opel Omega A (1986-1993)
Link to this page in different formats

Visitor comments


No comments yet


How much will 47 + 47 =


Astra J (2009-2015, petrol) 
  • General information
  • Vehicle device
  • User manual
  • Faults en route
  • Maintenance
  • Power unit
  • Engine repair
  • Cooling and lubrication system
  • Engine power system
  • Exhaust system
  • Transmission
  • Clutch
  • Car gearbox
  • Drive shafts
  • Chassis
  • Front suspension
  • Rear suspension
  • Steering
  • Brake system
  • Wheels and tires
  • Body
  • Exterior
  • Interior
  • Doors and windows
  • Body Care
  • Heating and air conditioning
  • Security systems
  • Electrical equipment
  • Equipment and devices
  • Lighting and signaling
  • Power devices
  • Electrical circuits
Astra H (2004-2009) 
  • General information
  • Introduction to the guide
  • Troubleshooting
  • User manual
  • Maintenance
  • Power unit
  • Engine repair
  • Cooling and heating
  • Power and exhaust system
  • Ignition system
  • Launch and charge system
  • Transmission
  • Mechanical gearbox
  • Automatic gearbox
  • Drive shafts
  • Chassis
  • Brake system
  • Car suspension
  • Steering
  • Body
  • Interior
  • Exterior
  • Electrical equipment
  • Equipment and devices
  • Electrical circuits
Astra G (1998-2004) 
  • General information
  • Introduction to manual
  • User manual
  • Maintenance
  • Power unit
  • SOHC gasoline engines
  • DOHC gasoline engines
  • Diesel engines 1.7 and 2.0
  • Engine repair
  • Cooling system
  • Supply system
  • Injection system (gasoline)
  • Injection system (diesel)
  • Exhaust system
  • Charge and launch system
  • Ignition system (gasoline)
  • Preheat system (diesel)
  • Transmission
  • Manual gearbox
  • Automatic gearbox
  • Clutch
  • Drive shafts
  • Chassis
  • Brake system
  • Wheel suspension
  • Steering
  • Body
  • Exterior
  • Interior
  • Doors and windows
  • Ventilation and heating
  • Electrical equipment
  • Equipment and devices
  • Electrical circuits
Astra G (1998-2004, petrol) 
  • General information
  • User manual
  • Car care
  • Maintenance
  • Power unit
  • Single shaft engines
  • Twin shaft engines
  • Engine repair
  • Cooling and heating
  • Fuel and exhaust systems
  • Starting and charging system
  • Ignition system
  • Transmission
  • Clutch
  • Mechanical gearbox
  • Automatic gearbox
  • Drive shafts
  • Chassis
  • Brake system
  • Car suspension
  • Steering
  • Body
  • Interior
  • Exterior
  • Electrical equipment
  • Equipment and devices
  • Wiring diagrams Opel Astra
  • Wiring diagrams Opel Zafira
Astra F (1991-1998, petrol) 
  • General information
  • Maintenance
  • Power unit
  • Engine in car
  • Engine removed
  • Cooling system
  • Heating and ventilation
  • Fuel supply (carburetor)
  • Fuel supply (injector)
  • Emission control
  • Ignition system
  • Transmission
  • Clutch
  • Mechanical gearbox
  • Automatic gearbox
  • Drive shafts
  • Chassis
  • Brake system
  • Car suspension
  • Steering
  • Body
  • Exterior
  • Interior
  • Electrical equipment
  • Equipment and devices
  • Electrical circuits
OpelBook.ru © 2017–2026 · Mobile version · · Sitemap: EN BG BY UA RS HR RO PL SK HU · Feedback · Site search
Astra F, petrol · Astra G, petrol · Astra G · Astra H · Astra J, petrol · Corsa B · Corsa C, petrol · Corsa C · Insignia A · Kadett D · Kadett E · Omega A · Omega B · Omega B2 · Vectra A, petrol · Vectra A · Vectra B, petrol · Vectra B · Vectra C · Zafira A, petrol · Frontera A, petrol · Frontera B · Ascona C · Vivaro A ·
We want your visit to be comfortable 🤝! We use cookies 🍪 to make that happen.