
Warning! New connecting rod bolts and nuts must be used to fasten the lower head of the connecting rod.
1. On 1.6L petrol engines, remove the cylinder head, oil pan and oil pickup pipe.
2. On DOCH 1.8 and 2.0L engines, remove the cylinder head, oil pan and oil receiver pipe. Unscrew screws and remove a partition from the base of the block of cylinders.
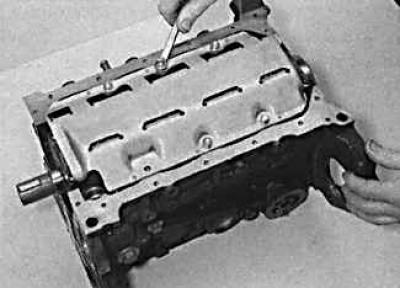
3. On 1.7L diesel engines, remove the cylinder head, oil pan and oil receiver pipe. Unscrew bolts and remove a partition from the basis of the block of cylinders.
4. On 2.0L diesel engines, remove the cylinder head, oil pan and oil pickup pipe.
5. On all models, if there is carbon on the top of the cylinder, remove it with a soft scraper. The presence of a step in the upper part of the cylinder indicates excessive wear of the cylinder and the need to bore the engine cylinder.
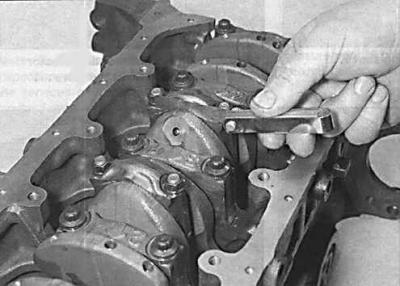
6. Check the side clearance of all connecting rod ends.
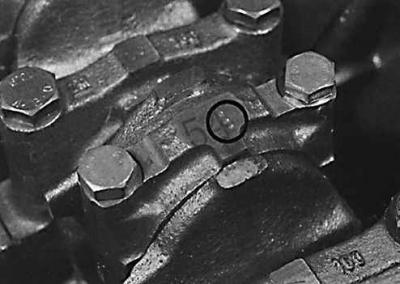
7. Using a hammer and center punch or paint, mark the position of the connecting rod cap and cylinder number.
8. Turn the crankshaft so that the pistons of the first and fourth cylinders are at bottom dead center.
9. Unscrew the nuts (diesel engines 1.7 l) or bolts (other engines) fixing the cover of the lower head of the connecting rod of the first cylinder. Remove the lower connecting rod cover.
10. Using a hammer handle, push the piston up the cylinder block and remove it from the cylinder block.
11. Install the connecting rod cap on the lower head of the connecting rod and screw it with nuts, which will allow you to keep them as a set and not confuse them.
12. Remove the piston of the fourth cylinder in the same way.
13. Rotate the crankshaft 180°to set the second and third cylinder pistons to bottom dead center and remove the pistons in the same way.
Visitor comments