
Removing
Upper section
1. Remove the air cleaner (see chapter Power supply systems, release and reduction of toxicity of exhaust gases).
2. Turn out fixing screws and remove the top section of a cover of a gas-distributing belt.
Upper and lower sections of the timing cover
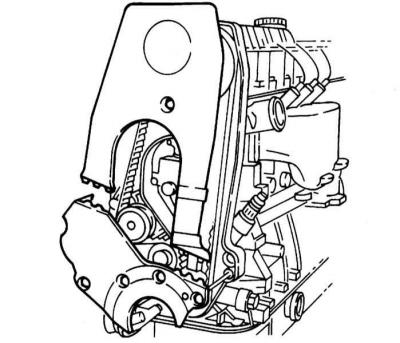
Bottom section
1. Remove the top section of the cover.
2. Remove the crankshaft pulley (see Section Removal and installation of the crankshaft pulley).
3. Turn out fixing bolts and remove the bottom section of a cover from the engine (refer to illustration).
Back cover
1. Remove the timing belt, its tensioner and timing gears (see Sections Removing and installing timing belt and Removal and installation of timing gears).
2. Release the electrical wiring of the crankshaft position sensor from the latches on the cover (CKP), - try to remember the route of its laying.
3. Turn out fixing bolts and remove a back cover from the engine.
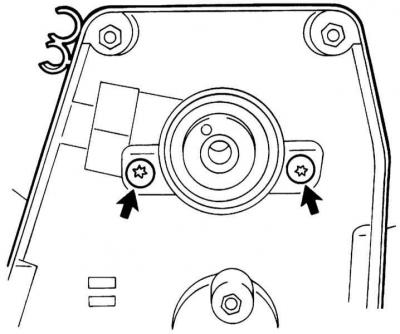
Screws for fastening the rear cover of the timing drive
Installation
Installation is carried out in the reverse order to the dismantling of the components. Track correctness of a laying and reliability of fixing of electroconducting of the CKP sensor. When installing the crankshaft pulley, do not forget to replace the bolt of its fastening. Tighten all fasteners to the required torque.
Visitor comments