


Contents: Removal ⬇ Installation ⬇
The necessity of performing the operation should be determined during the inspection of the technical condition of the front wheel drives (see "Front Wheel Drives - Checking Technical Condition"). All parts that require replacement during the operation are usually supplied with the CV joint or as part of its repair kit; if not, these parts must be purchased separately:
- grease for CV joints in the required quantity (110-130 g);
- new hinge protective cover;
- hinge retaining ring;
- new clamps for fastening the protective cover.
To complete the work you will need:
- special pliers for installing CV joint boot clamps, pliers or side cutters;
- external snap ring pliers.
Removal
1. Remove the drive assembly (see "Front Wheel Drive - Removal and Installation").
2. Using a slotted screwdriver, loosen the lock of the outer clamp.
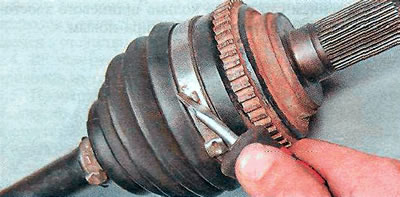
3. Using a slotted screwdriver, we disengage the end of the clamp from its lock and remove the clamp. The clamp can be removed by cutting it with side cutters (see "Inner drive joint - removal, replacement of protective cover and installation").
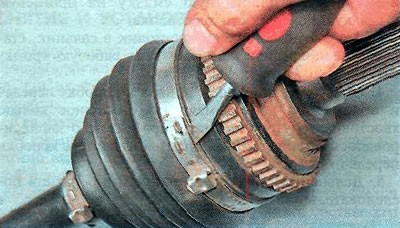
4. In a similar manner, remove the inner clamp of the CV joint protective boot.
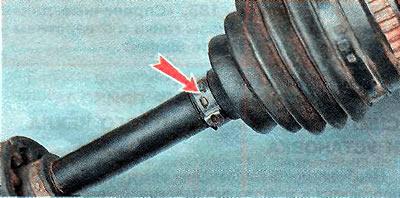
5. Move the cover along the shaft from the CV joint.
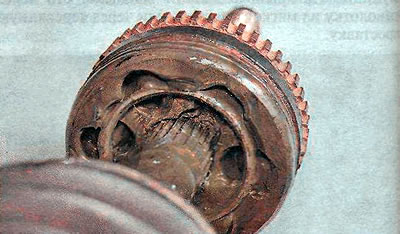
6. Using an external retaining ring plier, loosen the retaining ring and remove the CV joint from the drive shaft.
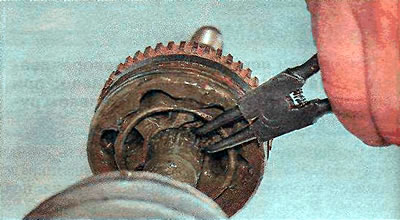
7. If the joint is to be reused, remove the retaining ring from it.
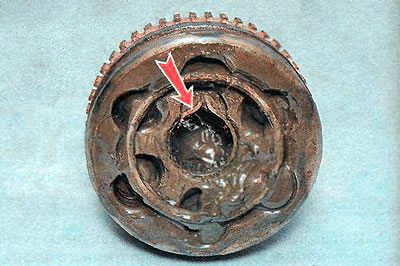
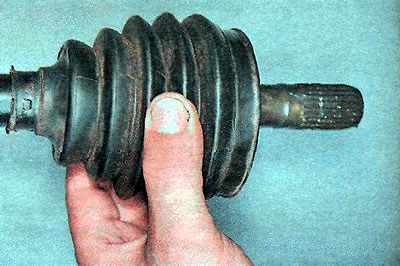
8. Remove the cover from the drive shaft.
Installation
1. If you are going to use an old joint, wash it in kerosene, wipe it with a clean cloth and let it dry.
2. Install the retaining ring into the joint.
3. To avoid damaging the new cover during installation, wrap the shaft splines with insulating tape.
4. Put a new protective cover on the shaft, move it to the center of the shaft and remove the insulating tape.
5. Lubricate the shaft splines with a special lubricant for CV joints.
6. Using an external retaining ring puller, loosen the retaining ring and place the CV joint on the drive shaft, making sure that the retaining ring fits into the groove of the shaft.
7. Fill the joint with grease (see, "Reference data") for constant velocity joints and place some of the grease in the protective cover (see "Inner drive joint - removal, replacement of protective cover and installation").
8. Move the protective cover towards the hinge so that the large sealing belt of the protective cover is completely put on the hinge housing, (the small sealing belt fits into the groove of the shaft (shown with the hinge and protective cover removed).
9. By lifting the small diameter sealing belt with a slotted screwdriver, we release air from the inner cavity of the cover.
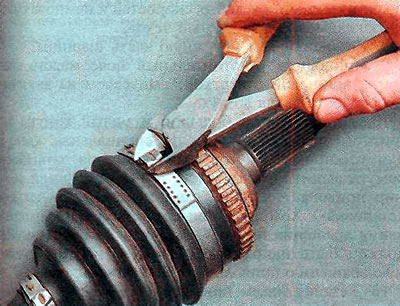
10. Install the large and small clamps of the protective cover. Using special clamp installation pliers or side cutters, tighten the large and small clamps of the protective cover. Install the clamps taking into account the direction of rotation of the drive. The outer end of the clamps should be directed in the direction opposite to the rotation of the drive when moving forward.
11. Install the drive assembly on the vehicle (see "Front Wheel Drive - Removal and Installation").
Visitor comments