
Note: Suspension and steering components must be checked regularly as wear or damage can shorten tire life, reduce vehicle handling and increase fuel consumption.
Checking the condition of shock absorbers
1. Park the vehicle on a level, level surface, if possible paved. Firmly apply the parking brake and check the tire inflation pressure.
2. Push down one of the corners of the car. When the corner is released, the body should return to its original position, making no more than one or two oscillations.
3. Body sway is highly likely to indicate wear or weakening of the corresponding shock absorber.
4. Repeat the procedure, alternately moving to the remaining corners of the car.
5. Jack up the vehicle and place it on jack stands or raise the vehicle on a lift.
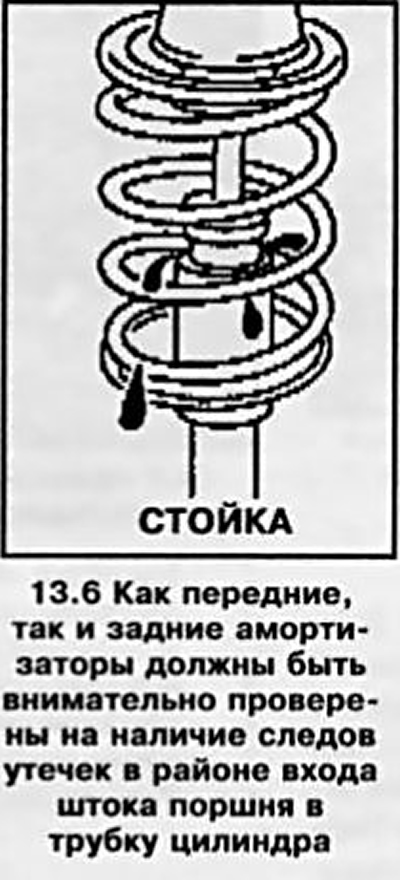
6. Carefully inspect shock absorbers for signs of fluid leaks (see resist. illustration). The presence of a thin oil film should not be a concern. Be sure to make sure that the shock absorber is the source of the leak, if necessary, replace the shock absorbers in the kit (front and rear).
7. Check up reliability of fastening of shock-absorbers on the support. Replace shock absorbers if found to be defective (also included).
8. A description of the procedure for replacing shock absorbers is given in Chapter 10.
Checking the Condition of Suspension and Steering Components
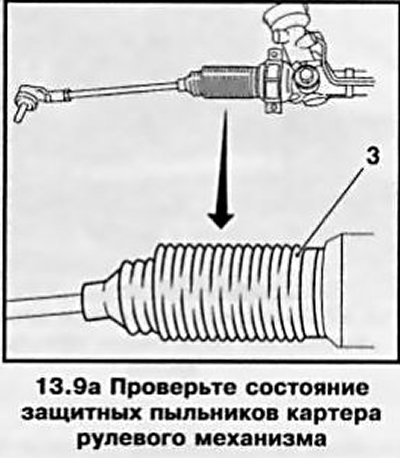
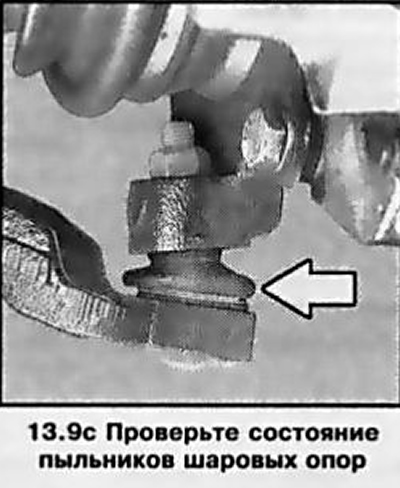
9. Visually check the suspension and steering components for deformation and mechanical damage. Assess the condition of the sealing collars, protective anthers and rubber-metal bushings - try not to miss signs of leak development (see resist. illustrations).
10. Clean the lower surface of the steering knuckle from traces of dirt, ask the assistant to grab the lower edge of the wheel and pull it in the transverse direction. Try to visually assess the play in the ball joints of the fist connection with the suspension control lever. If there is play, a worn hinge must be replaced.
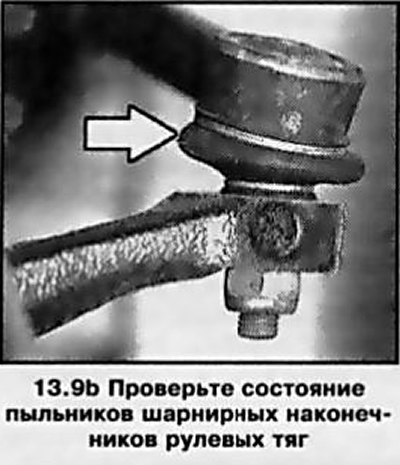
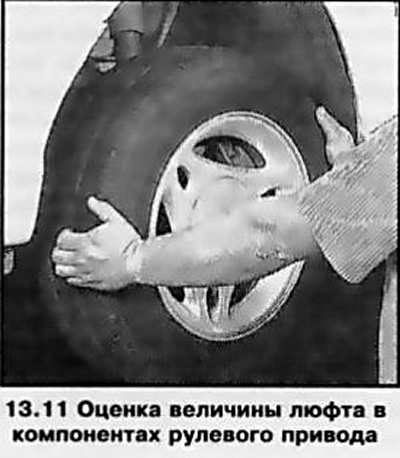
11. Grasp the front and rear edges of the wheel, then push the front edge and pull the rear. If play is found in the joints of the steering gear components, check the condition of the tie rod ends (see resist. illustration). The wear of the outer tips can be detected visually, the inner ones - by touch through the protective cover of the steering mechanism (while rolling the wheel). Move to the other side of the car and repeat the procedure by tugging on the opposite wheel.
12. For more information on the design of suspension components, see Chapter 10.
13. Having lowered the car on the earth, estimate the steering wheel play. From under the car, visually assess the inertia of the steering gear when the steering wheel is turned (need help from an assistant).
Checking the condition of the wheel bearings
14. Pull the top and bottom edges of the front wheel with both hands - any noticeable play indicates a loose/damaged wheel bearing or suspension components. Ask an assistant to firmly depress the foot brake pedal and repeat the check - if the play disappears or is reduced to a minimum level, therefore, the bearing should be dealt with, otherwise check the condition of the joints of the suspension components.
15. Grasp the front and rear edges of the wheel and repeat the check described above - if the play disappears when you depress the brake pedal, you should tighten or replace the wheel bearing, otherwise check the condition of the steering gear components (see paragraph 11).
Check of a condition of protective covers of power shafts
16. Corrugated rubber boots installed at both ends of each of the drive shafts are designed to protect the hinges of equal angular velocities (CV joints) from damage caused by the ingress of dirt. Oil and grease on the surface of the covers can lead to premature failure. It is advisable to wash the covers from time to time with a solution of soapy water. Due to the constant flexing when turning the wheels, the outer CV joint boots wear out faster and should be checked more often and regularly.
17. Carefully check the covers for cuts, cracks and other damage, evaluate the reliability of fixing them with bandage tapes (see resist. illustration). In case of detection of defects or traces of lubricant leakage, the damaged cover must be replaced (see chapter 8).

Visitor comments