
OpelBook.ru
Cars AvtoVAZ Cars Mitsubishi Cars BMW Cars Mercedes Cars Nissan Cars Toyota Cars Chevrolet
English Русский
Български
Беларускі
Український
Српски
Hrvatski
Română
Polski
Slovenský
Magyar
 |  Sitemap  |  Contacts  |    


Main Astra Corsa Insignia Kadett Omega Vectra Zafira Others Articles
Zafira A (1999-2005, petrol)
  • Main
  • Zafira
  • Zafira A
  • Transmission
  • Front wheel drives
  • Inner drive joint — removal, replacement of protective cover and installation

Inner drive joint — removal, replacement of protective cover and installation (Opel Zafira A)

            0

Contents: Removal ⬇ Installation ⬇
The necessity of performing the operation should be determined during the inspection of the technical condition of the front wheel drives (see "Front Wheel Drives - Technical Condition Check").

Note: This section shows the repair of a three-pin type inner joint. Some vehicles have a ball type inner joint. In this case, its repair is similar to the repair of an outer joint (see "Outer drive joint - removal, replacement of protective cover and installation").


All parts that require replacement during the operation are usually supplied with the CV joint or as part of its repair kit; if not, these parts must be purchased separately:
  • cV joint grease in the required quantity (120-140g for ball joint and 195-215g for three-pin joint);
  • new hinge protective cover;
  • hinge retaining ring;
  • new clamps for fastening the protective cover.

To complete the work you will need:
  • special pliers for installing CV joint boot clamps, pliers or side cutters;
  • external snap ring pliers.

Removal


1. Remove the drive assembly (see "Front Wheel Drive - Removal and Installation").

2. Using narrow-nosed pliers, remove the outer clamp of the protective cover.
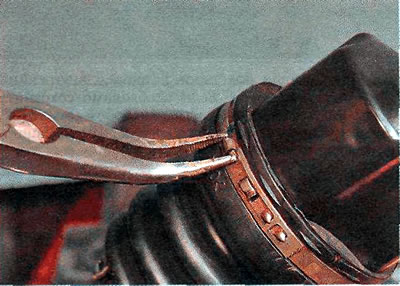
2. Using narrow-nosed pliers, remove the outer clamp of the protective cover.


3. Remove the outer part of the hinge.
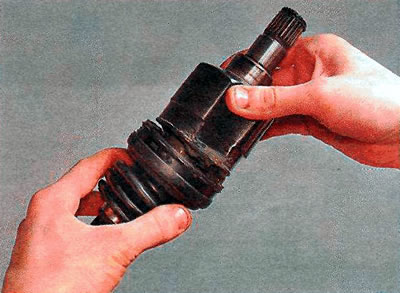


3. Remove the outer part of the hinge.


4. Using an external snap ring plier, loosen the snap ring.
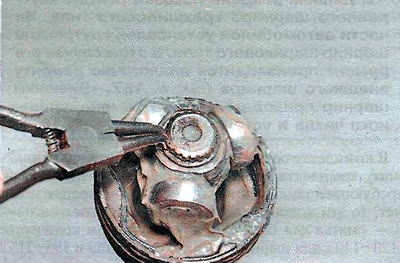
4. Using an external snap ring plier, loosen the snap ring.


5. Remove the inner part of the joint from the drive shaft.
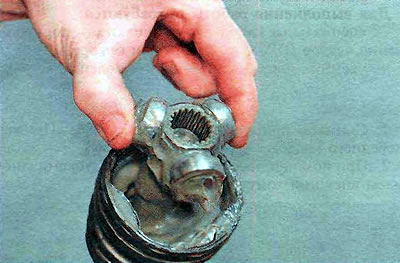
5. Remove the inner part of the joint from the drive shaft.


6. Using side cutters, cut the inner clamp and remove it. If you need to save the clamp, you can remove it in another way (see "Outer drive joint - removal, replacement of protective cover and installation").
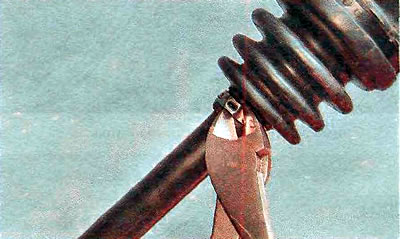


6. Using side cutters, cut the inner clamp and remove it. If you need to save the clamp, you can…


7. Remove the cover from the drive shaft.
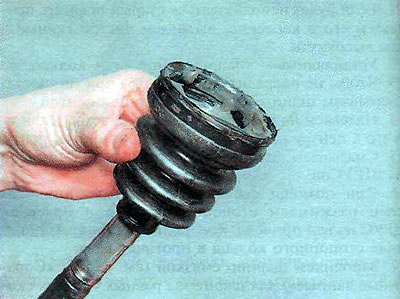
7. Remove the cover from the drive shaft.


Installation


1. If you are going to use an old joint, wash it in kerosene, wipe it with a clean cloth and let it dry.

2. To avoid damaging the new cover during installation, wrap the shaft splines with insulating tape.

3. Place a new protective cover on the shaft so that the small sealing belt of the cover fits into the groove of the shaft, remove the insulating tape.

4. Lubricate the shaft splines with a special lubricant for CV joints.

5. Place the joint on the drive shaft.

6. Using an external retaining ring plier, loosen the retaining ring and place it on the drive shaft, making sure that the retaining ring fits into the groove of the shaft.

7. Fill the inner and outer parts of the hinge with grease (see "Reference data") for constant velocity joints and a little grease we put in a protective cover.


8. Install the outer part of the hinge.

9. By lifting the small diameter sealing belt with a slotted screwdriver, we release air from the inner cavity of the cover.

10. Install the large and small clamps of the protective cover. Using special clamp installation pliers or side cutters, tighten the clamps of the protective cover (see "Outer drive joint - removal, replacement of protective cover and installation"). We install the clamps taking into account the direction of rotation of the drive. The outer end of the clamps should be directed in the direction opposite to the rotation of the drive when moving forward.

11. Install the drive assembly on the vehicle (see "Front Wheel Drive - Removal and Installation").

(The article was published on the website OpelBook.ru)


This article is available at russian, bulgarian, belarusian, ukrainian, serbian, croatian, romanian, polish, slovak, hungarian
Checking the article: Chernov Alexander

Share information:

Previous articles
Opel Zafira A: Front wheel drives
Next articles

Outer drive joint — removal, replacement of protective cover and installation
Front Wheel Drive — Removal and Installation
Front Wheel Drives — Technical Condition Check
Front Wheel Drives — Design Description
Front Wheel Drives — Reference Data


See similar ones from other Opel car manuals:
▶ Replacing the protective cover of the CV joint of the drive… Opel Frontera B (1998-2004)
▶ Rubber protective boots of the drive shaft and its outer CV… Opel Omega B2 (1999-2003)
▶ Checking the drive shaft protective cover Opel Vectra A (1988-1995, petrol)
▶ Inspection of suspension and steering components, checking… Opel Astra H (2004-2009)
▶ Removal and installation the front wheel brake protective… Opel Corsa C (2000-2006, petrol)
Link to this page in different formats

Visitor comments


No comments yet


How much will 21 + 14 =


Zafira A (1999-2005, petrol) 
  • General information
  • Governing bodies
  • User manual
  • Maintenance
  • Power unit
  • Engine repair
  • Control system
  • Cooling system
  • Exhaust system
  • Transmission
  • Clutch
  • Mechanical gearbox
  • Automatic gearbox
  • Front wheel drives
  • Chassis
  • Hubs, wheels and tires
  • Front suspension
  • Rear suspension
  • Steering
  • Brake system
  • Body
  • Maintenance and care
  • Exterior
  • Side doors
  • Climate control
  • Electrical equipment
  • Equipment and devices
  • Power devices
  • Lighting and signaling
  • Windshield wipers and washers
  • Electrical circuits
OpelBook.ru © 2017–2026 · Mobile version · · Sitemap: EN BG BY UA RS HR RO PL SK HU · Feedback · Site search
Astra F, petrol · Astra G, petrol · Astra G · Astra H · Astra J, petrol · Corsa B · Corsa C, petrol · Corsa C · Insignia A · Kadett D · Kadett E · Omega A · Omega B · Omega B2 · Vectra A, petrol · Vectra A · Vectra B, petrol · Vectra B · Vectra C · Zafira A, petrol · Frontera A, petrol · Frontera B · Ascona C · Vivaro A ·
We want your visit to be comfortable 🤝! We use cookies 🍪 to make that happen.