
To complete the work you will need:
- manhole or overpass (this is more convenient, but you can do the work on a flat horizontal platform);
- new hub nut (usually supplied with an external CV joint or as part of its repair kit);
- new inner joint shank circlip (usually supplied with an internal CV joint or as part of its repair kit).
Comment. Works on the left and right drive are carried out similarly.
Removing
1. We prepare the car for work (see «Preparing the car for maintenance and repair»).
2. Remove the latch of the decorative wheel cap (see «Wheel - replacement»), tighten the wheel bolts (without tightening them) and lower the car.
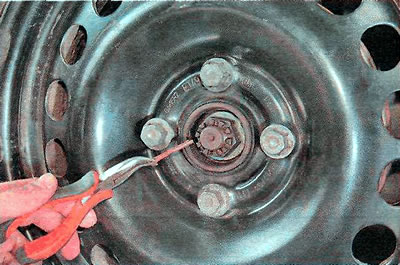
3. Straighten the edges of the cotter pin of the hub nut and remove it.
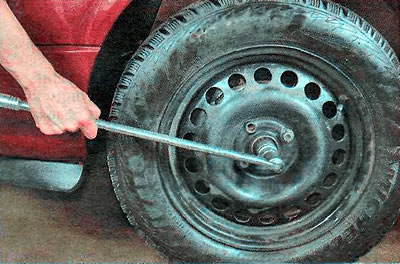
4. Using a 30 mm socket wrench with a knob, loosen the wheel hub nut.
5. We install the car on a reliable stand.
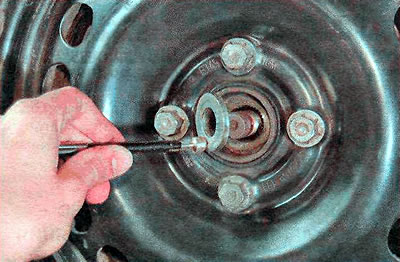
6. Using a 30 mm socket wrench, finally unscrew the wheel hub nut and remove the washer.
7. Remove the front wheel (see «Wheel - replacement»).
8. Drain the oil from the gearbox (see «Gearbox - checking the level and changing the oil»).
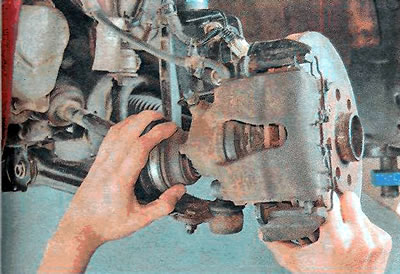
9. Disconnect the ball joint from the steering knuckle (see «Ball joint - replacement»).
10. We remove the shank of the outer hinge from the hub. If necessary, we knock it out through a soft metal drift or through a wooden spacer.

Comment. When removing the left drive, turn the steering wheel all the way to the left; when removing the right drive, turn the steering wheel all the way to the right.
11. Carefully pull the lower part of the rack outward, remove the shank of the outer hinge from the hub and carefully lower the drive onto the suspension arm.
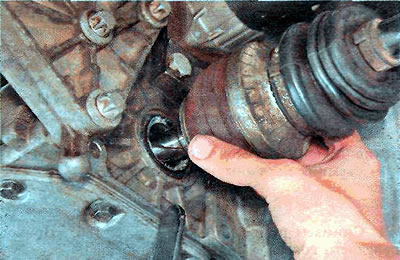
12. Using the mounting spatula as a lever (resting its end against the end of the body of the internal hinge), we shift the hinge outward, overcoming the resistance of the retaining ring.

13. Supporting the inner hinge, carefully (being careful not to damage the drive seal with the splines of the joint shank) remove the hinge from the gearbox and remove the drive assembly from the car.
Installation
1. Replace the retaining ring of the splined shank of the inner hinge housing with a new one.

2. Apply grease to the splined and smooth surfaces of the shank.
3. Carefully insert the shank into the stuffing box, being careful not to damage the working edge of the stuffing box with the splines of the shaft.
4. Vigorously insert the drive into the gearbox and be sure to make sure that the retaining ring of the inner joint shank is securely fixed and the drive does not move out of the gearbox housing.
5. We carry out further work in the reverse order.
Warning! When assembling, it is necessary to install a new hub nut and after tightening to the required torque (see «Reference data») align the grooves of the nut with the hole in the shank and insert the cotter pin.
Visitor comments