OpelBook.ru
Cars AvtoVAZ Cars Mitsubishi Cars BMW Cars Mercedes Cars Nissan Cars Toyota Cars Chevrolet
English Русский
Български
Беларускі
Український
Српски
Hrvatski
Română
Polski
Slovenský
Magyar
 |  Sitemap  |  Contacts  |    


Main Astra Corsa Insignia Kadett Omega Vectra Zafira Others Articles
Frontera A (1991-1998, petrol) Frontera B (1998-2004) Ascona C (1981-1988) Vivaro A (2001-2014)
  • Main
  • Opel
  • Ascona C
  • Power unit
  • Diesel engines
  • Removal and installation the timing belt

Removal and installation the timing belt (Opel Ascona C)

            0

Contents: Examination ⬇ Timing Belt Installation Value Table ⬇ Installation ⬇
Below are specific instructions for diesel engines only. The sequence of operations for gasoline engines was described above.

Remove the clutch housing cover.

Unscrew the upper and lower timing belt shield.

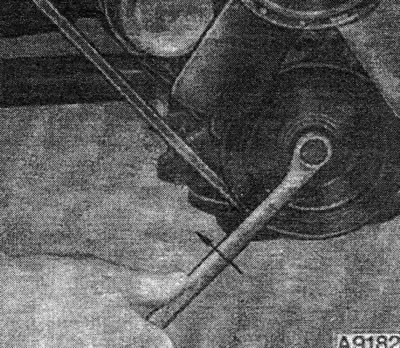
Set the piston of the first cylinder to TDC. To do this, put the gearbox in neutral and tighten the handbrake. Place a bent, socket, wrench or socket wrench onto the center bolt of the engine crankshaft pulley. Turn the crankshaft clockwise by hand until the top dead center mark on the flywheel (right) and the top dead center mark on the injection pump gear (left) align with their corresponding markings.
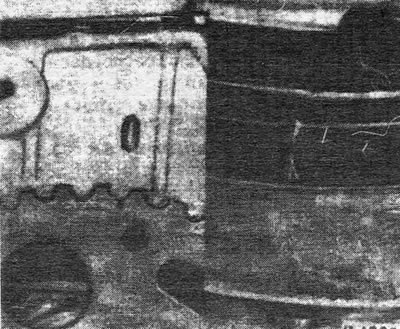
Set the piston of the first cylinder to TDC. To do this, put the gearbox in neutral and tighten the…


Unscrew the camshaft housing cover.

Remove the vacuum pump.

Instead of the vacuum pump, install and lock the camshaft using the Opel KM-537 tool.
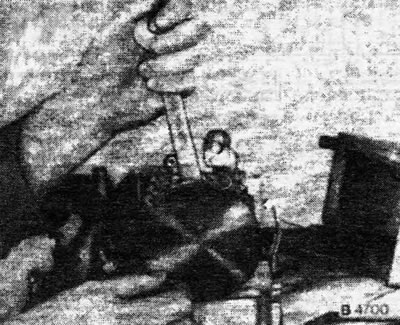
Instead of the vacuum pump, install and lock the camshaft using the Opel KM-537 tool.


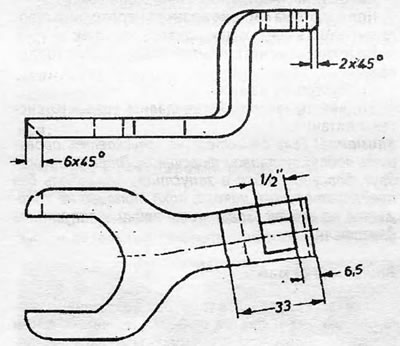
Loosen the camshaft wheel mounting bolts while holding the shaft with a wrench inserted into the special grooves on the camshaft. Ri S.V4700.


Loosen the water pump mounting bolts.
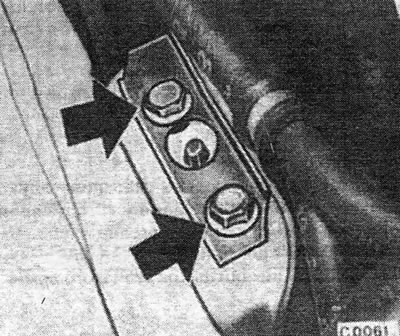
Loosen the water pump mounting bolts.


Loosen the timing belts by turning the pump counterclockwise using the OPEL tool KM-509.

Separate the engine mount, front right, from the side member.

Move the engine away from the side member. Remove the toothed belt from the idler wheels and pull it out between the side member and the engine support.

Check the serviceability of the timing belt guide wheels; replace damaged ones.

Check if the markings match as described in Figure B4785.

Put on a new belt.

Secure the engine support to the side member with a force of 40 Nm.

Tighten the timing belt.

Tighten the water pump bolts to 25 Nm.

Tighten the camshaft wheel bolts, but do not over tighten.

Check the valve timing.

Tighten the camshaft wheel to 75 Nm and turn them another 60°. Note: Always replace the bolts!

Check the moment the injection pump starts to feed.

Install the vacuum pump.

Install a new seal and tighten the camshaft cover evenly.
Install a new seal and tighten the camshaft cover evenly.


Screw on the lower and upper timing belt covers.


Screw on the clutch cover.

Checking the tension and adjusting the timing belt

For diesel engines up to 8/86, check the timing belt tension every 30,000 km. For petrol and diesel engines from 9/86, check the timing belt tension every 60,000 km or every 4th service.

Examination


To check the tension of the toothed belt, you need the OPEL device KM-510-A. The following special keys: 1.3-/1.6-l engines; KM-421A: 1.6-/1.8 l engines and diesel engine: KM-509; 1.8-/2.0 l engines: KM-637. Tensioning can also be done with a regular wrench, but to do this you need to remove the generator.

Correct tension increases belt life. Check the tension on a warm engine. Coolant temperature is about 80°C. If possible, install and tension the new belt on a cold engine. Coolant temperature below +25°C.

Caution! Do not check the belt tension by hand. Incorrect tension leads to increased noise.


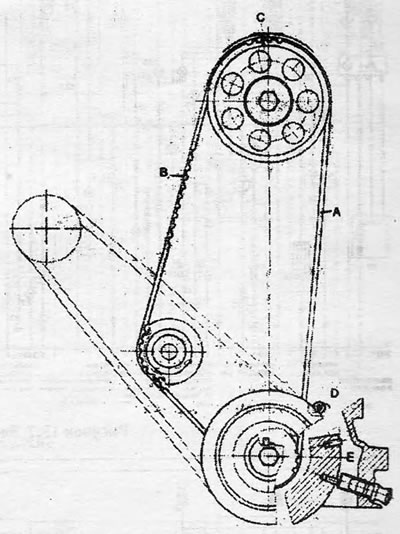
The tension is checked on the driven branch of the belt drive "B". The device is installed in the upper part of the belt.
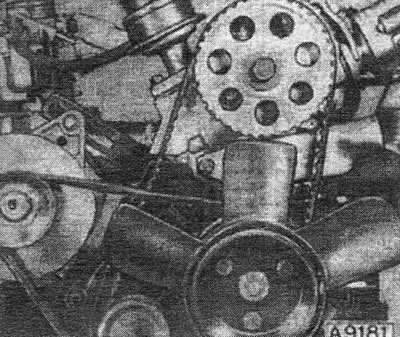
The tension is checked on the driven branch of the belt drive «B». The device is installed in the…


Loosen the generator tension bar and remove the V-belt. Lower the generator down.

Unscrew the upper and lower timing belt covers.


Unscrew the upper and lower timing belt covers.


Set piston 1 of engine cylinder to TDC. At the same time, turn the engine crankshaft at least 90° so that the toothed belt is tensioned.

Caution! Do not check the belt by hand, bending or twisting it.


Place the KM-510-A device in the working position and lock it.
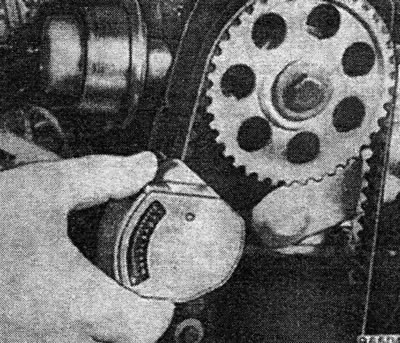
Place the KM-510-A device in the working position and lock it.


Place the device on the toothed belt at point "B", see figure A7872. Carefully unlock the device.
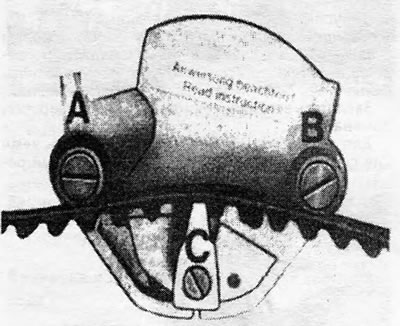
Place the device on the toothed belt at point «B», see figure A7872. Carefully unlock the device.


Attention! Install the test device so that the belt passes between points A, B, C, and the tensioner must fall between the belt teeth.


By lightly pressing your fingertips on the device, release it and take readings, see table.

Timing Belt Installation Value Table
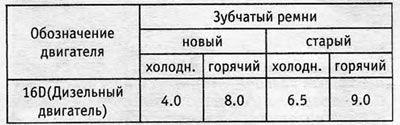


Timing Belt Installation Value Table

Installation


Loosen the water pump mounting bolts.

Use a special key for the water pump to adjust the toothed belt; turning the pump up increases the tension, turning it down decreases it. The tension can be adjusted using a regular wrench of the appropriate size, but to do this you need to remove the generator.
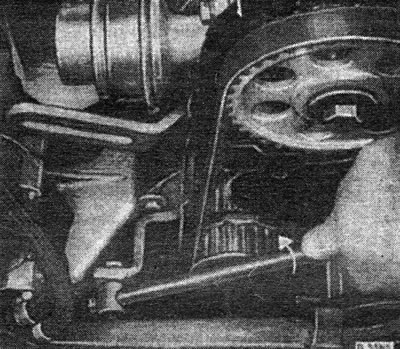
Use a special key for the water pump to adjust the toothed belt; turning the pump up increases the…


DesignationSpecial tool OPELWrench Motor Size
16N, 16SH, C18NE, 18E, 16D (Dieselmotor)OPELKI-509-AOPEL47.7 mm

Removal and installation the timing belt


Tighten the water pump mounting bolts to the torques shown. table.


Engine designationMeaning of torques
16N, 16SH, 1.8-2.0-l Diesel25 Nm

Remove the device. Make a full revolution of the crankshaft. Check the tension again.

Attention! Install and check the toothed belt until the device shows a constant value.


Install the upper and lower timing belt covers.

Diesel engine: check valve timing.

Diesel engine: check the start of delivery.

Install the generator. Put on the V-belt. Tighten the V-belt.

Attention! If you do not have a timing belt tension tester at hand (abroad, accident), then temporarily adjust the belt so that when you press it at point "B", figure A7872, it bends by about 10 mm. Avoid high speeds. Check with the device at the earliest opportunity.


This article is available at russian, bulgarian, belarusian, ukrainian, serbian, croatian, romanian, polish, slovak, hungarian
Checking the article: Kornev Georgy

Share information:

Previous articles
Opel Ascona C: Diesel engines
Next articles

Key diesel engine data
Diesel Engine — Operating Principle
Removal and installation the cylinder head
Replacement of camshaft housing, removal and installation of camshaft
Compression check
Engine lubrication system
Diesel injection equipment
Idle speed problems


See similar ones from other Opel car manuals:
▶ Timing Belt Covers — Removal and Installation Opel Astra F (1991-1998, petrol)
▶ Removal and installation the timing belt cover Opel Corsa B (1993-2000)
▶ Checking the timing belt of the gas distribution mechanism Opel Insignia A (2008-2017)
▶ Removal and installation the timing belt Opel Kadett D (1979-1984)
▶ Timing belt of the gas distribution mechanism-check Opel Omega B2 (1999-2003)
Link to this page in different formats

Visitor comments


No comments yet


How much will 31 + 17 =


Vivaro A (2001-2014) 
  • General information
  • User manual
  • Power unit
  • Petrol engine F4R
  • Diesel engine F9Q
  • Diesel engine G9U
  • Transmission
  • Clutch and drive shafts
  • Manual gearbox
  • Chassis
  • Front suspension
  • Rear suspension
  • Brake system
  • Body
  • Exterior
  • Interior
  • Electrical equipment
  • Heating and ventilation
  • Air conditioner
  • Equipment and devices
  • Electrical diagrams
Ascona C (1981-1988) 
  • General information
  • Maintenance
  • Power unit
  • Gasoline engines
  • Diesel engines
  • Cooling system
  • Fuel and exhaust system
  • Contact ignition system
  • Contactless ignition system
  • Transmission
  • Clutch
  • Mechanical gearbox
  • Automatic gearbox
  • Drive shafts
  • Chassis
  • Steering
  • Brake system
  • Car suspension
  • Body
  • Exterior
  • Interior
  • Doors and windows
  • Electrical equipment
  • Equipment and devices
  • Power devices
  • Electrical circuits
Frontera B (1998-2004) 
  • General information
  • User manual
  • Maintenance
  • Power unit
  • Petrol engines 2.2 l
  • Petrol engines 3.2 l
  • Diesel engines 2.2 l
  • Cooling system
  • Fuel system (petrol)
  • Fuel system (diesel)
  • Ignition system
  • Transmission
  • Clutch
  • Manual gearbox MUA5C
  • Automatic gearbox 4L30E
  • Chassis
  • Suspension and axles
  • Steering
  • Brake system
  • Body
  • Exterior
  • Interior
  • Doors, locks and windows
  • Heating and air conditioning
  • Electrical equipment
  • Power devices
  • Equipment and devices
  • Lighting and signaling
  • Electrical diagrams
Frontera A (1991-1998, petrol) 
  • General information
  • Introduction to guide
  • User manual
  • Maintenance
  • Power unit
  • Engine repair
  • Lubrication system
  • Cooling system
  • Power and exhaust system
  • Engine electrics
  • Transmission
  • Clutch
  • Mechanical gearbox
  • Cardan shafts
  • Chassis
  • Brake system
  • Front suspension
  • Rear suspension
  • Steering
  • Body
  • Repair and care
  • Electrical equipment
  • Equipment and devices
  • Electrical circuits
OpelBook.ru © 2017–2026 · Mobile version · · Sitemap: EN BG BY UA RS HR RO PL SK HU · Feedback · Site search
Astra F, petrol · Astra G, petrol · Astra G · Astra H · Astra J, petrol · Corsa B · Corsa C, petrol · Corsa C · Insignia A · Kadett D · Kadett E · Omega A · Omega B · Omega B2 · Vectra A, petrol · Vectra A · Vectra B, petrol · Vectra B · Vectra C · Zafira A, petrol · Frontera A, petrol · Frontera B · Ascona C · Vivaro A ·
We want your visit to be comfortable 🤝! We use cookies 🍪 to make that happen.