
Removing
Engines 1.7 l SOHC
Upper section
1. Remove the air cleaner assembly with air ducts and air flow meter (see chapter Power and exhaust systems).
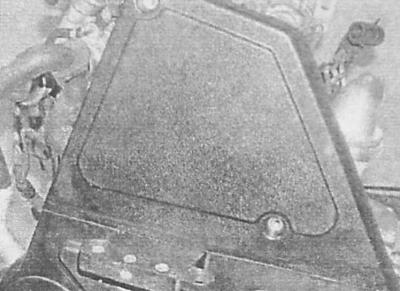
2. Turn out fixing screws and remove the top section of a cover of a gas-distributing belt.
Bottom section
1. Remove the top section of the cover (see above).
2. Remove the crankshaft pulley (see Removal and installation of the crankshaft pulley).
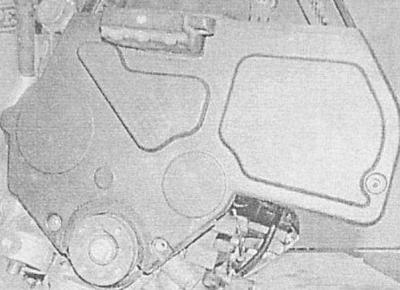
3. Turn out fixing bolts and remove from the engine the bottom section of a cover together with a sealing lining. Check the condition of the gasket, replace if necessary.
Back cover
1. Remove the timing belt (see Removing and installing timing belt).
2. Remove the camshaft and injection pump gears, idler pulley and tensioner assembly (see Removal and installation of the belt tensioner and timing gears (engines 1.7 l).
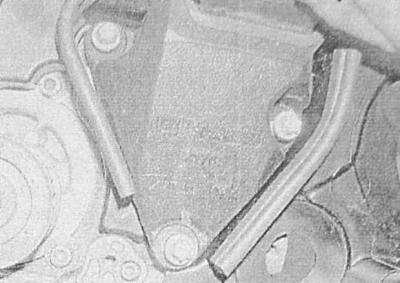
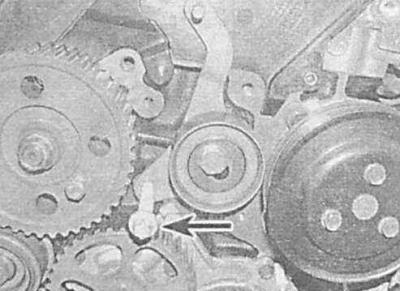
3. Mark the installation position of the right suspension support of the power unit, then unscrew the three bolts of its fastening.
4. Turn out six fixing bolts and remove a back cover from the engine.
Engines 1.7 L DOHC
Upper section
1. Disconnect the negative cable from the battery.
2. Remove the air cleaner assembly with air ducts (see chapter Power and exhaust systems).
3. Support the engine with a trolley jack - in order to distribute the load, lay a block of wood between the head of the jack and the oil pan.
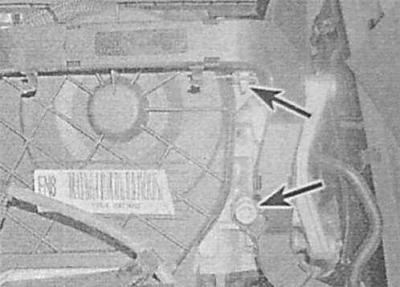
4. Mark the mounting components of the right suspension support of the power unit. Turn out three bolts of fastening of a support.
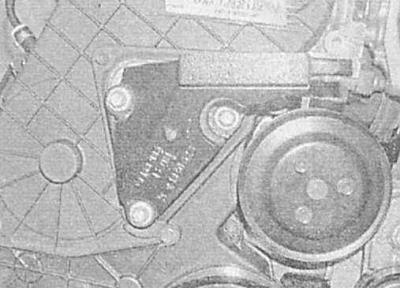
5. Turn out fixing bolts and separate an arm of a support from an adapter on the block of the engine.
6. If necessary, disconnect the electrical wiring from the generator (see chapter Engine electrical equipment).
7. Turn out a fixing bolt with a TORX head. Release the fixing clips for the routing chute of the electrical wiring and remove the latter from the right rear of the cylinder head.
8. Release the hoses from the clamps on the top cover, unscrew the eight fixing bolts of different lengths and remove the top section of the cover.
Bottom section
1. Remove the accessory drive belt (see chapter Current service), - pre-mark the direction of its rotation with paint or a marker. Apply the parking brake, jack up the front of the vehicle and place it on jack stands. Remove the right front wheel and (with appropriate equipment) crankcase protection.
2. Remove the top section of the cover (see above).
3. Remove the crankshaft pulley (see Removal and installation of the crankshaft pulley).
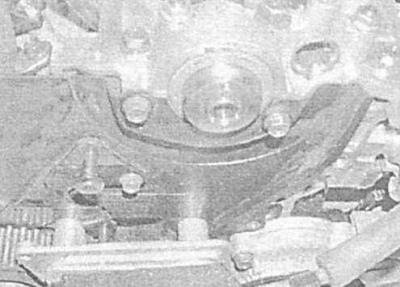
4. Turn out three fixing bolts and remove the bottom section of a cover from the case of the oil pump.
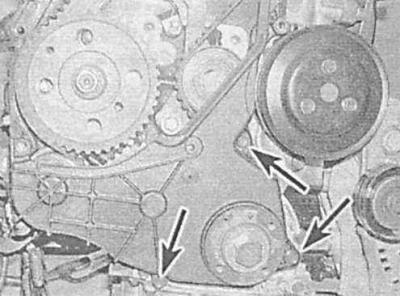
5. Remove the saga suspension support mounting adapter.
6. Temporarily screw the timing belt tensioner bracket bolt into place.
Back cover
1. Remove the timing belt (see Removing and installing timing belt).
2. Remove the idler roller and tensioner roller, camshaft gears and injection pump (see Removal and installation of the belt tensioner and timing gears (engines 1.7 l).
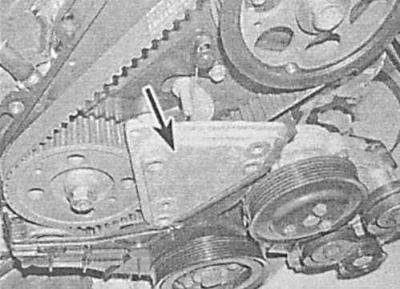
3. Disconnect the tensioner spring.
4. Turn out four bolts of fastening and remove a back cover of a timing belt.
Engines 2.0 l
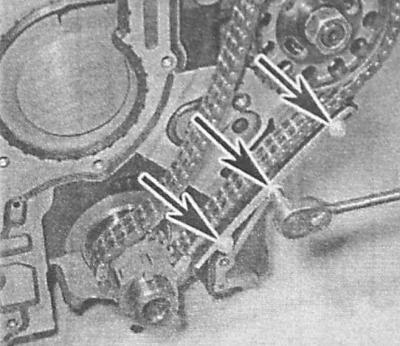
1. Remove the top chain and sprockets (see Removing and installing timing chains and sprockets, checking the condition of components (engines 2.0 l).
2. Remove the cylinder head (see Removal and installation of a head of cylinders).
Theoretically, the cover can be removed without first dismantling the head, however, this method involves the risk of damaging the cylinder head gasket.
3. Remove the water pump (see chapter Cooling, heating systems), - before releasing the bolt, temporarily remove the locking rod so as not to break it (don't forget to put the rod back in place after the bolt is loosened)
4. Remove the oil pan (see Removal and installation of the oil pan).
5. Remove generator (see chapter Engine electrical equipment).
6. Unscrew the lower tensioner cap from the back of the cover and remove the tensioner plunger - try to remember the installation position of the components. Remove the o-ring from the cap - when installing the o-ring must be replaced without fail.
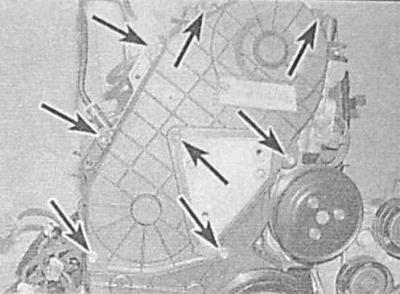
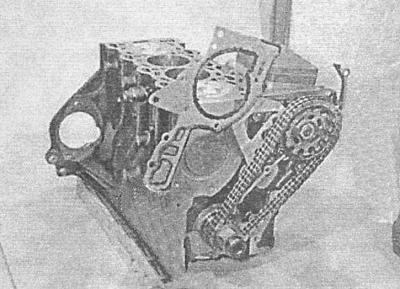
7. Remove the bolts securing the timing cover to the cylinder block - the bolts are of different lengths and must be screwed into place exactly when installed.
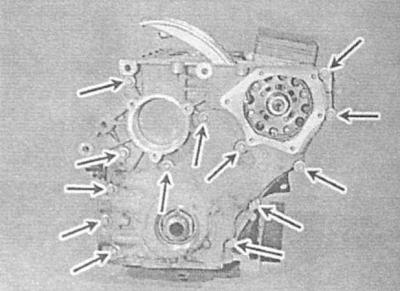
8. Carefully separate the cover from the block and remove it from the engine - try not to lose the guide bushings. If the guide bushings have a loose fit, remove them and store them in a safe place.
9. Turn out an axial bolt and remove shoes of natyazhitel of the top and bottom chains from the block of cylinders.
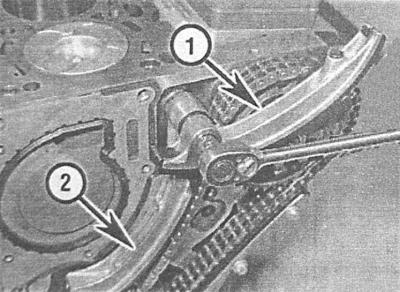
10. Remove the fixing bolts and remove the damper of the lower chain from the blockers - try to remember the installation position of the components.
11. Temporarily remove the lower timing chain sprocket from the injection pump flange and remove the timing cover gasket from the cylinder block. After removing the gasket, install the sprocket in its place on the pump flange.
Installation
Engines 1.7 l SOHC and DOHC
Installation is carried out in the reverse order to the dismantling of the components.
Engines 2.0 l
Before installing the cover, the compilers of this Guide recommend replacing the crankshaft oil seals (see Replacing the crankshaft seals).
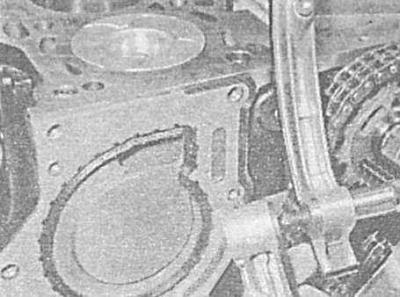
1. Make sure that the mating surfaces of the cover and engine block are absolutely clean and dry. Check that the guide bushings are in place, install the bushings if necessary.
2. Temporarily remove the sprocket from the injection pump flange and install the sealing gasket in place, making sure that it fits correctly on the guide bushings. Install the sprocket back onto the injection pump flange.
3. Install the damper of the lower chain on the cylinder block, screw in and tighten the bolts of its fastening with the required force.
The damper should be installed with the stepped side facing out.
4. Reinstall the tensioner shoes, screw in the axle bolt and tighten it with the required force.
5. Reinstall the timing cover, - align the oil pump drive gear with the crankshaft sprocket, then slide the cover into place, making sure that the guide bushings fit into the mating ones.
6. Screw in the fastening bolts and in several stages gradually tighten them with the required force.
7. Fit a new O-ring to the lower tensioner cap. Prime the plunger (blind end to the chain). Install the cap on the chain cover and tighten it to the required torque.
When installing a new tensioner, unlock it by completely drowning the central rod of the cap until it clicks - now the tensioner rod should sink freely and smoothly return to its original position.
8. Install the crankshaft pulley (see Removal and installation of the crankshaft pulley).
9. Install the cylinder head (see Removal and installation of a head of cylinders).
10. Install the upper timing chain and sprockets (see Removing and installing timing chains and sprockets, checking the condition of components (engines 2.0 l).
11. Install the oil pan (see Removal and installation of the oil pan).
12. Install water pump and generator (see chapters Cooling, heating systems and Engine electrical equipment).
13. Install the accessory drive belt (see chapter Current service).
14. Finally, fill the engine with oil and coolant (see chapters Current service and Cooling, heating systems). Start the engine and check for signs of leaks.
Visitor comments