
Removing
Engines 1.7 l SOHC
1. Remove the air cleaner housing assembly with air ducts and air flow meter (see chapter Power and exhaust systems).
2. Loosen the clamps and disconnect the crankcase ventilation hoses leading to the front and rear sides of the cover - it is necessary to unscrew the two bolts securing the wiring to the camshaft cover, lifting the wiring to gain access to the rear crankcase ventilation hose.
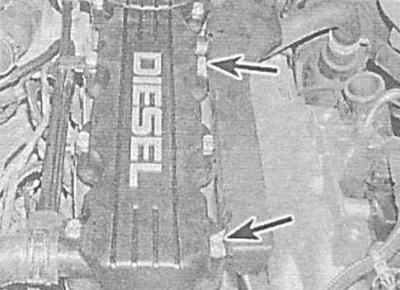
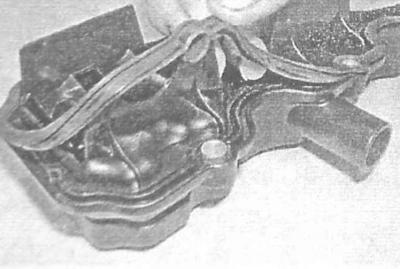
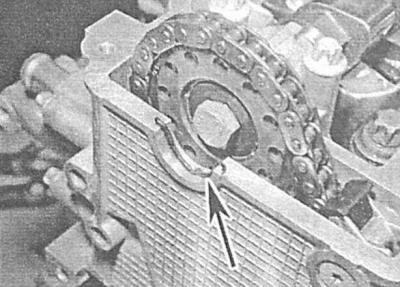
3. Remove the crankshaft pulley. Turn out fixing bolts and, remove a cover of the gas-distributing mechanism together with a sealing lining.
Engines 1.7 L DOHC
1. Remove the air cleaner and intake duct assembly with air mass meter (see chapter Power and exhaust systems).
2. Remove the engine control unit from the timing cover (ECM) (see chapter Power and exhaust systems).
3. Disconnect electroconducting, give fixing screws/a nut and remove an arm of fastening ECM.
4. Turn out a fixing bolt, disconnect electroconducting and remove a lifting lug of the engine from a back right part of a head of cylinders. Loosen the bolt securing the left rear lifting eye.
5. Loosen the fitting connectors for fastening the fuel pipes to the injection pump.
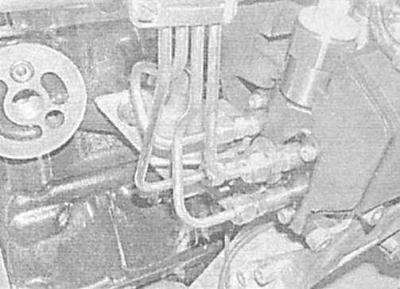
Access to fitting connections is limited - the compilers of this Guide consider it necessary to unscrew the bolt securing the filter / oil cooler housing and remove the sponge filling from the space between the injection pump and the filter housing.
6. Disconnect the fuel lines from the injectors.
7. Give fixing bolts and remove external consolidations of atomizers.
8. Turn out a bolt of fastening of a routing trench of an electroconducting to a back part of a head of cylinders. Release the two latches and remove the chute.
9. Give bolts of fastening of the top cover of a drive of GRM to a drive of the valvate mechanism.
10. Turn out fixing bolts and remove a cover of the gas-distributing mechanism together with a sealing lining.
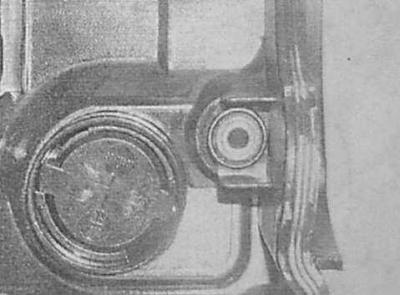
11. Check up a condition of a sealing lining, in case of need make its replacement.
Engines 2.0 l
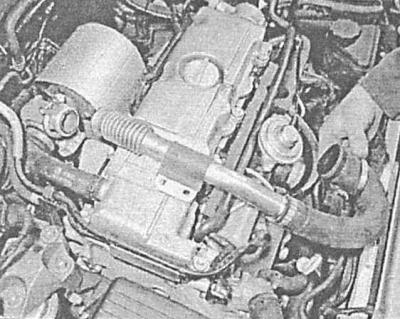
1. Turn out fixing screws and remove the top plastic cover from a cover of the gas-distributing mechanism.
2. Release fastening collars and disconnect a hose of system of ventilation of a crankcase from a back part of a cover. On Zafira models remove the seal of the engine compartment and the cover of the fairing installed in front of the windshield.
3. On low pressure turbocharged engines (X20DTL or Y20DTL) loosen the clamps securing the metal tube to the turbocharger assembly and the rubber sleeve to the pipeline, unscrew the two fixing bolts and remove the air duct assembly from the engine together with the sealing ring installed between the tube and the compressor. On high pressure turbocharged engines (Y20DTH) release the clamps, unscrew the bracket mounting bolts and remove the air hose between the turbocharger and the intercooler.
4. On all models Release the glow plug wiring harness from the clips on the back of the cover. Turn out a bolt of fastening of a routing trench of an electrical wiring of the inlet pipeline to a cover. Disconnect the vacuum hose connected to the right side of the cover.
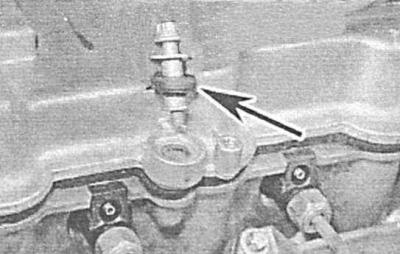
5. Turn out bolts of fastening of a cover and remove them together with sealing washers. Lift the cover and remove it together with the gasket. Check the condition of the gaskets and washers, replace the failed elements.
Installation
Engines 1.7 l SOHC
1. Make sure that the mating surfaces of the cover and body are absolutely clean and dry. Place the seal carefully on the cover.
2. Press the cover against the body - make sure that the sealing gasket does not move. Screw fixing bolts and tighten them with the required effort.
3. Attach hoses of system of ventilation of a crankcase and fix them collars.
4. Install the intake ducts and air cleaner housing.
Engines 1.7 L DOHC
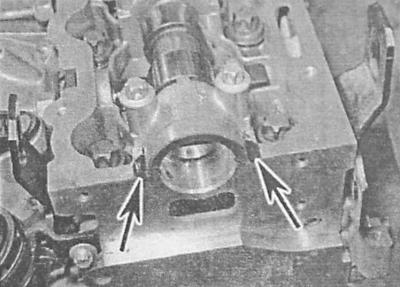
1. Make sure that the mating surfaces are absolutely clean and dry, place the sealing gasket in the groove of the cover. Check the condition of the O-ring at the bottom of the cover, replace if necessary.
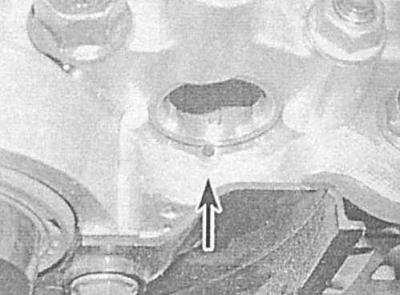
2. Lubricate mating surfaces with sealant, making sure that it does not get into the oil hole in the right rear of the exhaust camshaft. Nozzle seals are labeled «UPPER» And «OUTSIDE».
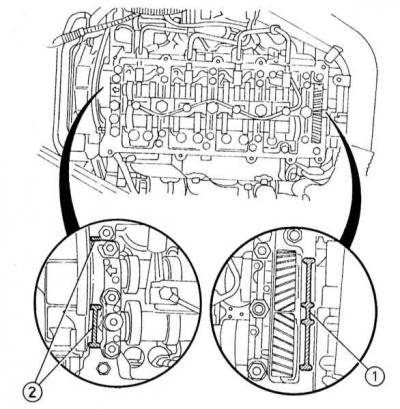
3. Carefully place the cover in place, being careful not to dislodge the gasket. Install the upper section of the timing cover. Screw in bolts of fastening of a cover of the gas-distributing mechanism and tighten them with the demanded effort.
4. Further installation is carried out in the reverse order of the removal of components - pay attention to the following points:
5. All bolts must be tightened strictly with the required force;
6. The outer seals of the nozzles are marked with inscriptions «UPPER» (upper) And «OUTSIDE» (external), - install the seals, making sure that they are put on the nozzle cones;
7. After starting the engine, carefully inspect it for signs of leak development.
Engines 2.0 l
1. Make sure that the mating surfaces are absolutely clean and dry, place the sealing gasket in the groove of the cover.
2. Slide the sealing washers over the cover bolts. Install the bolts on the cover, following the fixation of their heads with sealing washers by the lower shoulders.
3. Lubricate with sealant a semicircular cutout in the right side of the mating surface of the cylinder head and on both sides of the left bearing cover.
4. Carefully place the cover in place, screw in and hand-tighten all mounting bolts.
5. Tighten all mounting bolts to the correct torque.
6. Connect vacuum hoses to your fittings, fix the electrical wiring in the clamps. Connect the PCV hose to the back of the cover.
7. On models with low-pressure turbocharging, install the intake duct and air tube - do not forget to replace the sealing ring. Track reliability of a tightening of collars and clamps. On high pressure turbo models, reinstall the hose connecting the turbocharger to the intercooler. Track reliability of a tightening of fixture.
8. On all models, install the plastic cover and securely tighten the cover bolts. On Zafira models, reinstall the engine compartment seal and front fairing panel.
Visitor comments