
OpelBook.ru
Cars AvtoVAZ Cars Mitsubishi Cars BMW Cars Mercedes Cars Nissan Cars Toyota Cars Chevrolet
English Русский
Български
Беларускі
Український
Српски
Hrvatski
Română
Polski
Slovenský
Magyar
 |  Sitemap  |  Contacts  |    


Main Astra Corsa Insignia Kadett Omega Vectra Zafira Others Articles
Omega A (1986-1993) Omega B (1993-1999) Omega B2 (1999-2003)
  • Main
  • Omega
  • Omega A
  • Power unit
  • Ignition system
  • Breaker distributor cover and distributor runner — removal and installation

Breaker distributor cover and distributor runner — removal and installation (Opel Omega A)

            0

1. Access to the distributor is not easy, as it is located on the rear of the camshaft housing near the bulkhead.

2. On carbureted engines, remove the air cleaner assembly (Section 3).

3. Unscrew the screws securing the distributor cover, remove the cover (photo). Disconnect the high-voltage wires from the spark plugs and ignition coil. It is better to mark the wires with marking labels.
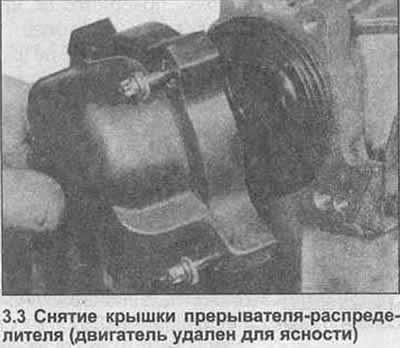
3. Unscrew the screws securing the distributor cover, remove the cover (photo). Disconnect the…


4. Remove the seal insulation from the distributor runner (photo).
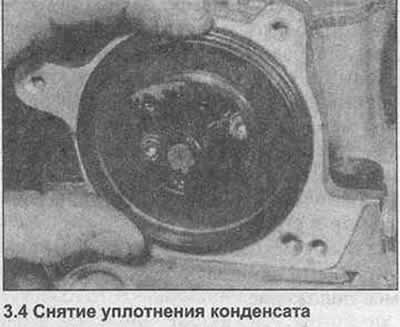
4. Remove the seal insulation from the distributor runner (photo).


5. Note the position of the distributor runner, then unscrew the two bolts. Remove the distributor runner from the shield (photo).
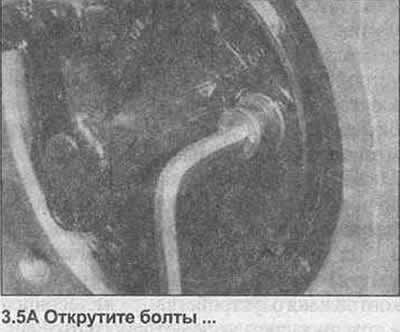
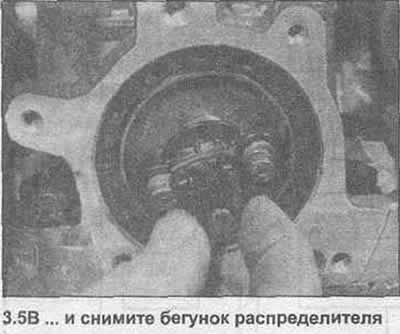
5. Note the position of the distributor runner, then unscrew the two bolts. Remove the distributor…


5. Note the position of the distributor runner, then unscrew the two bolts. Remove the distributor…


6. Remove the shield from the seal (photo).
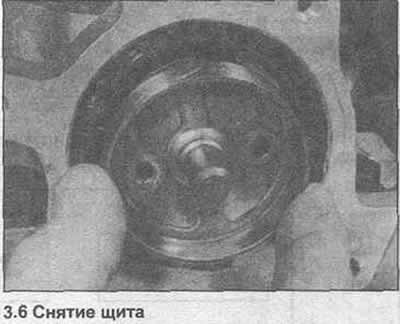


6. Remove the shield from the seal (photo).


7. To ensure correct installation, mark the end of the camshaft with paint in the direction the distributor rotor points.

8. Check the condition of the distributor cap and rotor, sparks are visible as thin black lines of carbon deposits. Clean carbon deposits from the spark plug tips, but do not remove metal, as this will increase the gap and the ignition spark will be increased. Check that the carbon brush inside the cap moves freely against the spring tension (photo).
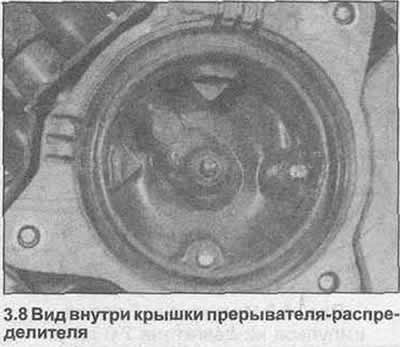
8. Check the condition of the distributor cap and rotor, sparks are visible as thin black lines of…


9. Installation is carried out in the reverse order, apply a little sealant under the heads of the support plate bolts.

Original posted on the website: Opelbook.ru


This article is available at russian, bulgarian, belarusian, ukrainian, serbian, croatian, romanian, polish, slovak, hungarian
Checking the article: Zinoviev Kirill

Share information:

Previous articles
Opel Omega A: Ignition system
Next articles

Routine maintenance
General description and precautions
Ignition System Specifications
Ignition timing angle — check
Octane Cap — Adjustment
Ignition Coil — Testing, Removal and Installation
Inductive pulse sensor — testing, removal and installation
Ignition control unit (models 1.8) — removal and installation
Spark plugs — removal, maintenance and installation


See similar ones from other Opel car manuals:
▶ Breaker Cover and Distributor Runner — Removal and… Opel Vectra A (1988-1995, petrol)
▶ Checking and replacing spark plug wires, cover and… Opel Frontera A (1991-1998, petrol)
▶ Distributor belt — removal, installation and adjustment Opel Astra F (1991-1998, petrol)
▶ Removal and installation the ignition distributor (engine… Opel Corsa B (1993-2000)
▶ Removal and installation the ignition system distributor Opel Kadett E (1984-1995)
Link to this page in different formats

Visitor comments


No comments yet


How much will 22 + 26 =


Omega B2 (1999-2003) 
  • General information
  • User manual
  • Maintenance
  • Troubleshooting
  • Power unit
  • Petrol 4-cylinder
  • Petrol 6-cylinder
  • Engine overhaul
  • Diesel engines 2.0 l
  • Diesel engines 2.5 l
  • Cooling and heating
  • Injection system (gasoline)
  • Fuel system (diesel)
  • Fuel system
  • Exhaust system
  • Ignition system
  • Transmission
  • Clutch
  • Mechanical gearbox
  • Automatic gearbox
  • Main gear and shafts
  • Chassis
  • Brake system
  • Car suspension
  • Steering
  • Body
  • Body elements
  • Electrical equipment
  • Equipment and devices
  • Electrical circuits
Omega B (1993-1999) 
  • General information
  • User manual
  • Tips for the car owner
  • Maintenance (gasoline)
  • Maintenance (diesel)
  • Power unit
  • Petrol engine SOHC 2.0 l
  • Petrol engine DOHC 2.0 l
  • Petrol engines 2.5 and 3.0 l
  • Repair of gasoline engines
  • Diesel engine 2.0 l
  • Diesel engine repair 2.0 l
  • Diesel engine 2.5 l
  • Cooling and heating
  • Power system (petrol)
  • Emission reduction
  • Fuel system (diesel 2.0 l)
  • Fuel system (diesel 2.5 l)
  • Launch system
  • Ignition system
  • Transmission
  • Clutch
  • Mechanical gearbox
  • Automatic gearbox
  • Drive shafts
  • Chassis
  • Brake system
  • Wheel suspension
  • Steering
  • Body
  • Exterior
  • Interior
  • Doors and windows
  • Electrical equipment
  • Equipment and devices
  • Wiring diagrams (early)
  • Wiring diagrams (late)
Omega A (1986-1993) 
  • General information
  • User manual
  • Maintenance
  • Changes and additions
  • Troubleshooting
  • Power unit
  • Gasoline engines
  • Diesel engines
  • Cooling system
  • Fuel system (gasoline)
  • Fuel system (diesel)
  • Ignition system
  • Transmission
  • Clutch
  • Mechanical gearbox
  • Automatic gearbox
  • Cardan shaft
  • Drive shafts
  • Chassis
  • Brake system
  • Car suspension
  • Steering
  • Body
  • Exterior
  • Interior
  • Electrical equipment
  • Power devices
  • Lighting and appliances
  • Electrical circuits
OpelBook.ru © 2017–2026 · Mobile version · · Sitemap: EN BG BY UA RS HR RO PL SK HU · Feedback · Site search
Astra F, petrol · Astra G, petrol · Astra G · Astra H · Astra J, petrol · Corsa B · Corsa C, petrol · Corsa C · Insignia A · Kadett D · Kadett E · Omega A · Omega B · Omega B2 · Vectra A, petrol · Vectra A · Vectra B, petrol · Vectra B · Vectra C · Zafira A, petrol · Frontera A, petrol · Frontera B · Ascona C · Vivaro A ·
We want your visit to be comfortable 🤝! We use cookies 🍪 to make that happen.