
OpelBook.ru
Cars AvtoVAZ Cars Mitsubishi Cars BMW Cars Mercedes Cars Nissan Cars Toyota Cars Chevrolet
English Русский
Български
Беларускі
Український
Српски
Hrvatski
Română
Polski
Slovenský
Magyar
 |  Sitemap  |  Contacts  |    


Main Astra Corsa Insignia Kadett Omega Vectra Zafira Others Articles
Vectra A (1988-1995, petrol) Vectra A (1988-1995) Vectra B (1995-2002, petrol) Vectra B (1995-2002) Vectra C (2002-2008)
  • Main
  • Vectra
  • Vectra A
  • Electrical equipment
  • Power devices
  • Breaker Cover and Distributor Runner — Removal and Installation

Breaker Cover and Distributor Runner — Removal and Installation (Opel Vectra A)

            0

Contents: Removal ⬇ Installation ⬇
Note: Before you begin, see. Chapter 3.


Removal


Models 14 NV and 16 SV


1. Disconnect the negative cable from the battery.

2. Mark the position of each high tension wire to avoid confusion during installation, then disconnect the wires from the spark plugs (pull the connectors). Also disconnect the high voltage wire from the ignition coils.

3. On the Bosch distributor, use a screwdriver to remove the two spring clips and remove the breaker-distributor cover. On the Lucas distributor, unscrew the two small bolts and remove the cover (see illustrations).
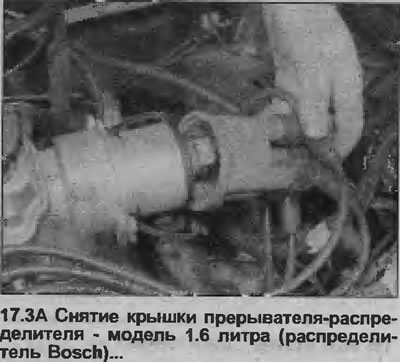
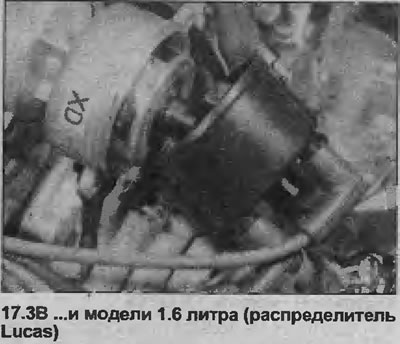
3. On the Bosch distributor, use a screwdriver to remove the two spring clips and remove the…


3. On the Bosch distributor, use a screwdriver to remove the two spring clips and remove the…


4. The distributor rotor is simply seated on the end of the distributor shaft.

5. If necessary, the plastic shield on the Bosch distributor can be pulled off the end to gain access to the distributor components (see illustration).
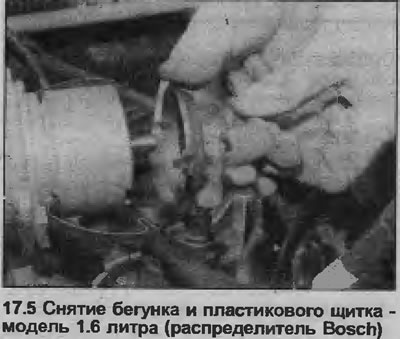


5. If necessary, the plastic shield on the Bosch distributor can be pulled off the end to gain…


Other models


6. Proceed as described in points 1 and 2.

7. On models with two overhead camshafts (except X20 XEV), unscrew the two mounting bolts, remove the spark plug cover from the camshaft cover.

8. Unscrew the three mounting screws and remove the breaker-distributor cover (see illustration).
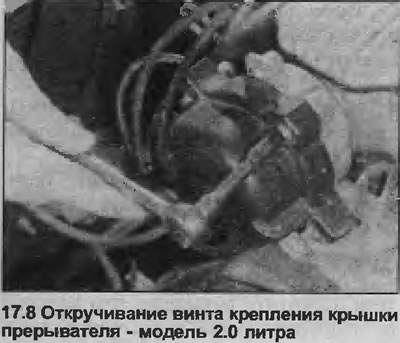
8. Unscrew the three mounting screws and remove the breaker-distributor cover (see illustration).


9. Remove the plastic shield from the distributor rotor housing. The shield is installed in the housing, with an O-ring seal in the groove along the periphery. Release the shield, while making sure not to damage the distributor rotor (see illustration).
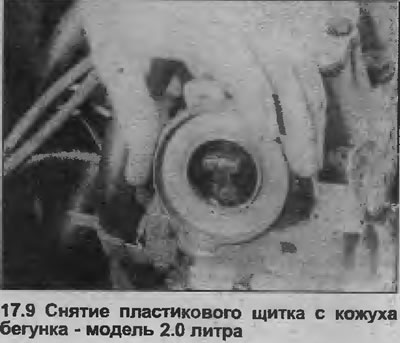
9. Remove the plastic shield from the distributor rotor housing. The shield is installed in the…


10. Using a socket wrench, unscrew the two mounting screws and remove the distributor rotor, leaving the metal rotor hub in the casing (see illustrations).
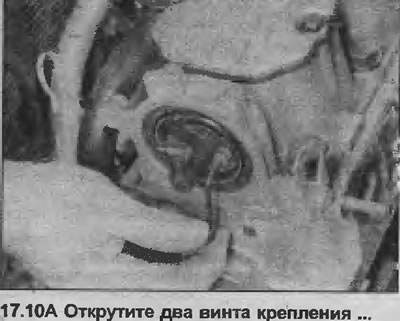
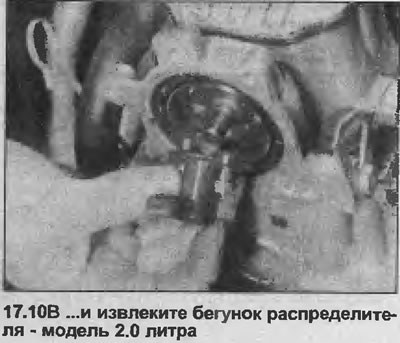

10. Using a socket wrench, unscrew the two mounting screws and remove the distributor rotor,…


10. Using a socket wrench, unscrew the two mounting screws and remove the distributor rotor,…


11. Check the condition of the O-ring on the plastic shield, replace if necessary.

Installation


12. Install in the reverse order. Remember that the distributor rotor can only be installed in one position. If necessary, turn the metal rotor hub so that the screw holes align with the holes in the distributor rotor and the end of the camshaft. Make sure that the high-tension wires are connected correctly.


This article is available at russian, bulgarian, belarusian, ukrainian, serbian, croatian, romanian, polish, slovak, hungarian
Checking the article: Chernov Alexander

Share information:

Previous articles
Opel Vectra A: Power devices
Next articles

Ignition coil — removal, inspection and installation
Starter — overhaul
Starter — removal and installation
Starter — check
Starter — General Description
Generator Drive Belt — Removal, Installation and Adjustment
Distributor (models with one overhead camshaft) — removal and installation
Distributor (models with two overhead camshafts) — removal and installation
Distributor — disassembly, inspection and assembly
Ignition timing — checking and adjustment
Ignition timing — adjustment for use with unleaded petrol
Electronic modules — removal and installation


See similar ones from other Opel car manuals:
▶ Breaker distributor cover and distributor runner — removal… Opel Omega A (1986-1993)
▶ Checking and replacing spark plug wires, cover and… Opel Frontera A (1991-1998, petrol)
▶ Camshaft Cover — Removal and Installation Opel Astra F (1991-1998, petrol)
▶ Removal and installation the timing cover Opel Corsa B (1993-2000)
▶ Luggage compartment cover Opel Insignia A (2008-2017)
Link to this page in different formats

Visitor comments


No comments yet


How much will 44 + 20 =


Vectra C (2002-2008) 
  • General information
  • User manual
  • Vehicle device
  • Maintenance
  • Troubleshooting
  • Power unit
  • Engine repair
  • Cooling system
  • Power and control system
  • Engine electrics
  • Transmission
  • Clutch
  • Car gearbox
  • Drive shafts
  • Chassis
  • Car suspension
  • Steering
  • Brake system
  • Body
  • Exterior
  • Interior
  • Doors, locks and windows
  • Heating and ventilation
  • Electrical equipment
  • Equipment and devices
  • Headlights and lighting
  • Electrical circuits
Vectra B (1995-2002) 
  • General information
  • User manual
  • Weekly checks
  • Maintenance (gasoline)
  • Maintenance (diesel)
  • Troubleshooting
  • Power unit
  • SOHC gasoline engine
  • DOHC petrol engine
  • Diesel engine 1.7 liter
  • Diesel engine 2.0 liters
  • Engine repair
  • Cooling system
  • Fuel system (gasoline)
  • Fuel system (diesel)
  • Charging system
  • Launch system
  • Ignition and preheat
  • Transmission
  • Clutch
  • Mechanical gearbox
  • Automatic gearbox
  • Drive shafts
  • Chassis
  • Brake system
  • Wheel suspension
  • Steering
  • Body
  • Exterior
  • Interior
  • Doors and windows
  • Heating and ventilation
  • Electrical equipment
  • Equipment and devices
  • Electrical circuits
Vectra B (1995-2002, petrol) 
  • General information
  • Maintenance
  • Help with malfunctions
  • Power unit
  • Engine repair
  • Exhaust system
  • Cooling system
  • Fuel system
  • Multec injection system
  • Four point injection
  • Transmission
  • Clutch
  • Gearbox and drive
  • Chassis
  • Wheel suspension
  • Steering
  • Brake system
  • Wheels and tires
  • Body
  • Exterior
  • Interior
  • Electrical equipment
  • Fuses and electronics
  • Power devices
  • Ignition system
  • Lighting and signaling
  • Equipment and devices
  • Heating and ventilation
  • Electrical circuits
Vectra A (1988-1995) 
  • Power unit
  • Engine repair
  • Ignition system
  • Lubrication system
  • Cooling system
  • Injection system
  • Fuel system (carburetor)
  • Fuel system (diesel)
  • Exhaust system
  • Transmission
  • Clutch
  • Car gearbox
  • Chassis
  • Front suspension
  • Rear suspension
  • Steering
  • Brake system
  • Wheels and tires
  • Body
  • Exterior
  • Interior
  • Electrical equipment
  • Electrical circuits
Vectra A (1988-1995, petrol) 
  • General information
  • User manual
  • Maintenance
  • Power unit
  • SOHC engine
  • DOHC engine
  • Cooling and ventilation
  • Fuel system (carburetor)
  • Fuel system (injector)
  • Exhaust converter
  • Transmission
  • Clutch
  • Mechanical gearbox
  • Automatic gearbox
  • Drive shafts
  • Chassis
  • Brake system
  • Car suspension
  • Steering
  • Body
  • Body elements
  • Electrical equipment
  • Power devices
  • Equipment and devices
  • Electrical circuits
OpelBook.ru © 2017–2026 · Mobile version · · Sitemap: EN BG BY UA RS HR RO PL SK HU · Feedback · Site search
Astra F, petrol · Astra G, petrol · Astra G · Astra H · Astra J, petrol · Corsa B · Corsa C, petrol · Corsa C · Insignia A · Kadett D · Kadett E · Omega A · Omega B · Omega B2 · Vectra A, petrol · Vectra A · Vectra B, petrol · Vectra B · Vectra C · Zafira A, petrol · Frontera A, petrol · Frontera B · Ascona C · Vivaro A ·
We want your visit to be comfortable 🤝! We use cookies 🍪 to make that happen.