
OpelBook.ru
Cars AvtoVAZ Cars Mitsubishi Cars BMW Cars Mercedes Cars Nissan Cars Toyota Cars Chevrolet
English Русский
Български
Беларускі
Український
Српски
Hrvatski
Română
Polski
Slovenský
Magyar
 |  Sitemap  |  Contacts  |    


Main Astra Corsa Insignia Kadett Omega Vectra Zafira Others Articles
Vectra A (1988-1995, petrol) Vectra A (1988-1995) Vectra B (1995-2002, petrol) Vectra B (1995-2002) Vectra C (2002-2008)
  • Main
  • Vectra
  • Vectra A
  • Electrical equipment
  • Power devices
  • Ignition coil — removal, inspection and installation

Ignition coil — removal, inspection and installation (Opel Vectra A)

            0

Contents: Removal ⬇ Examination ⬇ Installation ⬇
Note: Before you begin, see. Chapter 3. To check the ignition coil you will need an ohmmeter.


Removal


1. The ignition coil is made in the form of a cylindrical plastic box. It is attached with bolts to the inner panel of the left wing, closer to the upper mount of the suspension strut (under the brake booster fluid reservoir, on some models). On 14 NY, 16 SV and 18 SV models, an ignition amplifier unit is mounted on the ignition coil bracket or backing plate (see illustration).
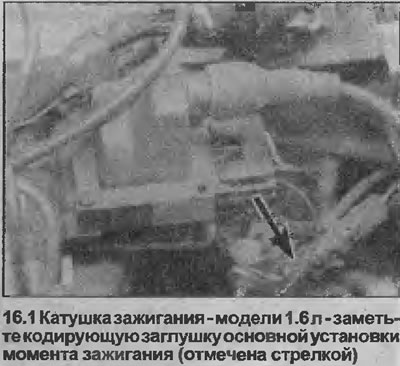
1. The ignition coil is made in the form of a cylindrical plastic box. It is attached with bolts to…


2. Disconnect the negative cable from the battery.

3. Before disconnecting, note the low voltage wiring connections (see illustration).
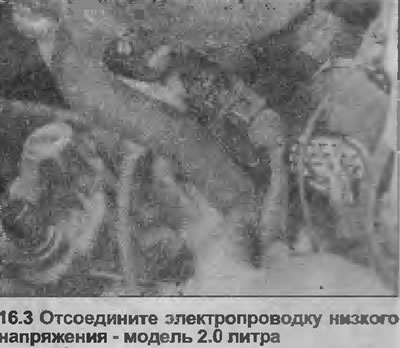
3. Before disconnecting, note the low voltage wiring connections (see illustration).


4. Please note that on models with power steering, one of the ignition coil mounting bolts also secures the brake booster fluid reservoir bracket.


5. Remove the ignition coil.

6. On models with a cylindrical spool, the mounting clamp can be removed from the spool by unscrewing the nut.

Examination


7. To test the ignition coil, first disconnect the low voltage wiring and the high voltage wire. Check the primary windings of the ignition coil by connecting a multimeter across the low voltage wire terminals ("+" or "15" and or "1"). Then check the secondary windings by connecting the multimeter across the terminal ("4") and one of the low voltage wire terminals (usually the "-/1" terminal, although in some cases, it can be either terminal). On 20 XEJ models, the results should be close to the specified values. On all other models, typical ignition coil primary resistance is less than 1 ohm, and secondary resistance is in the range of 4,000-12,000 ohms.

8. If the results obtained differ significantly from those specified, or if there is a short circuit or open circuit in the winding, the ignition coil must be replaced.

Installation


9. Install in reverse order, but check that the connections are correct. They are usually different in appearance so as not to mix them up during installation. If this is not the case, mark or number the connections yourself. If the connections are mixed up, the polarity of the ignition coil will be changed. Although the engine may run, the spark plugs will wear out faster and the engine will have difficulty starting and/or run erratically.

10. Where fitted, ensure the noise suppression capacitor is in place before installing the ignition coil mounting bolts.


This article is available at russian, bulgarian, belarusian, ukrainian, serbian, croatian, romanian, polish, slovak, hungarian
Checking the article: Chernov Alexander

Share information:

Previous articles
Opel Vectra A: Power devices
Next articles

Starter — overhaul
Starter — removal and installation
Starter — check
Starter — General Description
Generator Drive Belt — Removal, Installation and Adjustment
Generator brushes — removal, inspection and installation
Breaker Cover and Distributor Runner — Removal and Installation
Distributor (models with one overhead camshaft) — removal and installation
Distributor (models with two overhead camshafts) — removal and installation
Distributor — disassembly, inspection and assembly
Ignition timing — checking and adjustment
Ignition timing — adjustment for use with unleaded petrol


See similar ones from other Opel car manuals:
▶ Ignition coil — removal, inspection and installation Opel Astra F (1991-1998, petrol)
▶ Checking the ignition coil (engine C14NZ) Opel Corsa B (1993-2000)
▶ Checking the ignition coil Opel Kadett D (1979-1984)
▶ Ignition Coil — Testing, Removal and Installation Opel Omega A (1986-1993)
▶ Ignition coil — common part Opel Ascona C (1981-1988)
Link to this page in different formats

Visitor comments


No comments yet


How much will 47 + 15 =


Vectra C (2002-2008) 
  • General information
  • User manual
  • Vehicle device
  • Maintenance
  • Troubleshooting
  • Power unit
  • Engine repair
  • Cooling system
  • Power and control system
  • Engine electrics
  • Transmission
  • Clutch
  • Car gearbox
  • Drive shafts
  • Chassis
  • Car suspension
  • Steering
  • Brake system
  • Body
  • Exterior
  • Interior
  • Doors, locks and windows
  • Heating and ventilation
  • Electrical equipment
  • Equipment and devices
  • Headlights and lighting
  • Electrical circuits
Vectra B (1995-2002) 
  • General information
  • User manual
  • Weekly checks
  • Maintenance (gasoline)
  • Maintenance (diesel)
  • Troubleshooting
  • Power unit
  • SOHC gasoline engine
  • DOHC petrol engine
  • Diesel engine 1.7 liter
  • Diesel engine 2.0 liters
  • Engine repair
  • Cooling system
  • Fuel system (gasoline)
  • Fuel system (diesel)
  • Charging system
  • Launch system
  • Ignition and preheat
  • Transmission
  • Clutch
  • Mechanical gearbox
  • Automatic gearbox
  • Drive shafts
  • Chassis
  • Brake system
  • Wheel suspension
  • Steering
  • Body
  • Exterior
  • Interior
  • Doors and windows
  • Heating and ventilation
  • Electrical equipment
  • Equipment and devices
  • Electrical circuits
Vectra B (1995-2002, petrol) 
  • General information
  • Maintenance
  • Help with malfunctions
  • Power unit
  • Engine repair
  • Exhaust system
  • Cooling system
  • Fuel system
  • Multec injection system
  • Four point injection
  • Transmission
  • Clutch
  • Gearbox and drive
  • Chassis
  • Wheel suspension
  • Steering
  • Brake system
  • Wheels and tires
  • Body
  • Exterior
  • Interior
  • Electrical equipment
  • Fuses and electronics
  • Power devices
  • Ignition system
  • Lighting and signaling
  • Equipment and devices
  • Heating and ventilation
  • Electrical circuits
Vectra A (1988-1995) 
  • Power unit
  • Engine repair
  • Ignition system
  • Lubrication system
  • Cooling system
  • Injection system
  • Fuel system (carburetor)
  • Fuel system (diesel)
  • Exhaust system
  • Transmission
  • Clutch
  • Car gearbox
  • Chassis
  • Front suspension
  • Rear suspension
  • Steering
  • Brake system
  • Wheels and tires
  • Body
  • Exterior
  • Interior
  • Electrical equipment
  • Electrical circuits
Vectra A (1988-1995, petrol) 
  • General information
  • User manual
  • Maintenance
  • Power unit
  • SOHC engine
  • DOHC engine
  • Cooling and ventilation
  • Fuel system (carburetor)
  • Fuel system (injector)
  • Exhaust converter
  • Transmission
  • Clutch
  • Mechanical gearbox
  • Automatic gearbox
  • Drive shafts
  • Chassis
  • Brake system
  • Car suspension
  • Steering
  • Body
  • Body elements
  • Electrical equipment
  • Power devices
  • Equipment and devices
  • Electrical circuits
OpelBook.ru © 2017–2026 · Mobile version · · Sitemap: EN BG BY UA RS HR RO PL SK HU · Feedback · Site search
Astra F, petrol · Astra G, petrol · Astra G · Astra H · Astra J, petrol · Corsa B · Corsa C, petrol · Corsa C · Insignia A · Kadett D · Kadett E · Omega A · Omega B · Omega B2 · Vectra A, petrol · Vectra A · Vectra B, petrol · Vectra B · Vectra C · Zafira A, petrol · Frontera A, petrol · Frontera B · Ascona C · Vivaro A ·
We want your visit to be comfortable 🤝! We use cookies 🍪 to make that happen.