
Type Delco-Remy (except "compact")
Removing
1. Remove the generator as described in Chapter 9.
2. Draw a line to match the shrouds.
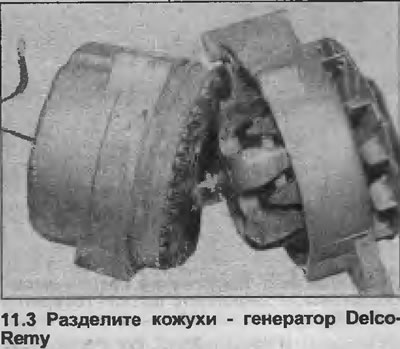
3. Loosen the three pinch bolts, remove the drive side cover and rotor from the other half of the cover and stator (see illustration).
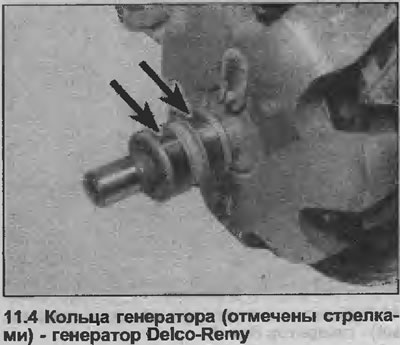
4. Check the condition of the generator rings, if necessary, clean them with a cloth or very fine sandpaper (see illustration).
5. Loosen and remove the three nuts and washers securing the stator wiring to the rectifier, remove the stator assembly (see illustration).
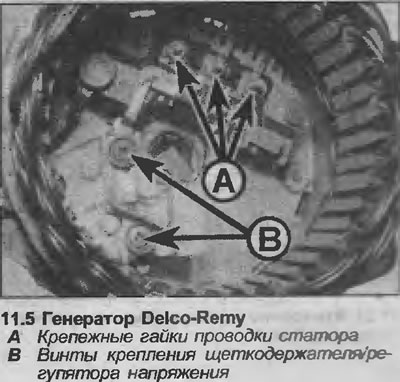
6. Loosen the screw and lift up the diode assembly.
7. Unscrew the two screws securing the brush holder and voltage regulator to the housing with slip ring, remove the brush holder assembly. Note the location of the insulating washers under the screw head.
8. Check that the brushes move freely in the guides and that their length is within the limits given in Specifications. If you are in doubt about the condition of the brushes, it is best to replace them.
9. To install new brushes, unsolder the contacts of the old brushes from the brush holder, and solder new ones in their place.
10. Check that the new brushes move freely in the guides.
Installation
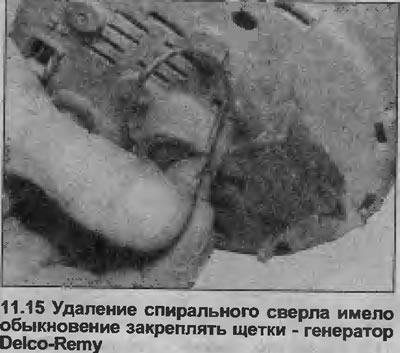
11. Before installing the brush holder assembly, secure the brushes in a fixed position using a piece of wire or a drill.
12. Install the brush holder assembly so that the wire or drill protrudes out through the groove in the housing with the sliding ring, tighten the fastening screws.
13. Install the diode assembly and the stator assembly into the casing, tighten the screws and nuts.
14. Assemble the rotor shrouds together, lining up the marks you made previously. Insert and tighten three tie bolts.
15. Remove the wire or drill from the groove in the housing with the slip ring so that the brushes rest on the rings of the rotor generator (see illustration).
16. Install the generator as described in Chapter 9.
Bosch type generator
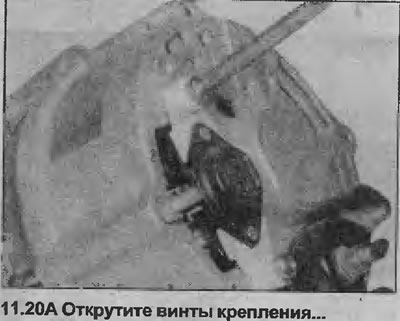
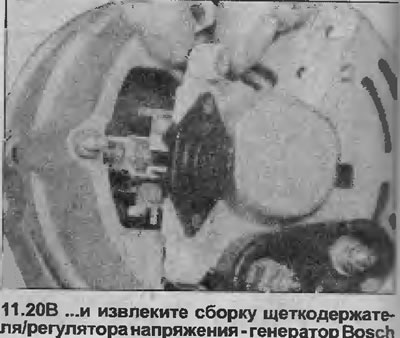
Removing
17. Disconnect the main air line from the air filter, air block, or throttle body, depending on the model, and remove this for better access.
18. Disconnect the battery wiring.
19. If required for improved accessibility, the generator can be removed as described in Chapter 9.
20. Unscrew the two mounting screws, remove the brush holder / voltage regulator assembly (see illustrations).
21. Check that the brushes move freely in the guides and that the length of the brushes is within the limits given in Specifications (see illustration).
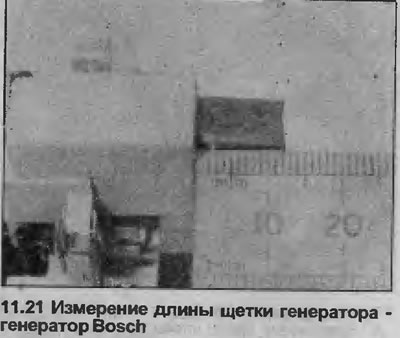
If you are in doubt about the condition of the brushes, it is best to replace them as follows.
22. Unsolder the brush wire from the brush holder. Remove the brush. Do the same with the remaining brush.
Installation
23. Please note that whenever new brushes are installed, new springs must also be installed.
24. Install new springs in the brush holder, insert new brushes and check that they move freely in the guides. If they stick, slightly sharpen them with small files or sandpaper.
25. Solder the ends of the brush wires to the brush holder, being careful not to get solder on the twisted wire.
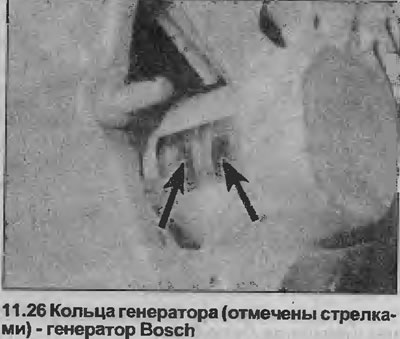
26. Check the condition of the generator rings, if necessary, clean them with a cloth or very fine sandpaper (see illustration).
27. Install the voltage regulator brush holder assembly, tighten the fastening screws.
28. Where necessary, install the generator as described in Chapter 9.
29. Reconnect the battery wiring.
30. Install the main air line.
Delco-Remy "compact"
Removing
31. Remove the alternator as described in Chapter 9.
32. Remove the plastic cover from the back of the generator.
33. Remove the two bolts securing the brush holder to the back of the alternator, one bolt also secures the noise suppression capacitor.
34. Remove the noise suppression capacitor, then remove the brush holder, noting the position of the flat connector on the side.
35. Check that the brushes move freely in the holders and that the length of the brush is within the limits given in the Specifications. If you are in doubt about the condition of the brushes, it is best to replace them.
36. Check the condition of the generator rings, clean them with a cloth or fine sandpaper.
Installation
37. Installation of the brush is carried out in the reverse order.
Visitor comments