
Note: Before you start, see Chapter 3.
Except generators "compact" series
Removing
1. Disconnect the wiring from the battery.
2. Disconnect the main air line from the air filter, air block, or throttle body, depending on the model, and remove this for better access.
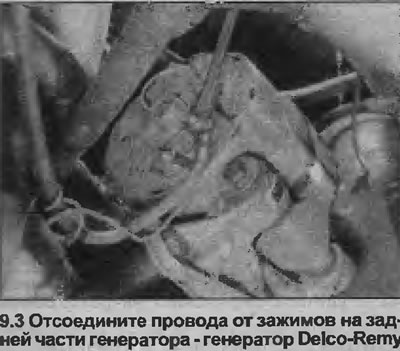
3. Disconnect the electrical wiring at the rear of the generator, noting their location (see illustration).
4. Remove when the water belt (Chapter 8).
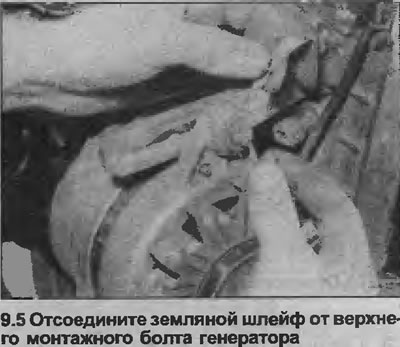
5. Unscrew the two mounting bolts and nuts, remove the washers and bushings, remembering their location. Note the location of the ground strap (see illustration).
6. Remove the generator.
Installation
7. Install in reverse order, paying attention to the following.
8. Clamp the ground loop with the top mounting bolt.
9. Install and tension the drive belt (Chapter 8).
Generators "compact" series
Removing
10. Disconnect the negative cable from the battery.
11. Remove the intake air line and, if necessary for improved access, the air filter assembly.
12. Mark the direction of rotation of the alternator drive belt with chalk.
13. Use a wrench or hex socket to turn the auto tension roller clockwise (when viewed from the right side of the car) and fix it in this position. After loosening the tension on the drive belt, remove it from the alternator pulley, then allow the tension mechanism to return to its original position.
14. Disconnect the electrical wiring at the back of the generator.
15. Unscrew and remove the alternator lower mounting bolt, loosen both upper bolts that secure the alternator brackets to the engine.
16. Unscrew and remove both bolts that secure the generator to the mounting brackets, noting the location of the bolts as they are of different lengths. Remove the generator from the engine.
Installation
17. Install in reverse order. Tighten the mounting bolts with a tightening torque specified specifications, and install the drive belt as described in Chapter 8.
Visitor comments