
Removing
All engines
1. Disconnect the negative cable from the battery. Apply the parking brake, then jack up the front of the vehicle and place it on jack stands. If equipped, remove the crankcase protection.
2. Drain the engine oil (see chapter Current service), then install a new sealing washer and screw the drain plug into place and tighten it to the required torque.
Engines 1.7 l
On 1.7L SOHC models, removing the oil pan involves removing the crankshaft main bearing cap bridge. When installing the jumper, the bolts of its fastening must be replaced without fail.
1. Turn out bolts of fastening of the bottom section of the pallet to the main casting. Separate the lower section of the pallet and remove it from the engine.
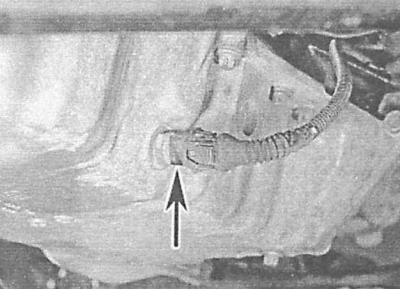
2. On 1.7L SOHC engines to remove the main cast section of the sump, disconnect the electrical wiring from the oil temperature sensor installed in its front part, on engines 1.7 l DOHC - remove the exhaust pipe of the exhaust system (see chapter Power and exhaust systems).
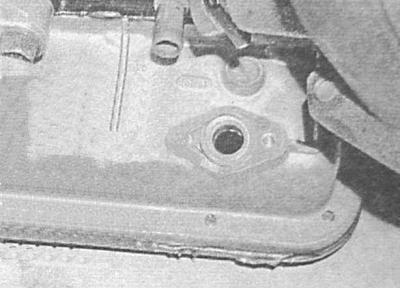
3. Remove the bolt (s) attaching the dipstick guide tube to the cylinder block/sump injection molding section.
4. On 1.7L SOHC engines remove the guide tube from the main casting section of the sump.
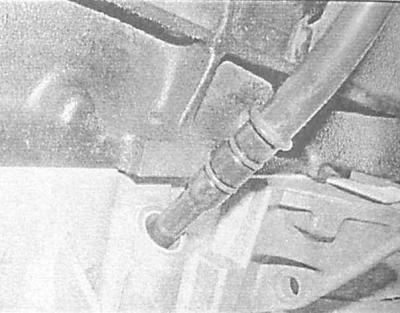
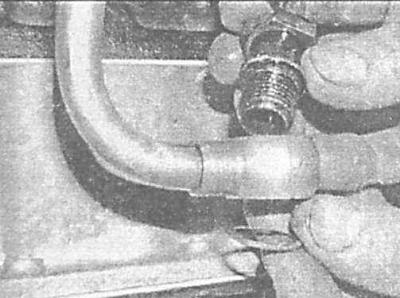
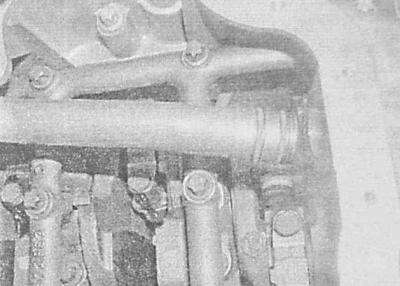
5. Then turn out the connecting bolt and disconnect the turbocharger oil return tube from the casting section of the sump. Remove sealing washers.
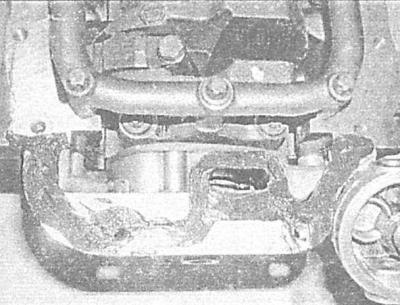
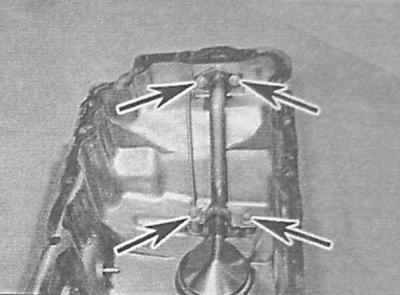
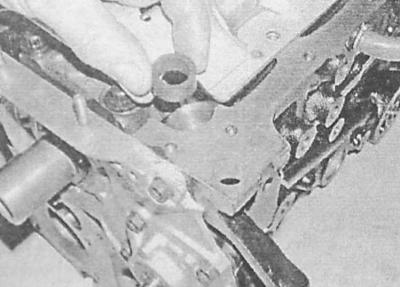
6. Turn out two bolts of fastening of an oil pickup to casting of the pallet and remove a tube, - pay attention that the oil pickup is equipped with two sealing rings.
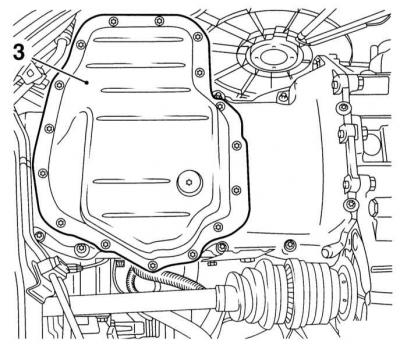
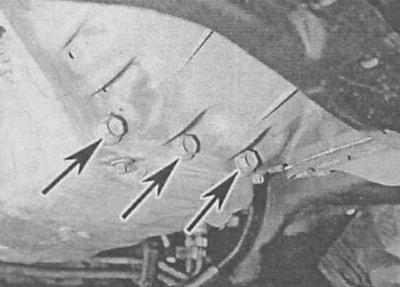
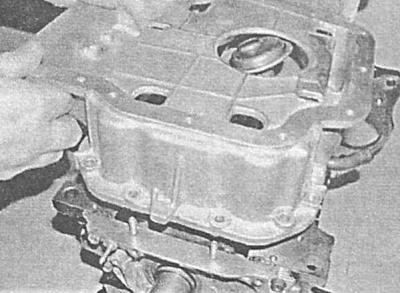
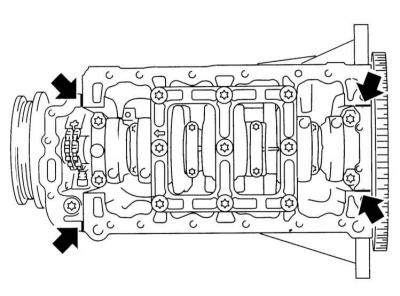
7. Gradually loosen the bolts and nuts securing the cast section of the sump to the cylinder block/cover or oil pump housing, transmission case. If pallet «stuck» to the gasket, tap it with a soft-faced hammer.
On 1.7L SOHC models, the released pan should be moved towards the front subframe.
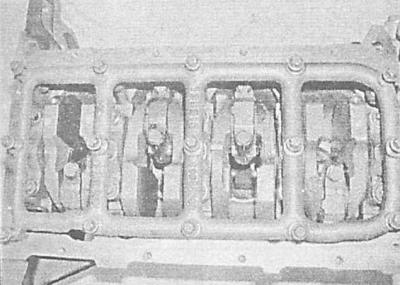
8. On 1.7L SOHC models Turn out bolts of fastening of the bridge of covers of radical bearings and remove the last together with casting of the pallet.
9. On 1.7L DOHC engines remove the oil baffle plate attached to the cylinder block from below.
Engines 2.0 l
1. Disconnect the wiring from the oil temperature sensor and (with appropriate equipment) oil level sensor.
2. Turn out bolts of fastening of a flange of the pallet to a manual transmission case.
3. Gradually releasing, turn out bolts of fastening of the pallet to the basis of the block of cylinders / the oil pump. If necessary, lightly tapping the pan with a soft-faced hammer, separate it from the engine and remove it from under the car.
All engines
1. Check the condition of the oil intake strainer - if necessary, remove it together with the O-ring and wash it in solvent.

Installation
Engines 1.7 l SOHC
1. Thoroughly clean the mating surfaces of the lower and main sections of the oil pan. Apply a pad of suitable sealant to the mating surface where it meets the oil pump cover and rear main bearing cover.

2. Lay a new gasket on the mating surface of the main cast section of the sump and place the latter on the front stretcher.
3. Reinstall the main bearing cap bridge, install the NEW mounting bolts and tighten to specification.
4. Press the cast section of the pallet to the engine, screw in and hand-tighten all bolts of its fastening.
5. Tighten the fixing bolts to the required torque.
If a cast sump section is being installed on an engine that has been removed from the vehicle and separated from the transmission, make sure that the section flange on the flywheel side aligns with the corresponding cylinder block flange.
6. Torque tighten the bolts securing the sump casting to the transmission case.
7. Connect the turbocharger oil return pipe to the sump using new seals. Tighten the tube mounting bolt to the required torque.
8. Insert the dipstick guide tube into the cast section of the sump, replacing the o-rings, connect the tube to the block. Tighten the tube support bracket bolt to the block to the correct torque.
9. Connect the wiring to the crankshaft position and oil temperature sensors. Attach the wiring to the support bracket.
10. Install o-rings on the end of the pickup tube and connect the tube to the cast section of the sump. Tighten the NEW tube mounting bolts to the correct torque.
11. Thoroughly clean the mating surfaces of the main and lower sections of the pallet, completely freeing them from traces of oil and dirt.
12. Using a new gasket, install the lower pan section onto the main section casting. Screw and tighten with the required effort fixing bolts.
13. Install the crankcase, lower the car to the ground and fill the engine with fresh engine oil (see chapter Current service).
Engines 1.7 L DOHC
1. Remove all traces of dirt, oil, and sealant from mating surfaces of both sump sections, and, if removed, from the oil pickup.
2. If necessary, replace the sealing ring of the oil pickup and install the latter in the base of the cylinder block. Screw in the oil intake bolt and tighten it to the required torque. Install the oil deflector plate.
3. Make sure that the mating surfaces of the cylinder block and the main cast section of the oil pan are absolutely clean and dry. Apply a suitable sealant to the top mating surface on the top main pan section.
4. Install a new rubber seal on the dipstick guide tube to the pan casting.
5. Install the cast section of the pallet and install the bolts and nuts of its fastening. Note that four long bolts thread into holes in the back of the pallet casting. If the pallet was dismantled on the engine removed and separated from the transmission, make sure that the rear surfaces of the cylinder block and the casting of the pallet are brought out in the same plane. Working diagonally from the center outwards, tighten the pan casting bolts evenly to the correct torque.
6. Screw in the bolts of the casting of the pallet to the transmission case and tighten them with the required force.
7. Make sure that the guide tube of the measuring probe is installed correctly, wrap the bolts of its fastening and tighten them with the required force.
8. Install the exhaust pipe (see chapter Power and exhaust systems).
9. Make sure that the mating surfaces of the main and bottom sections of the pallet are absolutely clean and dry. Apply a coat of suitable sealant to the mating surface of the bottom section. Press the bottom section of the pallet to the top, screw in and tighten the fixing bolts with the required force.
10. Reinstall the crankcase if equipped. Lower the vehicle to the ground and fill with fresh engine oil (see chapter Current service).
Engines 2.0 l
1. Thoroughly clean the mating surfaces of the cylinder block/sump and, if removed, the oil intake.
2. If necessary, after replacing the sealing ring, install the oil pick-up on the pan, tightening its fastening bolts with the required force.
3. Apply a layer of suitable sealant to the mating surface of the cylinder block at the joints with the oil pump housing and the crankshaft rear support cover.
4. Having replaced a sealing lining, press the pallet to the block of cylinders, screw and by hand tighten fixing bolts.
5. Moving from the center to the edges, in a diagonal order, evenly tighten the bolts securing the sump to the cylinder block / oil pump with the required force.
6. Torque tighten the sump flange-to-transmission housing bolts.
7. Connect the electrical wiring to the oil temperature sensor and (if installed) oil level sensor.
8. Reinstall the engine crankcase if equipped. Lower the vehicle to the ground and fill the engine with fresh motor oil (see chapter Current service).
Visitor comments