
Note: This procedure will require a ball joint puller. When installing, use a new self-locking tie-rod end ball joint nut.
Removing
1. Where applicable, remove the wheel cover, then loosen the front wheel bolts. Apply the handbrake, then jack up and support the front of the vehicle on axle stands. Remove the corresponding front wheel.
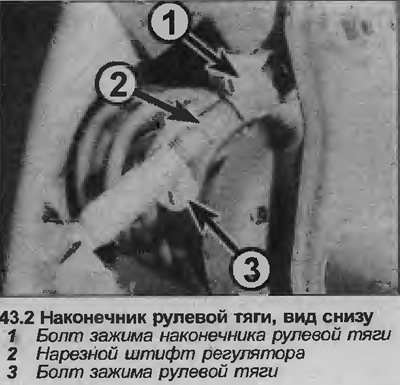
2. Loosen the tie rod end clamp bolt securing the tie rod end to the adjuster threaded stud on the tie rod (see illustration).
3. Unscrew the self-locking nut of the ball joint connecting the tie rod end to the suspension strut.
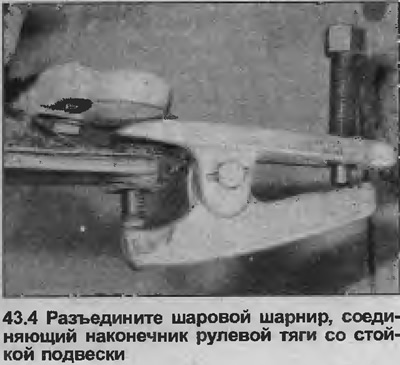
4. Using a ball joint remover, disconnect the joint connecting the tie rod end to the suspension strut (see illustration).
5. Mark the position of the tie rod end on the adjuster pin with paint or tape. You can also count the number of thread revolutions on the protruding part of the pin. Then unscrew the tip from the steering rod.
6. Please note that the right tie rod end is marked with the letter "R", and the left tie rod end has no mark.
Installation
7. Screw the tie rod end onto the adjuster pin to the position marked during removal.
8. Connect the tie rod end ball joint to the suspension strut and tighten the new self-locking nut to the specified torque.
9. Tighten the tie rod end clamp bolt.
10. Install the wheel and lower the vehicle to the ground. Finally tighten the wheel bolts and, where applicable, install the cap.
11. Check the alignment of the front wheels as described in Chapter 45 and adjust if necessary. Take a short drive to check linkage alignment.
Visitor comments