
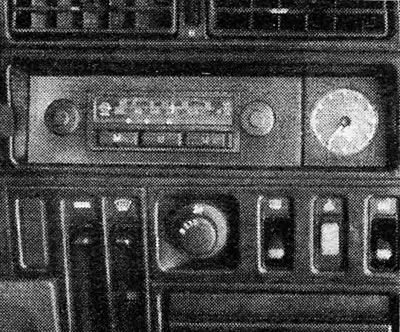
Figure 12.74. Radio location
1. A radio or tape recorder is a very expensive electrical appliance and will only work best if it is installed correctly. It makes no sense to expect the same sound quality that you might get in a concert hall from a receiver hanging on the dashboard and speakers located in the back seat or on the rear shelf. If you don't want to install the equipment yourself, there are many workshops that can help you with this issue.
2. Make sure the receiver you purchase has the same polarity as the car. For receivers with adjustable polarity, be sure to ensure that the polarity is adjusted to suit your vehicle before installing the receiver.
3. It is very difficult to give detailed instructions on the installation of the receiver, speakers and antenna, since this issue is decided only in accordance with the wishes and capabilities of the owner, however, the following paragraphs contain recommendations relevant to all types of installation of such equipment.
Radios
4. Most radios have standard sizes - 18 cm long and 5 cm wide. In this case, they will fit the size of the provided hole in the car. As an alternative, you can purchase a special console that is installed between the front panel and the floor, or on the transmission tunnel. These same consoles can be used to place additional switches if necessary.
5. Some radios come with a mounting bracket and instructions; others will require the fabrication of drilled and bent metal strips that form the support brackets. These stripes can be purchased at most specialty auto stores. The receiver must be properly grounded by running a separate ground wire between the radio housing and the vehicle body.
6. Use the manufacturer's instructions when connecting the radio to the vehicle's electrical circuit. It is necessary to install a 1 - 2 Ampere fuse on the receiver power cable; throttle may also be required (see next section). Take the power wire from the bottom of the hazard light switch (see Figure 12.75).
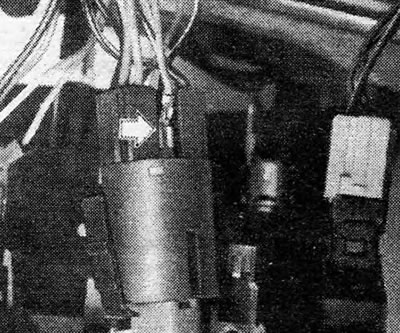
Figure 12.75. The receiver power wire going to the hazard warning switch is indicated by the arrow
7. The type of antenna used in each specific case depends solely on the individual wishes of the owner. Generally speaking, the higher the antenna, the better the reception. It is best to install an antenna that can be easily removed, especially if you use a power car wash or live in an area where cars are frequently vandalized. In this case, the electrical antennas can be raised or lowered automatically, in accordance with the switching on or off of the radio. However, they can present more problems than conventional manual antennas.
8. When choosing an antenna location, keep the following points in mind:
- (A) The antenna wire should be shorter, the better; this means that it is better to install the antenna on the front of the car
- (b) The antenna should be installed as far as possible from the ignition distributor and high voltage wires
- (V) The part of the antenna that is located below the mounting point should not touch the wheels or anything else
- (G) If possible, the antenna should be positioned so that its center wire does not pass through the engine compartment
- (d) The plane of the panel on which the antenna mount is located should not be located at an angle, so that the antenna could not be positioned vertically (when viewed in relation to the car). Most antennas are slightly adjustable
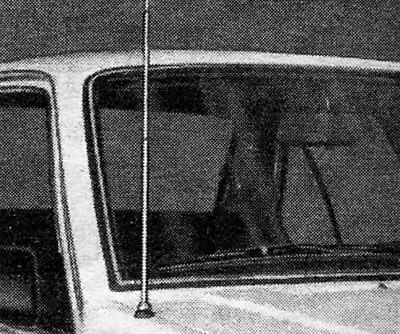
Figure 12.76. Antenna location on the front fender
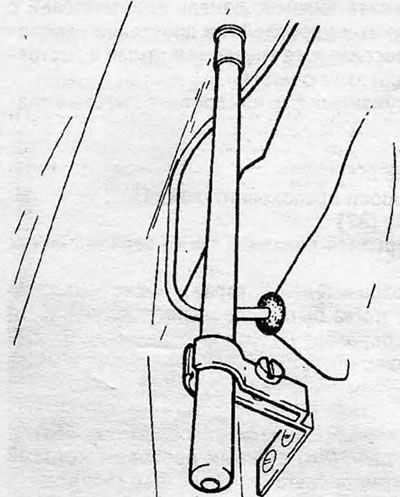
Figure 12.77. Lower antenna support and rubber cap for the wire that goes into the cavity in the area of the lower right front of the car
9. Having decided on where to install the antenna, you need to make a relatively large hole in the panel. The exact size of the hole will depend on the specific antenna type, although in general cases the hole diameter is 19mm. Once you have made the required hole, sand the edges and then coat them with special paint to prevent corrosion.
10. Install the antenna according to the manufacturer's instructions. If the antenna is too tall, or if it protrudes too far under the mounting panel, you can install a support for it. Such a support can be made from the metal strips mentioned earlier. This support should be secured in place properly. To ensure the best reception, it is recommended to install a ground wire between the antenna and the vehicle body.
11. You will probably need to drill one or two holes in the car body in order to route the antenna wire through them into the car. If this is the case, make sure that rubber caps are placed on the holes to protect the wire and prevent corrosion.
12. The location and installation of speakers depends mainly on their type. Generally speaking, the speakers fit into the air vents in the front panel. In such cases, simply remove the protective grilles from their places and attach the speakers with bolts or screws. Be especially careful not to damage the speaker diaphragm. It's also a good idea to install a spacer between the speaker frame and the mounting panel. In order to prevent vibration, some speakers are pre-equipped with such a spacer.

Figure 12.81. Rear speaker placement - Saloon
13. If the receiver has speakers that can be installed side by side, simply attach them with self-tapping screws to the mounting panel.
14. When connecting a rear-mounted speaker to the receiver, the wires should be routed through the vehicle under the floor mats or carpet, preferably on the sides where they will not be stepped on by passengers. Make the appropriate connections according to the manufacturer's instructions.
15. For best results, insert speakers so that they protrude into the inner surfaces (e.g. doors or luggage compartment).
16. When installing speakers on the front doors, make sure that there is enough space for them and that they will not touch the lock or window mechanism. Place the speaker on the door trim and trace it around the perimeter. Then, with the speaker out of the way, draw a second line, inside the first, so that you can secure the back of the speaker well while still allowing the speaker flange to be firmly supported. When you are sure that the drawn line is drawn correctly, drill several small holes around its perimeter. Then insert a jigsaw blade into one of the holes and cut along the line until the center part can be removed.
17. Sand the edges of the hole and coat it with paint to prevent corrosion. Cut a corresponding hole in the interior door trim panel so that it can then be completely covered by the speaker grille. Now drill a hole through the edge of the door and into the door frame. These holes will be required for wiring the speakers. Route the speaker wires through the holes in the door and door frame. Don't forget to install the rubber caps. After wiring, reinstall the interior door trim panel and secure the speaker to the door using self-tapping screws.
18. Now you have several meters of additional electrical wiring in the car. Secure it properly with PVC tape. Don't leave wires dangling.
19. The receiver should now work. However, before you put the tools away, you need to align the antenna. Unless there are specific instructions from the manufacturer about this, proceed as follows: Find a station with a low signal strength in the medium wave band and slowly turn the tuning knob until the loudest sound is reached. The radio is now aligned with the antenna.
Tape recorders
20. Instructions for installing stereo recorders are the same as for installing radios. Tape recorders are not typically subject to interference to the same extent as receivers, although they can be, so their location requirements are not as limited. If possible, it is better to install the tape recorder on a flat surface. The driver must also have easy access to the tape recorder, provided that he (driver) fastened with a seat belt.
Manufacturer installed radios
21. If the vehicle is equipped with a manufacturer-installed radio, the receiver can be removed for repairs before removing the front panel (refer to Chapter 11).
22. Disconnect the battery.
23. Remove the ashtray and the central switch panel containing 6 switches) from the front panel.
24. Remove the mounting screws from the bracket holding the receiver.
25. Slide the receiver forward so you can disconnect the power, antenna, and speaker wires from it.
26. On some models, the rear speakers are installed in the side panels of the rear shelf (see photo 46.26).
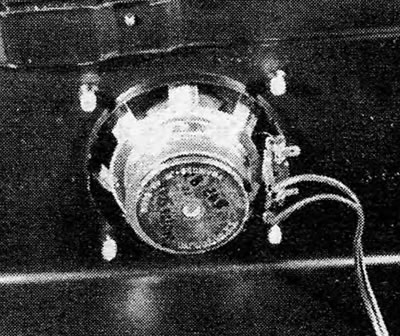
Photo 46.26 Typical rear speaker mount
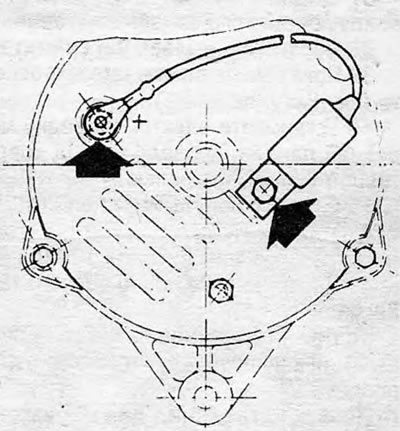
Figure 12.82. Interference suppressor installed on a Detco-Remy generator
Visitor comments