
2. Remove the slotted nut on the top of the antenna. If you do not have the necessary wrench, use a screwdriver to insert it into one of the slots, being careful not to damage the car's paint. Remove the slotted nut and parts from the upper half of the mount (see photo 45.2).
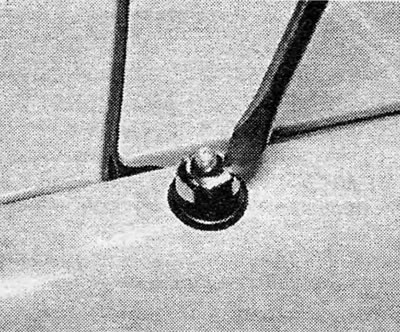
Photo 45.2 Unscrewing the slotted antenna nut using a screwdriver
3. Disconnect the lower antenna support bracket (if it is installed) and extend the antenna inside the wing. Remove the fastening parts.
4. Remove the radio (refer to Section 46 for details).
5. Release the antenna wire from its mounting clips, removing decorative panels to gain access if necessary. Pull the wire inside the wing and put the rubber cap back in place.
6. Reinstall by performing the above steps in reverse order. Use a new rubber cap and make sure there is good metal-to-metal contact between the antenna and the underside of the wing.
Visitor comments