
2. If such a system is installed, it is necessary to use a larger washer fluid reservoir, which is installed under the hood.
3. The washer nozzles must be adjusted using a pin so that a stream of washer fluid hits the headlight glass. If necessary, the nozzle system can be removed by carefully detaching it from the bumper (see photo 40.3), and then detaching the sleeve.
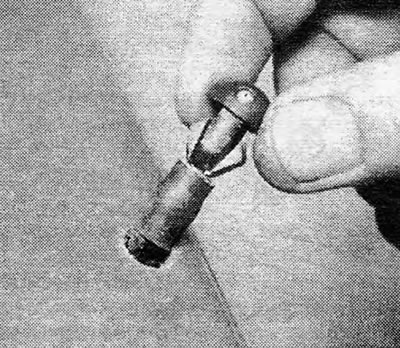
Photo 40.3 Removing the headlight washer nozzle
4. Remove the wiper blades and arms in the same manner as described for the windshield wiper system, (see photo 40.4). Access to the arm nut and motor mount nuts will be much easier if you remove the front bumper first.
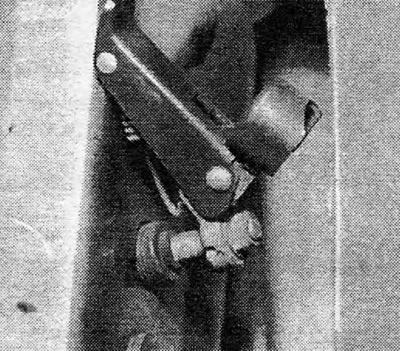
Photo 40.4 Front headlight wiper arm mounting nut
5. The wiper motor is located under the front end of the wheel arch (see photo 40.5). To remove the motor, disconnect the arms and wiper blades, then unscrew the two mounting bolts and remove the motor from its place on the wheel arch. Disconnect its electrical wiring.

Photo 40.5 Headlight wiper motor. Please note that the motor may be right or left depending on the model (right or left hand drive) and has the corresponding marks - L or R
6. Reinstalling all parts is carried out by performing the above steps in reverse order. Check that the windshield wiper, washer and headlight are functioning correctly before finishing work.
7. Check that the headlight beam is set correctly (see Section 31). Make sure the wiper arm is positioned so that it touches the bottom of the headlamp support plate in the "switched off".
8. Adjust the direction of the washer nozzle (see Figure 12.40).
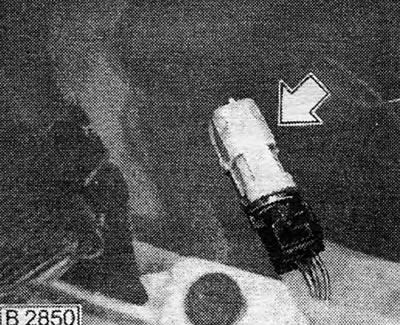
Figure 12.39. The electrical wiring plug for the headlight wiper motor is indicated by the arrow
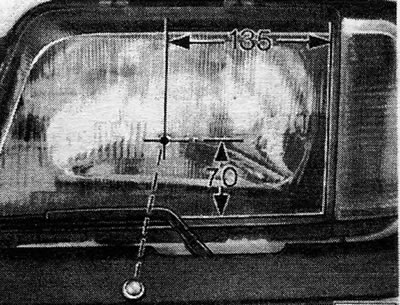
Figure 12.40. Diagram for setting the position of the washer fluid jet on the headlights Measurements are in mm
Visitor comments