
2. In order to make a temporary adjustment, place the car on a flat surface at a distance of approximately 3 meters from a vertical wall, or a piece of board located strictly vertically. The wall or board must be perpendicular to the center line of the vehicle and the vehicle must be normally loaded. Also check that the tires have the correct pressure.
3. Draw a vertical line on the board that coincides with the central axis of the car.
4. Rock the vehicle vigorously several times to level it, then carefully measure the height from the ground to the center of the headlight beam.
5. Draw a horizontal line on the wall or board at the same height as the centers of the headlights, and on this line place an X on each side of the center line, at the same distance as the centers of the headlights.
6. Now find the controls on each headlight. Each headlight has two of them, located diagonally from each other (see photo 31.6).
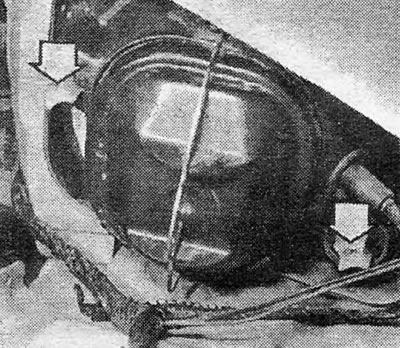
Photo 31.6 Headlight beam adjustment screws (indicated by arrows)
7. Turn on the headlights fully and, using the controls, adjust each headlight so that the beam is located directly under the corresponding cross on the wall or board.
8. Rock the vehicle again several times to ensure that the headlight beams are in the correct position. At the same time, check the operation of the high beam switch to make sure that the beams deviate slightly to the side and down. When finished, turn off the headlights.
9. Have your setup checked by a professional at the earliest opportunity.
10 Holts Amber Lamps may be useful for temporarily changing the color of headlights and comply with legal requirements.
Visitor comments