
2. Remove the mounting screw and drag the brake drum. If necessary, move the brake adjusters back (photo).
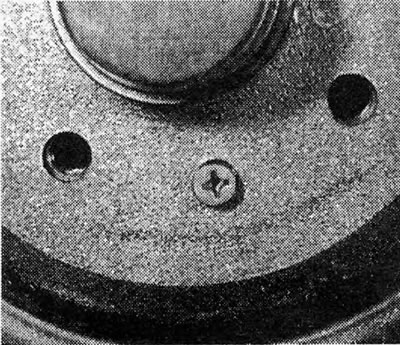
Photo 12.2 Brake drum retaining screw.
3. Using pliers, disconnect the upper return spring and pull the top ends of the shoes until they are around the cylinder.
4. Disconnect the fluid tube from the cylinder and cap the end of the tube as soon as you unscrew the coupling to prevent fluid loss. A dust cap for the nipple is suitable for this.
5. Unscrew the mounting bolts and remove the cylinder from the back plate.
b. Clean off any external dirt and remove the rubber boots from the cylinder body.
7. The pistons should usually be expelled due to the pressure of the coil spring, but if this is not the case, tap the end of the cylinder with a piece of wood or use low pressure compressed air from a foot pump into the tube connection.
8. Inspect the piston and cylinder barrel surfaces for rust, scratches, or metal-on-metal friction. If this occurs, replace the entire cylinder.
9. If these components are in good condition, then discard the oil seal and boots and purchase a repair kit that contains all the parts that need to be replaced.
10. Install piston seals (putting them in place only with your fingers), so that the spring is between them. Dip the pistons in clean hydraulic fluid and insert them into the cylinder.
11. Install the anthers.
12. Place the cylinder back on the backplate and connect the tubes.
13. Engage the brake shoes with the pistons and install the return spring.
14. Install the brake drum and adjust the shoes where needed (see Section 8).
15. Bleed the hydraulic system as indicated in Section 20.
16. Reinstall the road wheel and lower the car.
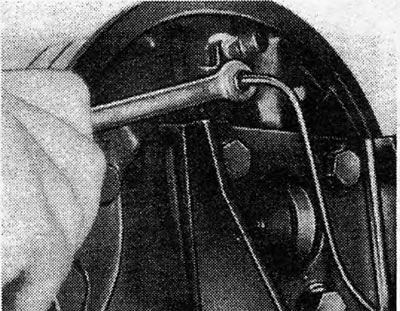
Pic. 9.28. Unscrewing the rear cylinder coupling
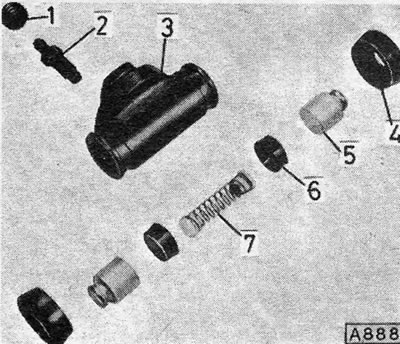
Pic. 9.29. Rear cylinder disassembled: 1. Dust cap; 2. Blow screw; 3. Cylinder; 4. Boot;5. Piston; 6. Oil seal; 7. Spring.
Visitor comments