
OpelBook.ru
Cars AvtoVAZ Cars Mitsubishi Cars BMW Cars Mercedes Cars Nissan Cars Toyota Cars Chevrolet
English Русский
Български
Беларускі
Український
Српски
Hrvatski
Română
Polski
Slovenský
Magyar
 |  Sitemap  |  Contacts  |    


Main Astra Corsa Insignia Kadett Omega Vectra Zafira Others Articles
Frontera A (1991-1998, petrol) Frontera B (1998-2004) Ascona C (1981-1988) Vivaro A (2001-2014)
  • Main
  • Opel
  • Ascona C
  • Chassis
  • Brake system
  • Disc pads — inspection and replacement

Disc pads — inspection and replacement (Opel Ascona C)

            0

1. Raise the front of the machine. If the wheels were balanced directly on the car (new machines are balanced in this way during production), then note the relative position of the wheel to the hub so that it can be positioned correctly during assembly.

2. Inspect the thickness of the friction material on each pad. If any one of them has a thickness that meets or is below the specified minimum, then replace the entire set (four pads) as follows.
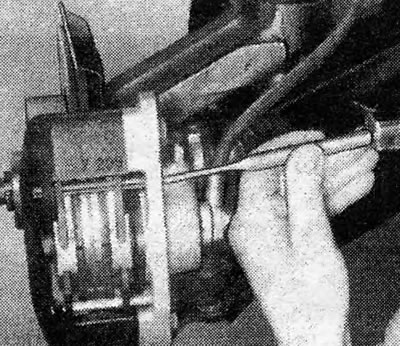
Figure 9.2. Removing the brake shoe retaining pin

Figure 9.2. Removing the brake shoe retaining pin


3. Press out the pins holding the pads by pressing on their inner ends with a punch.
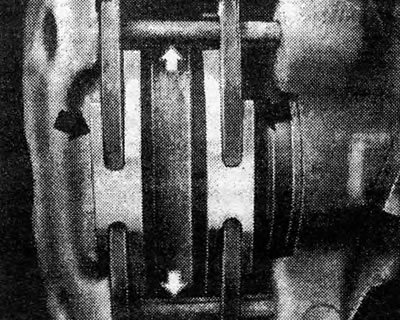
Figure 9.3. Correctly positioned disc brake pad springs - indicated by arrows

Figure 9.3. Correctly positioned disc brake pad springs - indicated by arrows


4. Remove the springs (photo).
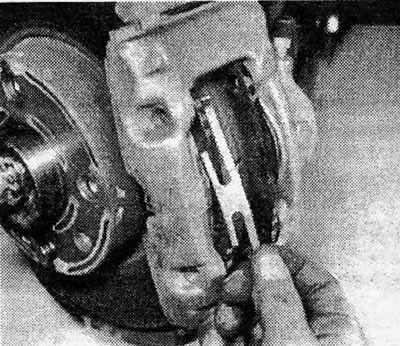
Photo 3.4 Removing the disc brake pad spring

Photo 3.4 Removing the disc brake pad spring


5. Using a pair of pliers, pull out the outer shoe (photo).
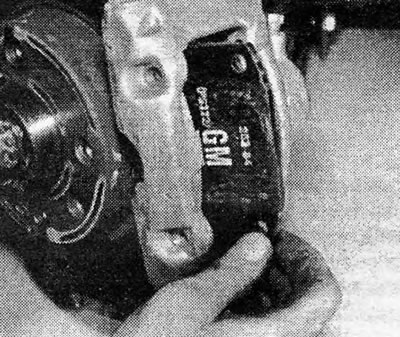
Photo 3.5 Partially removed outer disk pad.

Photo 3.5 Partially removed outer disk pad.


6. Remove the inner shoe. If it is very tight, then move the shoe slightly to the side to press on the caliper piston (photo).
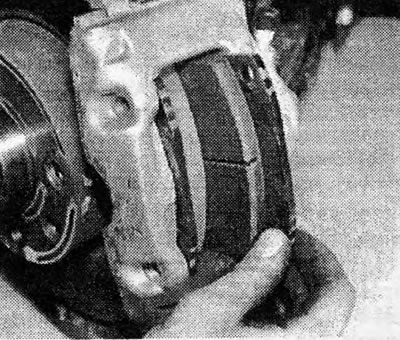
Photo 3.6 Removing the inner disc pad.

Photo 3.6 Removing the inner disc pad.


7. To install new, thicker pads, you need to press the caliper piston all the way into its cylinder using a flat metal rod, such as a tire lever. Pushing the piston will cause the fluid in the reservoir to rise, so anticipate this by pumping out some fluid using an old (clean) hydrometer or something similar.

8. Brush the caliper cheeks without inhaling the powder.

9. Insert the pads, making sure the lining side is against the disc. If you are installing disc pads made by the vehicle manufacturer, you may find that two of the four pads have white marks on their back plates. If this is the case, the pads with the marks should be installed on the piston sides of the calipers. On new ATE type brake assemblies a washer may be installed between the inner brake shoe and the caliper piston. In this case, make sure that the washer is inserted with the inner shoe (photo).
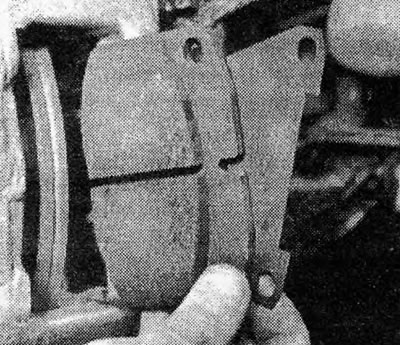


Photo 3.9 Inner disc pad and washer of the ATE type brake unit.

Photo 3.9 Inner disc pad and washer of the ATE type brake unit.


10. Position the expansion springs correctly (Figure 9.3), and then insert the retaining pins (photo).
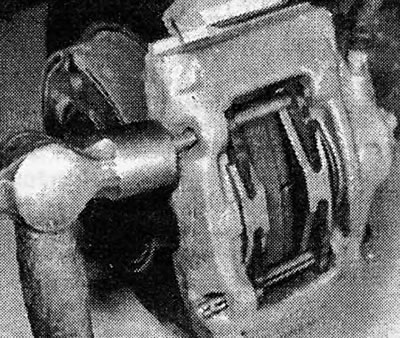
Photo 3.10A Insert the disc pad stud
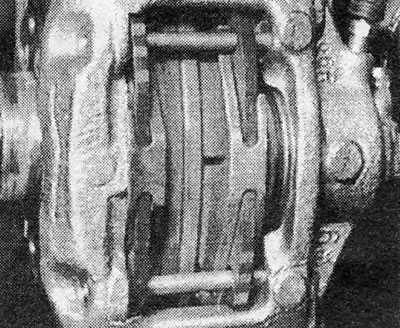
Photo 3.10A Insert the disc pad stud


Photo 3.10B Reassembled disc pads.

Photo 3.10B Reassembled disc pads.


11. Repeat these steps on the opposite brake.

12. Install the wheels and lower the car.


13. Press the brake pedal firmly several times to ensure that the pads are correctly positioned relative to the discs.

14. Add liquid to the reservoir to the required level.

15. New brake pads need to be bedded in, so avoid hard braking if possible during the first 120 miles (200 km).


This article is available at russian, bulgarian, belarusian, ukrainian, serbian, croatian, romanian, polish, slovak, hungarian
Checking the article: Kornev Georgy

Share information:

Previous articles
Opel Ascona C: Brake system
Next articles

Routine maintenance
General description
Brake system — specifications
Caliper (type ATE) — removal, inspection and installation
Caliper (type GMF) — removal, inspection and installation
Brake disc — inspection, removal and installation
Brake Disc Shield — Removal and Installation
Rear brakes (on models manufactured before 1984) — lining
Rear Brake Shoes (Pre-1984 Models) — Inspect and Replace


See similar ones from other Opel car manuals:
▶ Handbrake pads (rear disc brakes) — replacement Opel Astra F (1991-1998, petrol)
▶ Replacing the front disc brake pads Opel Corsa B (1993-2000)
▶ Replacing the brake pads of the rear disc brake mechanisms Opel Kadett E (1984-1995)
▶ Rear Disc Brake Pads — Inspection, Removal and Installation Opel Vectra A (1988-1995, petrol)
▶ Rear brake pads of the rear disc brake mechanism —… Opel Zafira A (1999-2005, petrol)
Link to this page in different formats

Visitor comments


No comments yet


How much will 12 + 17 =


Vivaro A (2001-2014) 
  • General information
  • User manual
  • Power unit
  • Petrol engine F4R
  • Diesel engine F9Q
  • Diesel engine G9U
  • Transmission
  • Clutch and drive shafts
  • Manual gearbox
  • Chassis
  • Front suspension
  • Rear suspension
  • Brake system
  • Body
  • Exterior
  • Interior
  • Electrical equipment
  • Heating and ventilation
  • Air conditioner
  • Equipment and devices
  • Electrical diagrams
Ascona C (1981-1988) 
  • General information
  • Maintenance
  • Power unit
  • Gasoline engines
  • Diesel engines
  • Cooling system
  • Fuel and exhaust system
  • Contact ignition system
  • Contactless ignition system
  • Transmission
  • Clutch
  • Mechanical gearbox
  • Automatic gearbox
  • Drive shafts
  • Chassis
  • Steering
  • Brake system
  • Car suspension
  • Body
  • Exterior
  • Interior
  • Doors and windows
  • Electrical equipment
  • Equipment and devices
  • Power devices
  • Electrical circuits
Frontera B (1998-2004) 
  • General information
  • User manual
  • Maintenance
  • Power unit
  • Petrol engines 2.2 l
  • Petrol engines 3.2 l
  • Diesel engines 2.2 l
  • Cooling system
  • Fuel system (petrol)
  • Fuel system (diesel)
  • Ignition system
  • Transmission
  • Clutch
  • Manual gearbox MUA5C
  • Automatic gearbox 4L30E
  • Chassis
  • Suspension and axles
  • Steering
  • Brake system
  • Body
  • Exterior
  • Interior
  • Doors, locks and windows
  • Heating and air conditioning
  • Electrical equipment
  • Power devices
  • Equipment and devices
  • Lighting and signaling
  • Electrical diagrams
Frontera A (1991-1998, petrol) 
  • General information
  • Introduction to guide
  • User manual
  • Maintenance
  • Power unit
  • Engine repair
  • Lubrication system
  • Cooling system
  • Power and exhaust system
  • Engine electrics
  • Transmission
  • Clutch
  • Mechanical gearbox
  • Cardan shafts
  • Chassis
  • Brake system
  • Front suspension
  • Rear suspension
  • Steering
  • Body
  • Repair and care
  • Electrical equipment
  • Equipment and devices
  • Electrical circuits
OpelBook.ru © 2017–2026 · Mobile version · · Sitemap: EN BG BY UA RS HR RO PL SK HU · Feedback · Site search
Astra F, petrol · Astra G, petrol · Astra G · Astra H · Astra J, petrol · Corsa B · Corsa C, petrol · Corsa C · Insignia A · Kadett D · Kadett E · Omega A · Omega B · Omega B2 · Vectra A, petrol · Vectra A · Vectra B, petrol · Vectra B · Vectra C · Zafira A, petrol · Frontera A, petrol · Frontera B · Ascona C · Vivaro A ·
We want your visit to be comfortable 🤝! We use cookies 🍪 to make that happen.