
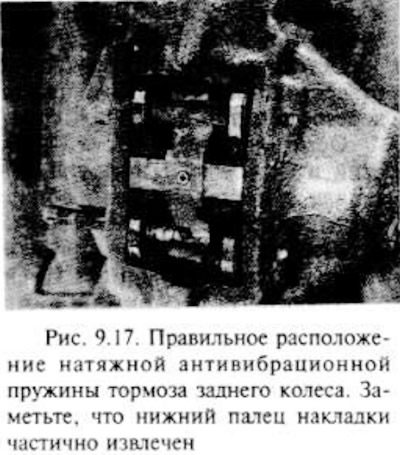
Note the location of the anti-rattling tension spring, then remove the upper and lower trim pins from the outside of the caliper using a suitable tool (pic. 9.17).
Remove tension spring.
Press the pads out of the disc with light pressure, then use pliers to remove the outer pad and. if required, an anti-screech gasket, which is located between the pad and the body.
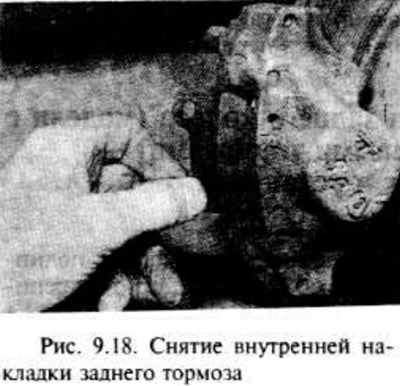
Remove the inner pad and, where required, the anti-squeal pad (pic. 9.18.).
Brush off dirt and dust from the bracket, being careful not to inhale the dust. Carefully remove rust from the edge of the brake disc.
To install new thicker linings, the piston in the bracket must be fully pressed into the hole using a pry bar-type flat metal bar. Pressing in the piston will cause the fluid level in the reservoir to rise, so some fluid must be drained using an old battery hydrometer or a rubber bulb.
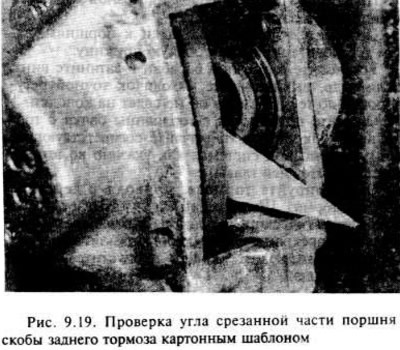
Check that the cuts in the pistons are at an angle of approximately 23°to the horizontal. You can check the installation with a cardboard template (pic. 9.19.).
Apply a little brake grease to the top and bottom edges of the platters on the new brake pads.
Position the new pads and anti-noise pads in the bracket. Make sure that the friction material is directed towards the disc and that the linings are slightly movable.
Install the anti-vibration tension spring on the pads, then insert the pad pins from the inside of the bracket while compressing the spring. Insert your fingers so that they are firmly in the bracket.
Repeat the operations on the other side of the car.
Install the wheels and lower the vehicle to the ground.
Press the foot brake several times to press the pads against the discs.
Check the brake fluid level and top up if necessary.
New brake pads must be worn in; if possible, avoid hard braking during the first 100 miles.
Visitor comments