


Remove the brake disc as described above in the relevant section.
Use a brush to remove dirt and dust from various parts, being careful not to inhale the dust.
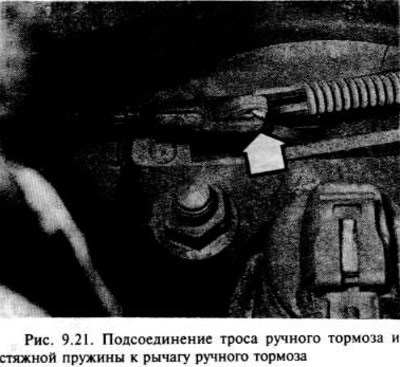
Disconnect the handbrake cable and release spring from the handbrake lever at the brake shoe support disc. If necessary, loosen the handbrake cable length adjuster (fig. 9.21.).
Remove the pad pins, springs and their washers by pressing them and turning them 90° with pliers. Note that the pins are removed from the rear side of the support disc.
The brake shoes, cable length adjuster, handbrake lever and tension springs can now be pulled out together as an assembly.
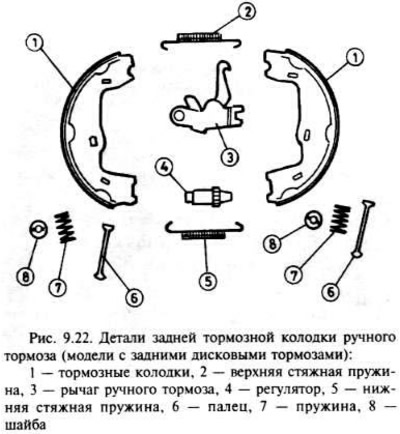
Note the location of all the parts, then unhook the upper and lower spring hooks from the brake shoes and remove the handbrake lever and cable length adjuster (fig. 9.22.).
Apply a small amount of brake grease to the threads of the adjuster, then screw it in to the minimum length. Also apply a small amount of brake grease to the friction areas of the brake pads on the backing disc.
Install one of the new pads and secure it to the support disc with a pin, spring and washer.
Set the handbrake lever to the desired position.
Place another brake shoe and secure it with a pin, spring and washer.
Attach the upper tension spring to the hooks.
Place the adjuster between the lower ends of the shoes as shown before disassembly, then install the lower spring.
Connect the handbrake cable and spring to the handbrake lever.
Install the brake disc as described above in the relevant section, but do not install the road wheel yet.
Repeat all operations with the other wheel of the car (on the other side).
Check the handbrake cable adjustment as described in the relevant section below.
Install the road wheels and lower the vehicle to the ground.
Visitor comments