
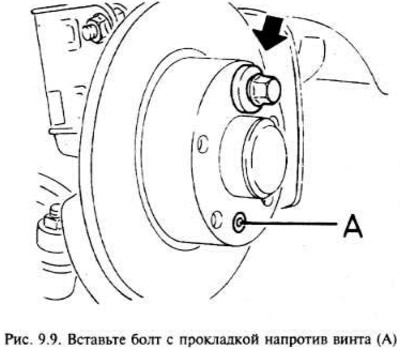
Make sure that the brake disc fixing screw is tightened, then place a 10mm thick spacer on one of the road wheel bolts, and install and tighten the bolt in the hole opposite the fixing screw (pic. 9.9).
Rotate the brake disc and inspect it for deep scratches and pits. Shallow pits are normal; In case of excessive wear, the disk should be replaced (either put a new one, or machine the old one within acceptable limits).
Using special instruments or feelers, check the runout of the disc; it should not exceed the values \u200b\u200bspecified.
If the disc runout is out of specification, remove the disc as described later in this section and ensure that the contact surfaces between the disc and the hub are absolutely clean.
After removing the disc, check the hub runout. If it exceeds the allowable value, then this is probably due to severe wear of the hub bearings or due to damage (see chapter 10).
Install the disc, check it for runout again. If the hub bearings are in good condition, then the defect is in the disc, which must be replaced.
Removing the front disc
If required, remove the road wheel bolt with the spacer used to check the disc. Remove the brake pads as described earlier. Loosen the two fixing screws and remove the bracket bracket.
Remove the mounting screw and remove the disc from the hub.
Removing the rear disc
If required, remove the road wheel bolt and spacer used to check the disc.
Remove the brake pads as shown below.
Remove brake caliper (see section below), however, do not disconnect the piping. Take the bracket aside and hang it on a wire or rope so that there is no load on the pipeline.
Remove the screw and pull the disc off the hub. If it is tight, apply pressure to the handbrake pads by inserting a screwdriver through the adjuster hole in the disc and turn the adjuster wheel.
Installation
Installation is carried out in the reverse order of removal, however, it is necessary to ensure that the mating surfaces of the disc and hub are absolutely clean. Install the brake pads as indicated in the sections above and below (depending on design).
Visitor comments