
Attention! Work is carried out on a cold engine.
Removing
1. Set the piston of the 1st cylinder to the TDC of the compression stroke.
2. Unscrew the oil filler cap and remove the engine cover by unscrewing the screws or pulling out the pins.
3. Remove the top and bottom belt covers.
4. Hang the engine on the jack by resting the board on the lifting foot of the jack.
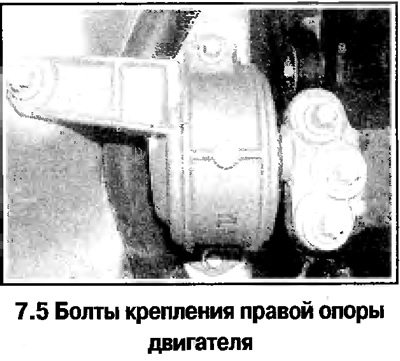
5. Turn away 3 bolts of fastening of an arm of the right support of the engine to the block of cylinders, and 3 bolts of fastening of a support to a mudguard to a body, remove an arm with a support (see photo).
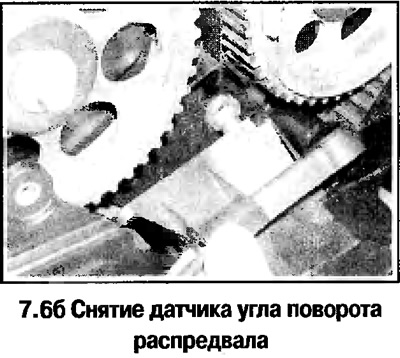
6. On engines of 1.4, 1.6 and 1.8 liters, check the alignment of the alignment marks (see photo). Remove the 2 bolts and remove the camshaft angle sensor (see photo). In the presence of a clamp OPEL KM852, fix the camshaft.
7.6a Installation marks on engines 1.4,1.6 and 1.8 liters
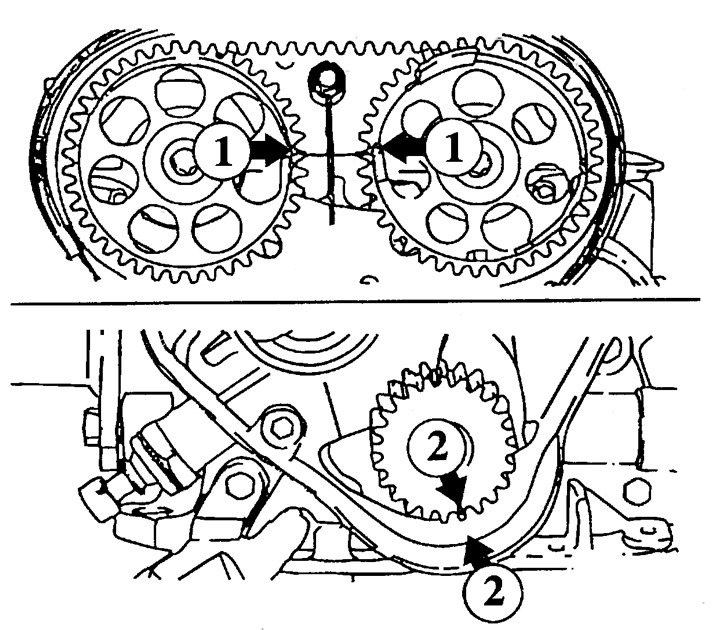
1. The marks on the camshaft sprockets must be strictly at the level of the upper edge of the cylinder head.
2. The mark on the crankshaft sprocket should be opposite the pointer on the oil pump housing.
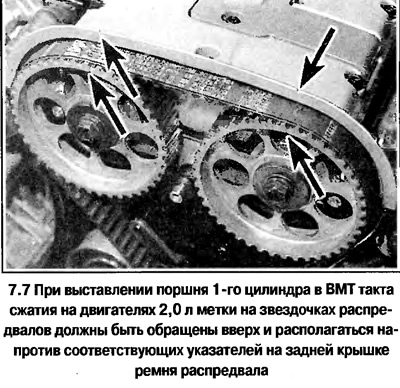
7. On 2.0L engines, make sure that the marks on the camshaft sprockets are facing up and are opposite the corresponding pointers on the rear camshaft belt cover, while the notch on the crown of the crankshaft pulley must be aligned with the pointer at the base of the belt cover (see photo).
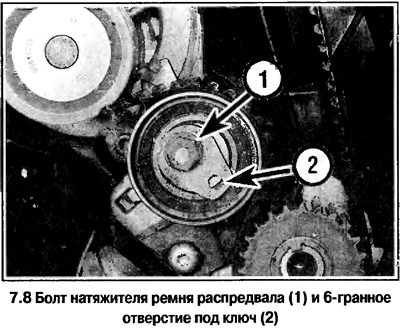
8. On all engines, loosen the tensioner bolt, turn the tensioner arm counterclockwise with a hex wrench, and tighten the bolt (see photo).
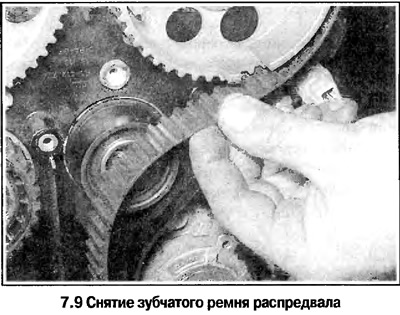
9. Remove the toothed belt (see photo). Mark on the belt the direction of its normal movement.
10. Check the condition of the belt. If the mileage of the belt is about 60,000 km, then it should be replaced. The belt also changes if any, even minor, defects are found (delamination, cracks, tears) or pollution.
Installation
11. Before installing the belt, once again make sure that the alignment marks are aligned (see photo)

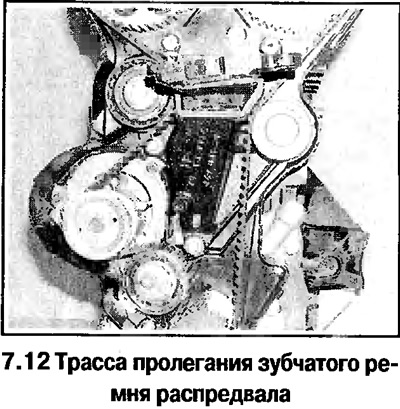
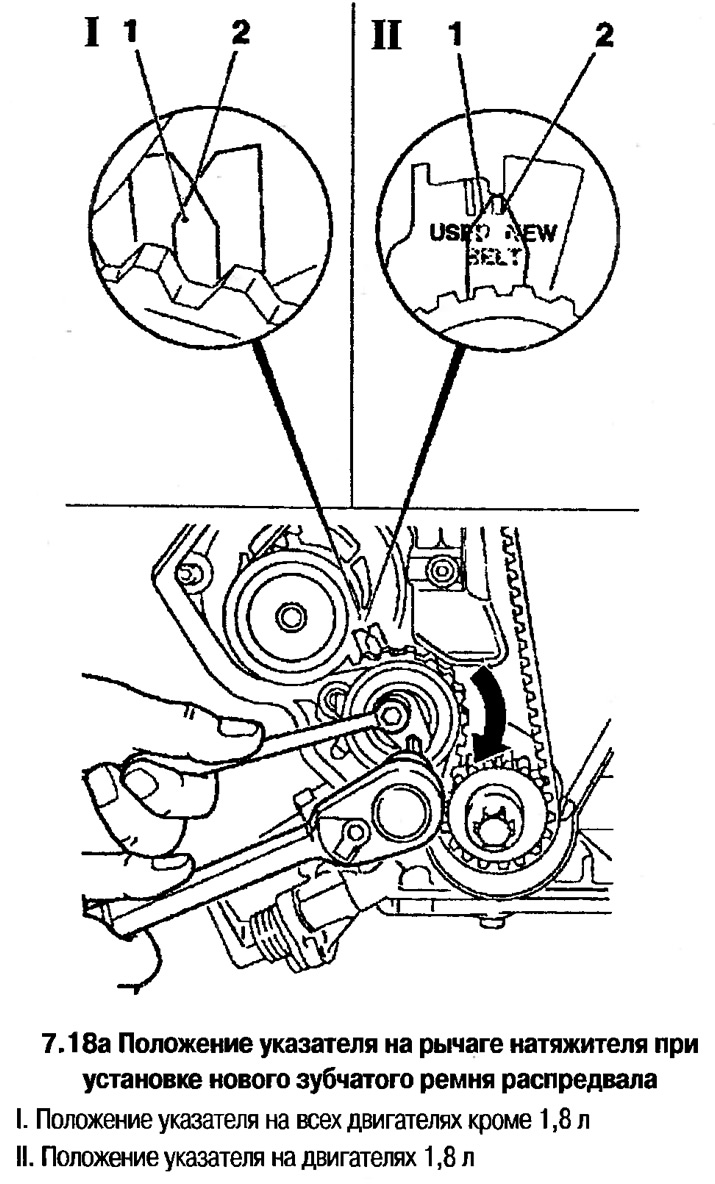
12. Put the belt on the crankshaft and camshaft sprockets, orienting in the direction of the arrow. Tension the belt from the tensioner side. First, put the belt on the crankshaft sprocket, then, slightly tightening it, on the camshaft sprocket. Lastly, the belt is put on tension rollers (see photo).
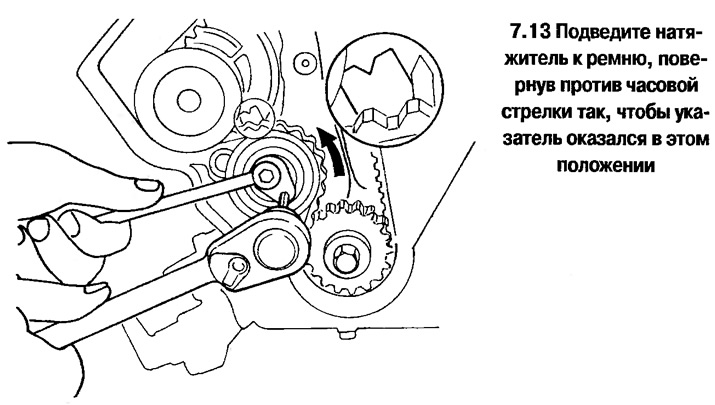
13. Loosen the tensioner bolt and move the tensioner to the belt (tensioner lever should be in the rightmost position), tighten the bolt (see photo).
14. Remove the tool from the tensioner hole. Install the removed engine mount, tighten the mount bolts to the specified torque.
15. Make sure that the alignment marks on the sprockets and are aligned with the marks on the oil pump housing on the rear cover.
16. Turn the crankshaft 2 turns in the direction of normal rotation. Make sure all alignment marks are aligned, then loosen the tensioner bolt.
17. If a new belt is being installed, then set the tensioner lever so that the pointer on it is aligned with the cutout on the rear tensioner plate. While holding the tensioner in this position, tighten the bolt to the specified torque. Turn the crankshaft 2 turns until the alignment marks are aligned. Make sure the pointer on the lever is also aligned with the notch on the plate.
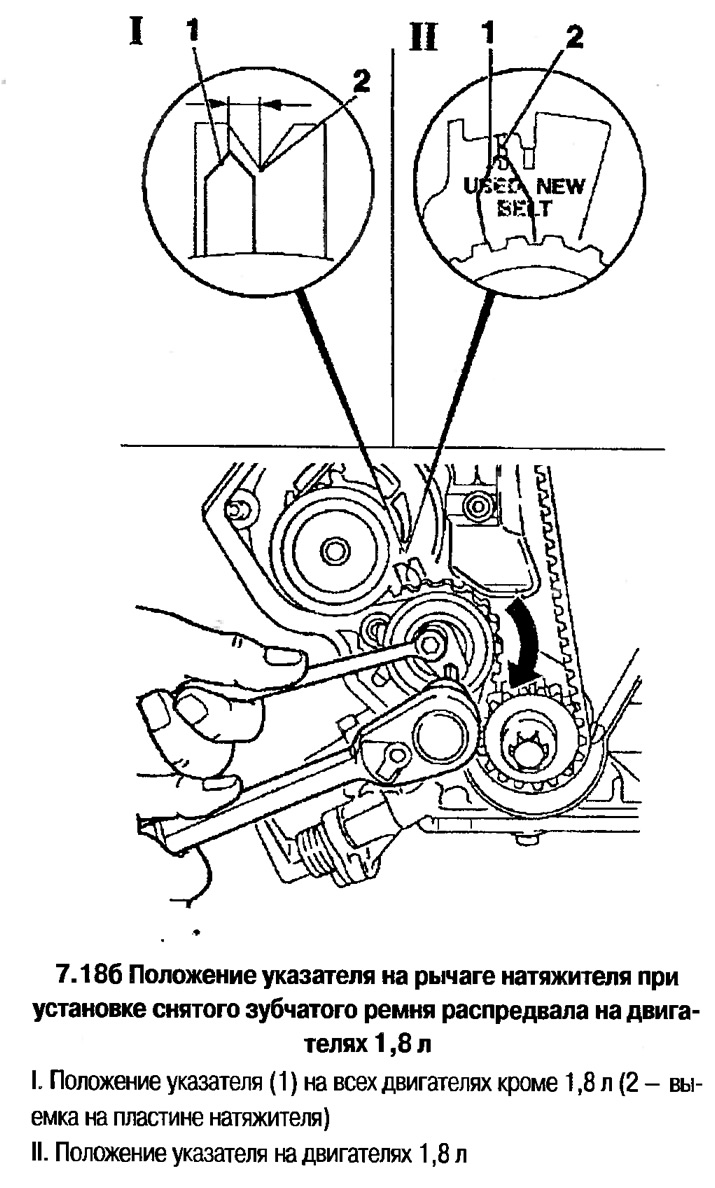
18. If a removed belt is installed, then on all engines except 1.8 liters, adjust the position of the tensioner so that the pointer on the lever is 4 mm to the left of the notch in the tensioner plate. On 1.8 liter engines, and adjust the tensioner so that the pointer on the lever is opposite the USED mark on the tensioner plate (see photo). While holding the tensioner in one of the above positions, tighten the bolt. Turn the crankshaft 2 turns until the alignment marks are aligned. Make sure the pointer on the lever is also aligned with the notch on the plate.
19. If it is not possible to precisely align the lever with the plate, then repeat the tensioning procedure again.
20. Install all removed parts in reverse order.
Visitor comments