
OpelBook.ru
Cars AvtoVAZ Cars Mitsubishi Cars BMW Cars Mercedes Cars Nissan Cars Toyota Cars Chevrolet
English Русский
Български
Беларускі
Український
Српски
Hrvatski
Română
Polski
Slovenský
Magyar
 |  Sitemap  |  Contacts  |    


Main Astra Corsa Insignia Kadett Omega Vectra Zafira Others Articles
Astra F (1991-1998, petrol) Astra G (1998-2004, petrol) Astra G (1998-2004) Astra H (2004-2009) Astra J (2009-2015, petrol)
  • Main
  • Astra
  • Astra G
  • Power unit
  • Twin shaft engines
  • Oil pan — removal and installation

Oil pan — removal and installation (Opel Astra G)

            0

Engines 1.4, 1.6 and 1.8 l


Removal

1. Disconnect the battery from ground.

2. Set the handbrake, lift the front of the car and place it on stands.

3. Drain the oil from the engine.

4. Disconnect the exhaust pipe from the manifold.

5. Disconnect the connector from the oil level sensor in the pan.

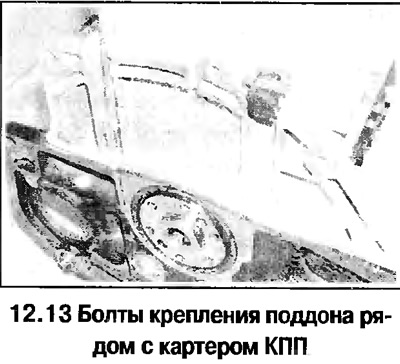
6. Unscrew the bolts securing the oil pan flange to the gearbox housing.

7. Remove the rubber plugs (see photo), covering the pallet mounting bolts (see photo).
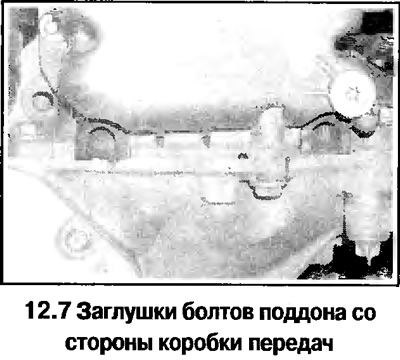
7. Remove the rubber plugs (see photo), covering the pallet mounting bolts (see photo).


8. Gradually and evenly unscrew the bolts and nuts of the oil pan. Open the pan seal with palm strikes, lower the pan and remove it from under the car. Unscrew the bolts and remove the oil receiver with the coarse filter. Wash the filter in solvent. If heavily contaminated with resinous deposits, replace the filter.

Installation

9. Clean the sealing surfaces of the oil pan and cylinder block from any remaining sealing material, then wipe the oil pan and internal surfaces of the engine clean.

10. Install the oil pan with a new gasket and tighten the bolts (see photo).
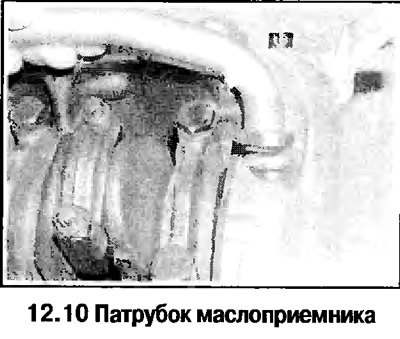
10. Install the oil pan with a new gasket and tighten the bolts (see photo).


11. On 1.4 and 1.6 L engines, apply sealant to the joints with the oil pump housing and the rear main bearing cap (see photo), place a new gasket on the pallet.
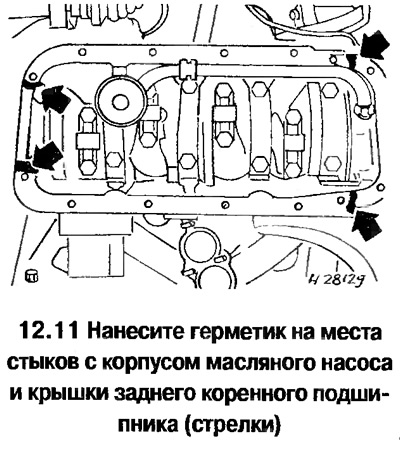


11. On 1.4 and 1.6 L engines, apply sealant to the joints with the oil pump housing and the rear…


12. On 1.8L engines, apply a 2.5mm bead of sealant to the sealing surfaces of the oil pan (buy sealant at OPEL car service). Near the cover of the 5th main bearing, increase the shaft diameter to 3.5 mm (see photo).
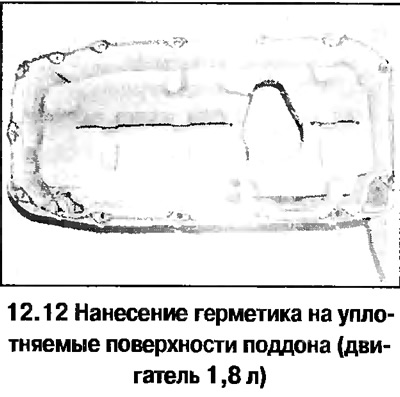
12. On 1.8L engines, apply a 2.5mm bead of sealant to the sealing surfaces of the oil pan (buy…


13. Install the pan, tighten the pan bolts evenly and in a diagonal sequence to the specified torque. Replace the bolt caps (see photo).
13. Install the pan, tighten the pan bolts evenly and in a diagonal sequence to the specified…


14. Install the removed parts.


15. Disconnect the battery from the ground, set the handbrake, lift the front of the car and place it on stands.

16. Drain the oil from the engine.

17. Disconnect the exhaust pipe from the manifold.

18. Disconnect the connector from the oil level sensor in the pan, remove the bracket and push the sensor connector into the pan.

19. Loosen the bolts and remove the lower section of the pan.

Article posted on an online resource [OPELBOOK.ru]

20. Remove the top section of the pan as follows.

A. Remove the oil filter (which you will replace during assembly).

B. On manual transmission models, disconnect the right axle shaft from the differential and remove the axle shaft flange.

B. Loosen the bolts securing the oil pan to the gearbox housing, the bolts securing the oil pump pipe to the main bearing cap frame and to the pump.

G. Loosen the remaining bolts and remove the top section, if necessary, open the seal by hitting it with your palm.

21. Installation is performed in the reverse order. Remove and install the oil level sensor. Replace all gaskets and seals of the disassembled connections. Tighten the lower section bolts in 2 stages (see Technical data).


This article is available at russian, bulgarian, belarusian, ukrainian, serbian, croatian, romanian, polish, slovak, hungarian
Checking the article: Kornev Georgy

Share information:

Previous articles
Opel Astra G: Twin shaft engines
Next articles

Cylinder head — removal and installation
Camshaft and tappets — removal and installation
Camshaft Seal — Replacement
Tensioner and sprockets — removal and installation
Timing Belt for Camshaft Drive — Removal and Installation
Timing Belt Covers — Removal and Installation
Oil level sensor — removal and installation
Oil pump — removal, disassembly and installation
Flywheel/torque converter drive disc — removal and installation
Crankshaft seals — replacement
Balance Mechanism — Removal and Installation (2.0L Engines Only)


Link to this page in different formats

Visitor comments


No comments yet


How much will 14 + 34 =


Astra J (2009-2015, petrol) 
  • General information
  • Vehicle device
  • User manual
  • Faults en route
  • Maintenance
  • Power unit
  • Engine repair
  • Cooling and lubrication system
  • Engine power system
  • Exhaust system
  • Transmission
  • Clutch
  • Car gearbox
  • Drive shafts
  • Chassis
  • Front suspension
  • Rear suspension
  • Steering
  • Brake system
  • Wheels and tires
  • Body
  • Exterior
  • Interior
  • Doors and windows
  • Body Care
  • Heating and air conditioning
  • Security systems
  • Electrical equipment
  • Equipment and devices
  • Lighting and signaling
  • Power devices
  • Electrical circuits
Astra H (2004-2009) 
  • General information
  • Introduction to the guide
  • Troubleshooting
  • User manual
  • Maintenance
  • Power unit
  • Engine repair
  • Cooling and heating
  • Power and exhaust system
  • Ignition system
  • Launch and charge system
  • Transmission
  • Mechanical gearbox
  • Automatic gearbox
  • Drive shafts
  • Chassis
  • Brake system
  • Car suspension
  • Steering
  • Body
  • Interior
  • Exterior
  • Electrical equipment
  • Equipment and devices
  • Electrical circuits
Astra G (1998-2004) 
  • General information
  • Introduction to manual
  • User manual
  • Maintenance
  • Power unit
  • SOHC gasoline engines
  • DOHC gasoline engines
  • Diesel engines 1.7 and 2.0
  • Engine repair
  • Cooling system
  • Supply system
  • Injection system (gasoline)
  • Injection system (diesel)
  • Exhaust system
  • Charge and launch system
  • Ignition system (gasoline)
  • Preheat system (diesel)
  • Transmission
  • Manual gearbox
  • Automatic gearbox
  • Clutch
  • Drive shafts
  • Chassis
  • Brake system
  • Wheel suspension
  • Steering
  • Body
  • Exterior
  • Interior
  • Doors and windows
  • Ventilation and heating
  • Electrical equipment
  • Equipment and devices
  • Electrical circuits
Astra G (1998-2004, petrol) 
  • General information
  • User manual
  • Car care
  • Maintenance
  • Power unit
  • Single shaft engines
  • Twin shaft engines
  • Engine repair
  • Cooling and heating
  • Fuel and exhaust systems
  • Starting and charging system
  • Ignition system
  • Transmission
  • Clutch
  • Mechanical gearbox
  • Automatic gearbox
  • Drive shafts
  • Chassis
  • Brake system
  • Car suspension
  • Steering
  • Body
  • Interior
  • Exterior
  • Electrical equipment
  • Equipment and devices
  • Wiring diagrams Opel Astra
  • Wiring diagrams Opel Zafira
Astra F (1991-1998, petrol) 
  • General information
  • Maintenance
  • Power unit
  • Engine in car
  • Engine removed
  • Cooling system
  • Heating and ventilation
  • Fuel supply (carburetor)
  • Fuel supply (injector)
  • Emission control
  • Ignition system
  • Transmission
  • Clutch
  • Mechanical gearbox
  • Automatic gearbox
  • Drive shafts
  • Chassis
  • Brake system
  • Car suspension
  • Steering
  • Body
  • Exterior
  • Interior
  • Electrical equipment
  • Equipment and devices
  • Electrical circuits
OpelBook.ru © 2017–2026 · Mobile version · · Sitemap: EN BG BY UA RS HR RO PL SK HU · Feedback · Site search
Astra F, petrol · Astra G, petrol · Astra G · Astra H · Astra J, petrol · Corsa B · Corsa C, petrol · Corsa C · Insignia A · Kadett D · Kadett E · Omega A · Omega B · Omega B2 · Vectra A, petrol · Vectra A · Vectra B, petrol · Vectra B · Vectra C · Zafira A, petrol · Frontera A, petrol · Frontera B · Ascona C · Vivaro A ·
We want your visit to be comfortable 🤝! We use cookies 🍪 to make that happen.