
Removing
1. The mechanism consists of 2 balance shafts driven by a crankshaft (see photo).
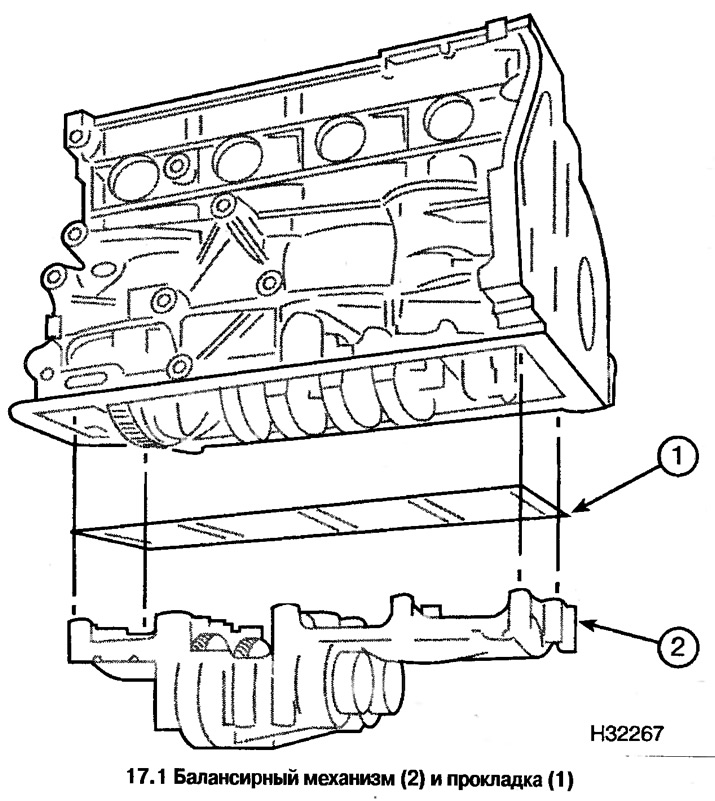
2. Remove both sections of the pallet, turn away bolts and remove the balancing mechanism and lining.
Installation
3. If during disassembly the crankshaft, main bearing caps or balancing mechanism were changed, then the clearance in the gear engagement of the mechanism should be checked and adjusted if necessary. If the replacement of these parts was not carried out, then the removed gasket of the balancing mechanism should be installed.
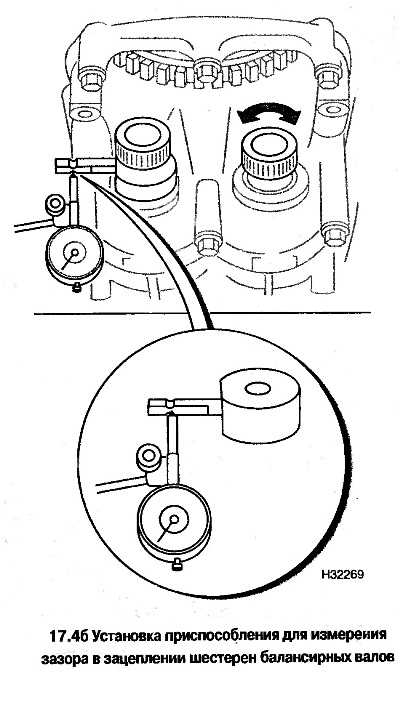
4. The clearance is checked with the OPEL KM949 fixture as follows.
- A. Set the piston of the 1st cylinder to the TDC of the compression stroke.
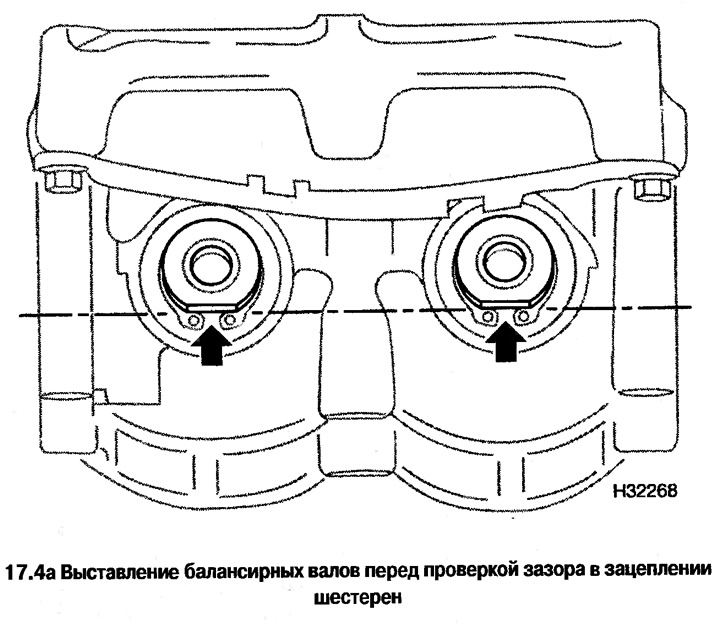
- b. Align both balance shafts so that the flats are at the bottom in line when viewed from the right side of the engine (see photo).
- V. Install the gasket and tighten the mechanism mounting bolts.
- d. Install the long knurled bolt of the OPEL KM949 tool into the balancer shaft on the intake valve side, set the lever to 9 o'clock, and tighten the bolt by hand.
- e. Thread the short knurled bolt into the other shaft and tighten by hand.
- e. Install dial gauge (see photo), select the free play of the gear by turning the bolt screwed into the shaft from the side of the exhaust valves and set the indicator to zero. Turn this bolt in the opposite direction and determine the indicator reading.
- and. Rotate the crankshaft until the lever is at 6 o'clock, loosen the bolt and set the lever again at 9 o'clock. Repeat the clearance measurements at this position of the shafts.
- h. Repeat the same measurements, turning the crankshaft further 90° (clearance must be measured at 4 positions of the balance shafts).
5. If the gap differs from the norm, then adjust it by selecting the thickness of the balancing mechanism gasket. The gasket has thickness markings. A change in the gasket number by 1 corresponds to a change in the clearance in the gear meshing by 0.02 mm. For example, if the measured gap is 0.08 mm and the gasket is marked "70", then when installing the gasket with the marking "67" the gap will decrease by 0.06 mm. Install the correct gasket and check the clearance.
6. In the absence of this, the gap should be checked at a car service.
Visitor comments