
Note: When installing, use a new toothed drive belt.
Removing
1. Remove the toothed drive belt and corresponding camshaft sprockets as described in Chapter 4.
2. If the exhaust camshaft must be removed, unscrew the two mounting bolts and remove the distributor from the end of the cylinder head, guided by Section 5, if it is needed.
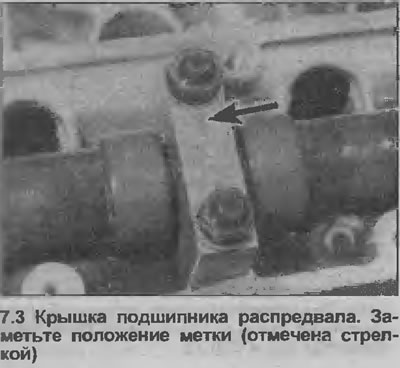
3. Check that there are marks on the camshaft bearing caps, if not, make your own marks on the caps and the top side of the cylinder head using a central punch. Before removing, note the orientation of the bearing caps, as they must be installed exactly in the same position that they occupied before removal (see illustration).
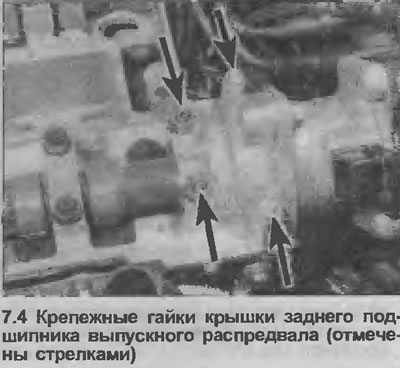
4. Loosen the nuts of the respective camshaft bearing caps one half turn, then further loosen all nuts another half turn, and so on (this is necessary to slowly reduce the tension of the valve springs). Note that the exhaust camshaft rear bearing cap, which also supports the distributor, is secured with four nuts (see illustration).
5. Remove the nuts and caps, then carefully lift the camshaft off the cylinder head.
6. Repeat procedure with remaining camshaft if required.
Inspection
7. Removing the camshaft (or camshafts), inspect the running surfaces of the bearings in the cylinder head and covers for signs of wear or pitting. If these damages are found, the cylinder head and all covers must be replaced as a complete set, since there is no way to regrind, and the covers cannot be replaced separately.
8. The camshaft should not have any marks or scratches on the necks or the surface of the contour of the cam, if such damage is found, replace the camshaft.
9. It is recommended to always replace the front oil seal after removing the camshaft.
Installation
10. Copiously coat the contact surfaces of the valve lifters and camshafts with molybdenum paste.
11. Cover the mating surfaces of the front and rear covers with sealant, install the covers in place, as noted before removal.
12. Gradually, half a turn, tighten the nuts of the camshaft bearing caps with a tightening torque regulated specifications. Note that when installing the exhaust camshaft, tighten the two smaller rear bearing cap mounting nuts first, then the main cap nuts. Note also that the two smaller nuts are tightened with less torque than the main nuts.
13. Rotate the camshaft until the camshaft sprocket orientation is in the up position, then lubricate the sealing lips of the front camshaft oil seal. Install the oil seal using a pipe or socket with a diameter slightly smaller than the camshaft sprocket bolt washer. Screw the bolt and washer into the end of the camshaft to press the oil seal into place.
14. Repeat the procedure with the remaining camshaft.
15. Install the distributor as described in Section 5. Install a new toothed drive belt and camshaft sprockets, then adjust the tension of the drive belt as described in Chapter 4 or 5.
Visitor comments