


Contents: Disassembly ⬇ Assembly ⬇
Disassembly
1. After removing the cylinder head as described in Chapter 8, clean its outer surface from dirt.
2. Remove the thermostat housing and thermostat as described in Section 3, remove the manifolds as described in Sections 4B and 4C.
3. Remove the spark plugs (if you haven't already done so, remove the distributor as described in Section 5.
4. Remove the camshafts as described in Chapter 7.
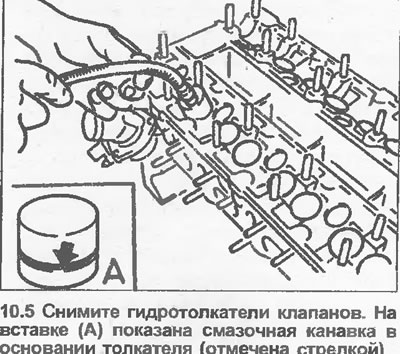
5. Remove the hydraulic valve lifters using a rubber suction cup - do not turn the cylinder head upside down. Always store the lifters in an upright position (the oil groove in the base (see illustration), soak them in the order they were removed in a container of clean engine oil until they are installed.
6. To remove the valve components, proceed as described in Section 2A, Chapter 22, points 3-7 inclusive.
7. The cylinder head and valves can be checked for signs of wear and damage as described in Section 2A, Chapter 23.
Assembly
8. After cleaning all parts, install the valve components as described in Section 2A, Chapter 22, items 10-19 inclusive.
9. Install the hydraulic valve lifters into the cylinder head in their original positions. Generously lubricate the lifters, mounting holes with oil, and if new lifters are installed, first dip each of them in a container with clean engine oil and squeeze them by hand several times. This is done to fill the lifters with oil.
10. Install the camshafts as described in Chapter 7.
[Material copied from the portal: www.opelbook.ru]
11. Install spark plugs if required, install distributor as described in Section 5.
12. Where applicable, install manifolds and/or thermostat and casing,
13. Install the cylinder head as described in Chapter 8 and Chapter 9.
Visitor comments