


Contents: Removal ⬇ Installation ⬇
Removal
1. Disconnect the negative cable from the battery.
2. Disconnect the electrical wiring from the air mass meter. Remove the O-ring.
3. Loosen the clamp screw securing the main air duct to the right end of the air mass meter.
4. Using a socket wrench, remove the four bolts securing the air block to the throttle body. Lift the block off the throttle body, disconnect the hose from the base of the air block, then remove the air mass meter/air block assembly.
5. Disconnect the wiring from the throttle position sensor.
6. Pull the cable off the throttle lever. Then remove the sealing ring from the bracket on the intake manifold, move the throttle cable to the side.
7. Disconnect the two breather hoses at the rear of the camshaft cover. Disconnect the larger hose from the throttle body, remove the hose.
8. Place a cloth under one of the fuel supply hose connections on the fuel line.
9. Slowly loosen the fuel supply hose coupling to gradually release the pressure in the fuel supply pipe, then disconnect the hose from the fuel line. Plug the end of the hose to prevent dirt from entering and causing further fuel leakage.
10. Repeat steps 9 and 10 with the remaining coupling connecting the fuel supply hose to the fuel line.
11. Disconnect the vacuum line from the top of the fuel pressure regulator.
12. Disconnect the wiring harness cover from the fuel injectors and move it to the side; be careful not to deform the wiring harness. Pull the wiring harness cover, squeeze the wiring connector fastening clips to release the cover from the injectors.
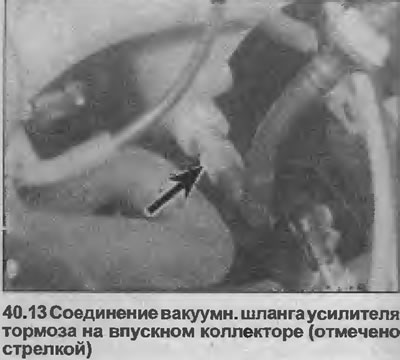
13. Loosen the nut and disconnect the brake booster vacuum hose on the left side of the intake manifold (see illustration).
14. Unscrew the fastening nut, remove the fuel supply hose bracket from the left side of the throttle body.
(Original posted on the website www.OPELBOOK.ru)
15. Loosen the mounting nuts and disconnect the ground cables from the mounting stand at both ends of the fuel line.
16. Loosen the mounting bolt and remove the wiring/hose holder from the left end of the intake manifold.
17. Remove the idle speed control valve as described in Chapter 22.
18. Unscrew or remove the upper nut and bolt securing the generator.
19. Make a final check to ensure all relevant hoses, pipes and wires are disconnected.
20. Unscrew the fastening nuts, remove the manifold from the cylinder head. Remove the gasket.
21. It is possible that when unscrewing the fastening nuts from the cylinder head, the struts may unscrew. In this case, the struts must be screwed back into the head.
22. If required, auxiliary components can be removed from the manifold, following the relevant Chapters of Sections 4A or 4B.
Installation
23. Installation is carried out in reverse order.
Visitor comments