
OpelBook.ru
Cars AvtoVAZ Cars Mitsubishi Cars BMW Cars Mercedes Cars Nissan Cars Toyota Cars Chevrolet
English Русский
Български
Беларускі
Український
Српски
Hrvatski
Română
Polski
Slovenský
Magyar
 |  Sitemap  |  Contacts  |    


Main Astra Corsa Insignia Kadett Omega Vectra Zafira Others Articles
Frontera A (1991-1998, petrol) Frontera B (1998-2004) Ascona C (1981-1988) Vivaro A (2001-2014)
  • Main
  • Opel
  • Frontera B
  • Transmission
  • Manual gearbox MUA5C
  • Shift forks and rods

Shift forks and rods (Opel Frontera B)

            0

Contents: Removal ⬇ Examination ⬇ Installation ⬇
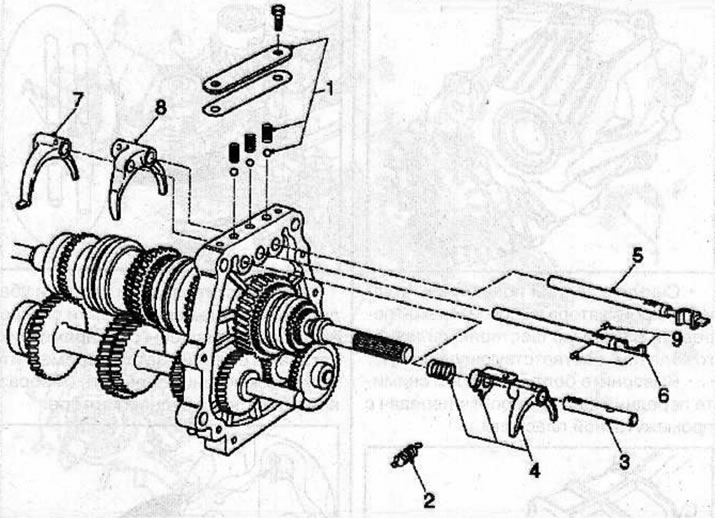
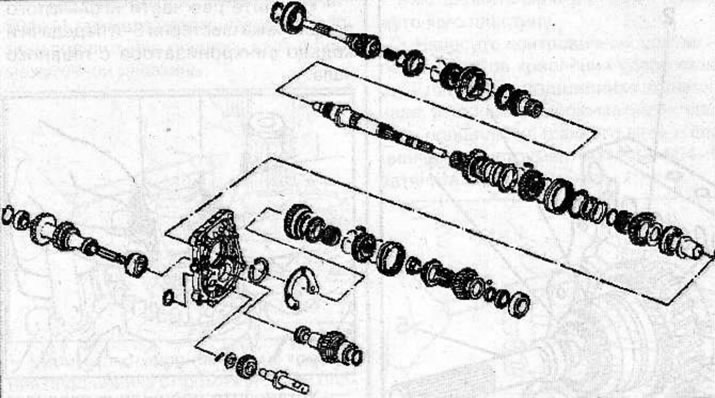
Shift Forks and Rods: 1 - retainer plate, springs and balls; 2 - retaining spring; 3 - 5th…

Shift Forks and Rods: 1 - retainer plate, springs and balls; 2 - retaining spring; 3 - 5th gear/reverse gear shift fork rod; 4 - 5th gear/reverse gear shift fork and spring; 5 - 1st/2nd gear shift fork rod; 6 - 3rd/4th gear shift fork rod; 7 - 3rd/4th gear shift fork; 8 - 1st/2nd gear shift fork; 9 - locking pin


Removal


Remove the gearbox housing from the intermediate plate (see the relevant chapter).

Remove 2 bolts and remove the retainer plate, gasket, and three springs from the intermediate plate.

Use a magnetic tool to remove the 3 balls from the slots in the spacer plate.
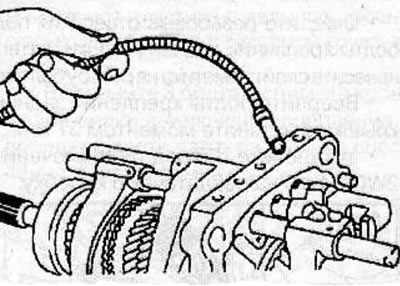
Use a magnetic tool to remove the 3 balls from the slots in the spacer plate.


Remove the retaining spring from the 5th/Reverse shift fork.


Using a cylindrical punch, knock out the 3 cylindrical pins that secure the gear shift forks to the rods.
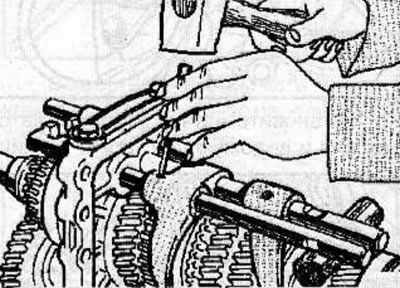
Using a cylindrical punch, knock out the 3 cylindrical pins that secure the gear shift forks to the…


Warning: To prevent damage to the piston rods, place wooden blocks between the piston rod and the gears.


Remove the 5th/reverse gear shift fork rod, the holding spring fork, the springs, the 1st/2nd gear shift fork rod, the 3rd/4th gear shift fork rod, and the 1st/2nd gear shift fork in sequence.

Be careful to preserve the locking pins located in the intermediate plate between the shift rods.

Examination


Check all removed parts for wear and damage.

Before installation, lubricate all parts with transmission oil.

Use a micrometer to measure the thickness of the shift fork tabs.
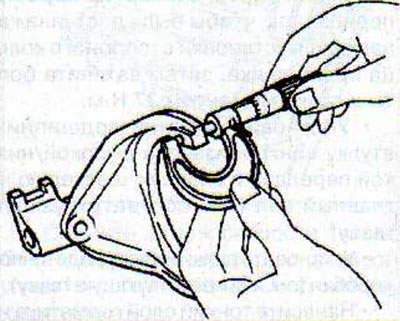
Use a micrometer to measure the thickness of the shift fork tabs.


Thickness of paws:
  • 1st/2nd gear shift fork: 9.00-9.85 mm
  • 3rd/4th gear shift fork: 9.00-9.80 mm
  • 5th gear/reverse gear shift fork: 9.00-9.80 mm

If the thickness of the shift fork tabs is below the specified limit, replace the shift fork.


In a free state, use a caliper to measure the length of the gearshift rod retainer springs.
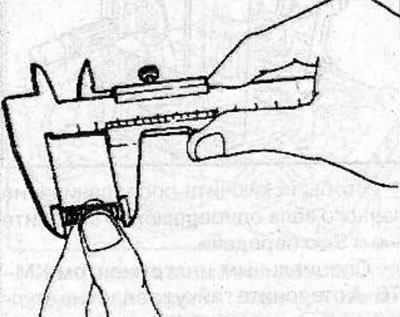
In a free state, use a caliper to measure the length of the gearshift rod retainer springs.


Length of springs in free state of gear shift rod retainers: 26.20-26.80 mm

Measure the force required to compress the spring to a length of 20 mm.
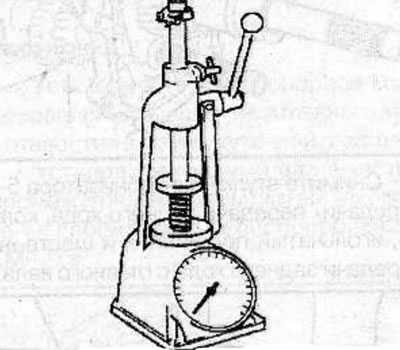
Measure the force required to compress the spring to a length of 20 mm.


The force that must be applied to compress the spring to a length of 20 mm: 8.9-9.0 kg

Installation


Installation


Install the 1st/2nd gear and 3rd/4th gear shift forks onto the synchronizer bushings.
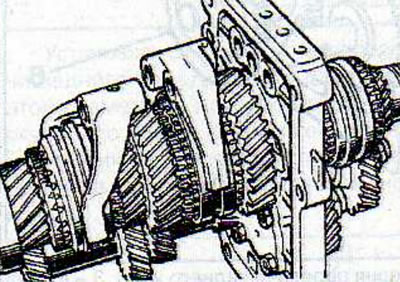


Install the 1st/2nd gear and 3rd/4th gear shift forks onto the synchronizer bushings.


Insert the 3rd/4th gear shift fork rod through the middle hole in the intermediate plate, then pass it through the 2 shift forks.
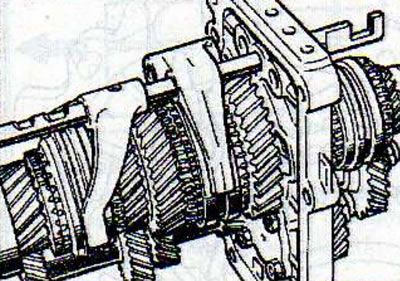
Insert the 3rd/4th gear shift fork rod through the middle hole in the intermediate plate, then pass…


Insert the locking pins into the intermediate plate on both sides of the shift fork shaft.

Install the 1st/2nd shift fork rod into the intermediate plate, then pass it through the hole in the fork.
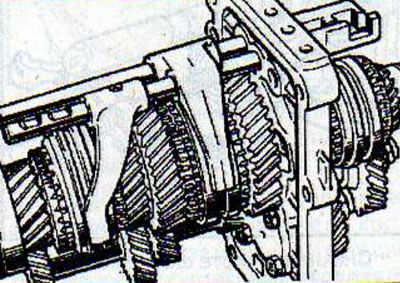
Install the 1st/2nd shift fork rod into the intermediate plate, then pass it through the hole in…


Install the 5th/Reverse shift fork and retaining spring, then insert the shift rod.
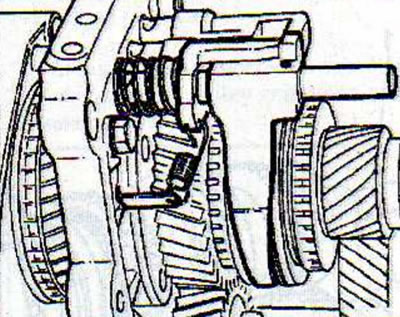


Install the 5th/Reverse shift fork and retaining spring, then insert the shift rod.


Use new pins to secure the forks to the shift rods.

Original article on the web portal: www.OPELBOOK.ru
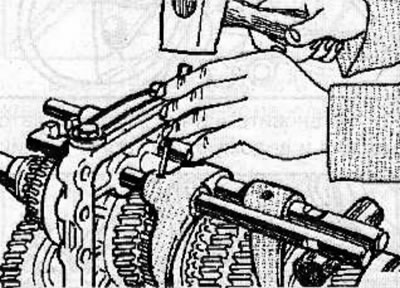
Use new pins to secure the forks to the shift rods.


Warning: To prevent damage to the piston rods, place wooden blocks between the piston rod and the gears.


Secure the 5th/Reverse shift fork retaining spring.

Install the balls and springs into the intermediate plate.

Install the retainer plate with a new gasket and secure with bolts, tightening them to a torque of 20 Nm.
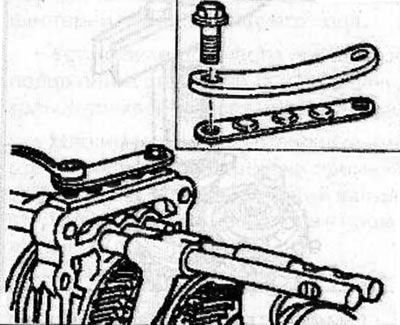
Install the retainer plate with a new gasket and secure with bolts, tightening them to a torque of…


Install the gearbox housing onto the intermediate plate (see the relevant chapter).


This article is available at russian, bulgarian, belarusian, ukrainian, serbian, croatian, romanian, polish, slovak, hungarian
Checking the article: Chernov Alexander

Share information:

Previous articles
Opel Frontera B: Manual gearbox MUA5C
Next articles

Disassembly and assembly of the gearbox
Replacing the front input shaft seal
Reverse light switch
Transmission support
Removal and installation the gearbox
Checking the level and replacing the transmission oil
Shafts and gears
Removal and installation the transfer case
Transfer case rear housing
Transfer case rods and forks
Transfer case mode switching drive
Four-wheel drive control unit


See similar ones from other Opel car manuals:
▶ Gear shift mechanism — adjustment Opel Astra F (1991-1998, petrol)
▶ Adjusting the gear shift drive Opel Corsa B (1993-2000)
▶ Replacing pistons with connecting rods Opel Insignia A (2008-2017)
▶ Installing pistons with connecting rods into cylinders Opel Kadett E (1984-1995)
▶ Manual transmission shift lever — removal, overhaul and… Opel Omega A (1986-1993)
Link to this page in different formats

Visitor comments


No comments yet


How much will 24 + 31 =


Vivaro A (2001-2014) 
  • General information
  • User manual
  • Power unit
  • Petrol engine F4R
  • Diesel engine F9Q
  • Diesel engine G9U
  • Transmission
  • Clutch and drive shafts
  • Manual gearbox
  • Chassis
  • Front suspension
  • Rear suspension
  • Brake system
  • Body
  • Exterior
  • Interior
  • Electrical equipment
  • Heating and ventilation
  • Air conditioner
  • Equipment and devices
  • Electrical diagrams
Ascona C (1981-1988) 
  • General information
  • Maintenance
  • Power unit
  • Gasoline engines
  • Diesel engines
  • Cooling system
  • Fuel and exhaust system
  • Contact ignition system
  • Contactless ignition system
  • Transmission
  • Clutch
  • Mechanical gearbox
  • Automatic gearbox
  • Drive shafts
  • Chassis
  • Steering
  • Brake system
  • Car suspension
  • Body
  • Exterior
  • Interior
  • Doors and windows
  • Electrical equipment
  • Equipment and devices
  • Power devices
  • Electrical circuits
Frontera B (1998-2004) 
  • General information
  • User manual
  • Maintenance
  • Power unit
  • Petrol engines 2.2 l
  • Petrol engines 3.2 l
  • Diesel engines 2.2 l
  • Cooling system
  • Fuel system (petrol)
  • Fuel system (diesel)
  • Ignition system
  • Transmission
  • Clutch
  • Manual gearbox MUA5C
  • Automatic gearbox 4L30E
  • Chassis
  • Suspension and axles
  • Steering
  • Brake system
  • Body
  • Exterior
  • Interior
  • Doors, locks and windows
  • Heating and air conditioning
  • Electrical equipment
  • Power devices
  • Equipment and devices
  • Lighting and signaling
  • Electrical diagrams
Frontera A (1991-1998, petrol) 
  • General information
  • Introduction to guide
  • User manual
  • Maintenance
  • Power unit
  • Engine repair
  • Lubrication system
  • Cooling system
  • Power and exhaust system
  • Engine electrics
  • Transmission
  • Clutch
  • Mechanical gearbox
  • Cardan shafts
  • Chassis
  • Brake system
  • Front suspension
  • Rear suspension
  • Steering
  • Body
  • Repair and care
  • Electrical equipment
  • Equipment and devices
  • Electrical circuits
OpelBook.ru © 2017–2026 · Mobile version · · Sitemap: EN BG BY UA RS HR RO PL SK HU · Feedback · Site search
Astra F, petrol · Astra G, petrol · Astra G · Astra H · Astra J, petrol · Corsa B · Corsa C, petrol · Corsa C · Insignia A · Kadett D · Kadett E · Omega A · Omega B · Omega B2 · Vectra A, petrol · Vectra A · Vectra B, petrol · Vectra B · Vectra C · Zafira A, petrol · Frontera A, petrol · Frontera B · Ascona C · Vivaro A ·
We want your visit to be comfortable 🤝! We use cookies 🍪 to make that happen.