OpelBook.ru
Cars AvtoVAZ Cars Mitsubishi Cars BMW Cars Mercedes Cars Nissan Cars Toyota Cars Chevrolet
English Русский
Български
Беларускі
Український
Српски
Hrvatski
Română
Polski
Slovenský
Magyar
 |  Sitemap  |  Contacts  |    


Main Astra Corsa Insignia Kadett Omega Vectra Zafira Others Articles
Omega A (1986-1993) Omega B (1993-1999) Omega B2 (1999-2003)
  • Main
  • Omega
  • Omega A
  • Transmission
  • Mechanical gearbox
  • Manual transmission shift lever — removal, overhaul and installation

Manual transmission shift lever — removal, overhaul and installation (Opel Omega A)

            0

1. Apply the handbrake. Jack up the front of the car and secure it on axle stands.

2. Above the propeller shaft, disconnect the shift rod from the base of the shift lever. To do this, remove the spring clip from one end of the pivot pin and remove the pin.

3. Remove the four bolts securing the gear shift lever to the suspension (photo).
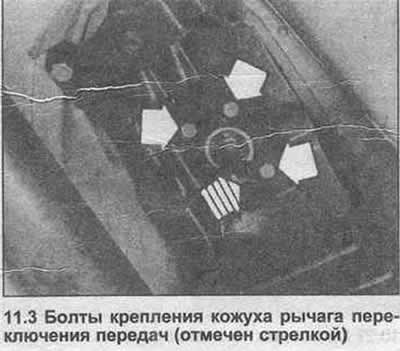
3. Remove the four bolts securing the gear shift lever to the suspension (photo).


4. Inside the car, remove the protective cover from the central console (photo). Turn it inside out, untie the rope and remove the protective cover.
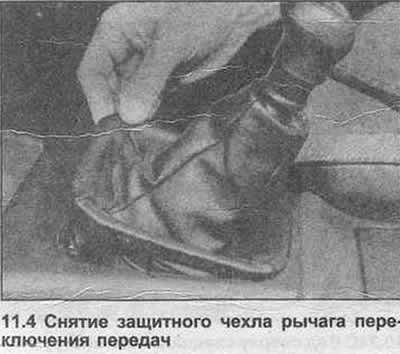
4. Inside the car, remove the protective cover from the central console (photo). Turn it inside…


5. Unscrew the two screws and remove the central control frame (photo).
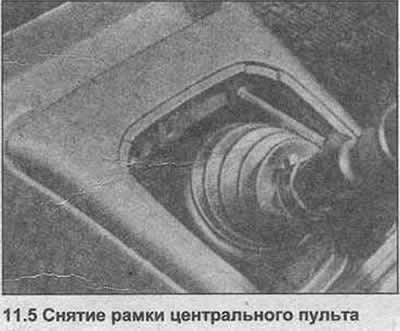
5. Unscrew the two screws and remove the central control frame (photo).


6. Cut the belt securing the rubber membranes to the gearshift lever. Release the bellows from the bottom plate and gearshift lever (photo).
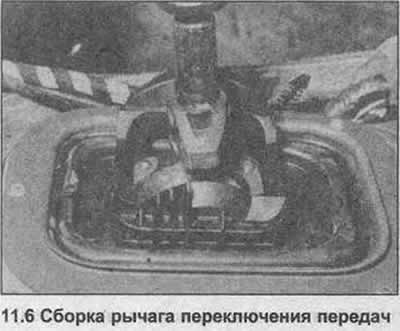


6. Cut the belt securing the rubber membranes to the gearshift lever. Release the bellows from the…


7. Lift the gear shift lever assembly and clamp it in a vice.

8. Remove the two half bushings from the base of the gear shift lever.

9. Remove the ring and knock out the gear shift lever with a mallet.

10. Remove the retaining ring from the casing.

11. Using a fine-tipped punch, remove the cylindrical pin from the offset finger tube, then lower the offset finger. Also remove the upper cylindrical pin and the limiter bushing.

[Original source is on the website: opelbook.ru]

12. If necessary, remove the gear shift lever button.

13. Remove the reverse gear unit by removing the retainer with the lever.

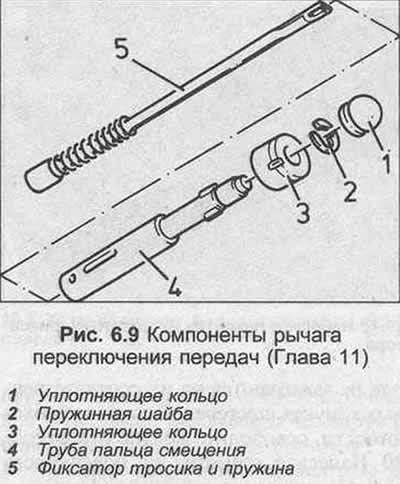
14. Use pliers to remove the spring clip, then remove the tube, seal ring, lock washer, lower seal ring and offset pin tube.

15. Remove the cable retainer and spring.

16. Clean all components, check their condition. Replace them as necessary.

17. Begin assembly by installing the spring to the retainer.

18. Insert the retainer into the offset finger tube.

19. Insert the sealing ring with the open groove facing up, then install the spring clip and the upper sealing ring.

20. Assemble the offset pin tube onto the gearshift lever tube with the groove facing the protrusion. Install the retainer.


21. Where used, place the O-ring on the gear shift lever pipe, then insert the reverse unit.

22. Lift the cable retainer and attach it to the protrusion.

23. Install the limiter bushing, drive in the cylindrical pin. The upper, long pin should point to the right.

24. Install the offset pin, drive in the cylindrical pin. Make sure that the limiter moves freely.

25. Place the snap ring on the shift lever ball, then place the assembly into the housing.

26. Press the two half bushings into the base of the gear shift lever.

27. Heat the new gear shift knob to approximately 70°C, then place it on the gear shift lever.

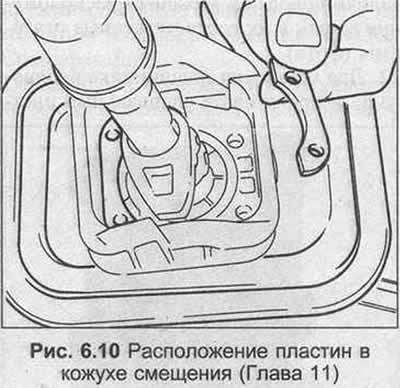
28. Lubricate the plates and place them in the offset housing.

29. Lubricate the foam gasket under the casing.

30. Place the gear shift assembly in the vehicle, aligning the bolt holes.

31. Insert and tighten four bolts under the vehicle.

32. Install the gear shift rod pivot pin and secure it with the spring clip.

33. Install the gear shift lever rubber membranes using a new belt.

34. Install the central console, frame and protective cover.

35. Lower the car to the ground.
35. Lower the car to the ground.


35. Lower the car to the ground.


This article is available at russian, bulgarian, belarusian, ukrainian, serbian, croatian, romanian, polish, slovak, hungarian
Checking the article: Zinoviev Kirill

Share information:

Previous articles
Opel Omega A: Mechanical gearbox
Next articles

Manual gearbox — assembly
Main casing of manual transmission — disassembly and assembly
Rear housing of a manual transmission — disassembly and assembly
Input shaft of a manual transmission — disassembly and assembly
Secondary shaft of a manual gearbox — disassembly and assembly
Manual transmission — inspection
Gear Shift Lever Mounting Hanger — Removal and Installation
Gear shift rod for manual transmission — adjustment


See similar ones from other Opel car manuals:
▶ Manual transmission shift lever Opel Zafira A (1999-2005, petrol)
▶ Removal and installation the gearshift lever boot (models… Opel Corsa C (2000-2006)
▶ Removal and installation of gear shift drive components… Opel Vectra C (2002-2008)
▶ Engine — removal and installation (manual transmission… Opel Astra F (1991-1998, petrol)
▶ Replacing the gear shift lever Opel Insignia A (2008-2017)
Link to this page in different formats

Visitor comments


No comments yet


How much will 42 + 34 =


Omega B2 (1999-2003) 
  • General information
  • User manual
  • Maintenance
  • Troubleshooting
  • Power unit
  • Petrol 4-cylinder
  • Petrol 6-cylinder
  • Engine overhaul
  • Diesel engines 2.0 l
  • Diesel engines 2.5 l
  • Cooling and heating
  • Injection system (gasoline)
  • Fuel system (diesel)
  • Fuel system
  • Exhaust system
  • Ignition system
  • Transmission
  • Clutch
  • Mechanical gearbox
  • Automatic gearbox
  • Main gear and shafts
  • Chassis
  • Brake system
  • Car suspension
  • Steering
  • Body
  • Body elements
  • Electrical equipment
  • Equipment and devices
  • Electrical circuits
Omega B (1993-1999) 
  • General information
  • User manual
  • Tips for the car owner
  • Maintenance (gasoline)
  • Maintenance (diesel)
  • Power unit
  • Petrol engine SOHC 2.0 l
  • Petrol engine DOHC 2.0 l
  • Petrol engines 2.5 and 3.0 l
  • Repair of gasoline engines
  • Diesel engine 2.0 l
  • Diesel engine repair 2.0 l
  • Diesel engine 2.5 l
  • Cooling and heating
  • Power system (petrol)
  • Emission reduction
  • Fuel system (diesel 2.0 l)
  • Fuel system (diesel 2.5 l)
  • Launch system
  • Ignition system
  • Transmission
  • Clutch
  • Mechanical gearbox
  • Automatic gearbox
  • Drive shafts
  • Chassis
  • Brake system
  • Wheel suspension
  • Steering
  • Body
  • Exterior
  • Interior
  • Doors and windows
  • Electrical equipment
  • Equipment and devices
  • Wiring diagrams (early)
  • Wiring diagrams (late)
Omega A (1986-1993) 
  • General information
  • User manual
  • Maintenance
  • Changes and additions
  • Troubleshooting
  • Power unit
  • Gasoline engines
  • Diesel engines
  • Cooling system
  • Fuel system (gasoline)
  • Fuel system (diesel)
  • Ignition system
  • Transmission
  • Clutch
  • Mechanical gearbox
  • Automatic gearbox
  • Cardan shaft
  • Drive shafts
  • Chassis
  • Brake system
  • Car suspension
  • Steering
  • Body
  • Exterior
  • Interior
  • Electrical equipment
  • Power devices
  • Lighting and appliances
  • Electrical circuits
OpelBook.ru © 2017–2026 · Mobile version · · Sitemap: EN BG BY UA RS HR RO PL SK HU · Feedback · Site search
Astra F, petrol · Astra G, petrol · Astra G · Astra H · Astra J, petrol · Corsa B · Corsa C, petrol · Corsa C · Insignia A · Kadett D · Kadett E · Omega A · Omega B · Omega B2 · Vectra A, petrol · Vectra A · Vectra B, petrol · Vectra B · Vectra C · Zafira A, petrol · Frontera A, petrol · Frontera B · Ascona C · Vivaro A ·
We want your visit to be comfortable 🤝! We use cookies 🍪 to make that happen.