


Contents: Removal ⬇ Installation ⬇
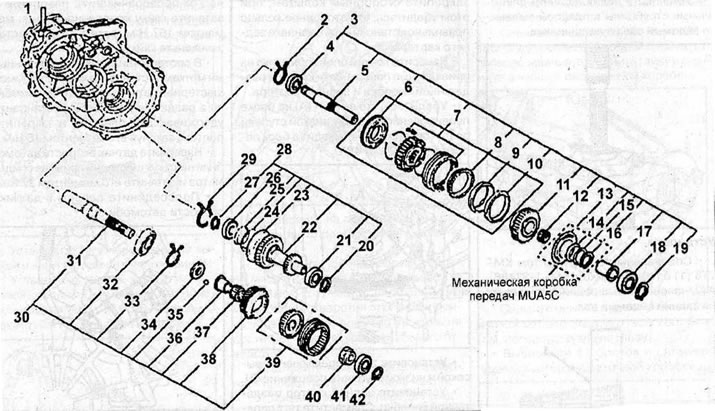
Transfer case: 1 - transfer case housing; 2 - retaining ring; 3 - front output shaft assembly with gears; 4 - bearing; 5 - front output shaft; 6 - locking plate; 7 - 2WD-4WD shift clutch; 8 - ring; 9 - ring; 10 - ring; 11 - front output shaft gear; 12 - needle bearing; 13 - axial clearance adjustment plate; 14 - disc spring; 15 - spacer sleeve; 16 - retaining ring; 17 - bearing sleeve; 18 - bearing; 19 - retaining ring; 20 - retaining ring; 21 - bearing; 22 - intermediate gear; 23 - Axial clearance adjustment plate; 24 - disc spring; 25 - spacer sleeve; 26 - bearing; 27 - retaining ring; 28 - intermediate shaft assembly; 29 - retaining ring; 30 - input shaft assembly; 31 - input shaft; 32 - bearing; 33 - retaining ring; 34 - ball; 35 - bearing; 36 - bearing sleeve; 37 - needle bearing; 38 - transfer case input gear; 39 - Transfer case high/low gear shift clutch; 40 - nut; 41 - bearing; 42 - retaining ring
Removal
Release the clamp and disconnect the vacuum hose from the transfer case shift actuator.
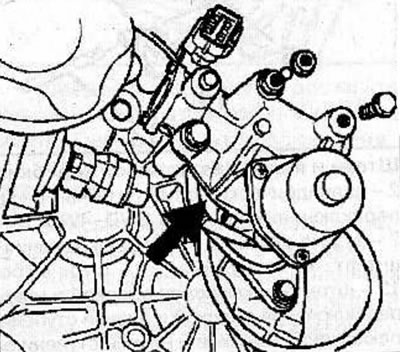
Disconnect the wiring harness from the transfer case shift actuator.
On a vehicle with a 6VD1-W engine, unscrew the bolt and nut and remove the heat-protective cover of the transfer case mode switching drive.
Remove 3 bolts and remove the mode switching drive from the transfer case.
Installation
Install the mode shift drive onto the transfer case and secure with 3 bolts, tightening them to a torque of 19 Nm.
On a vehicle with a 6VD1-W engine, install the heat shield for the transfer case mode shift drive and secure it with the bolt and nut, tightening them to a torque of 19 Nm.
Connect the wiring harness to the transfer case shift actuator.
Connect the vacuum hose to the transfer case shift actuator and secure it with a clamp.
Visitor comments