
OpelBook.ru
Cars AvtoVAZ Cars Mitsubishi Cars BMW Cars Mercedes Cars Nissan Cars Toyota Cars Chevrolet
English Русский
Български
Беларускі
Український
Српски
Hrvatski
Română
Polski
Slovenský
Magyar
 |  Sitemap  |  Contacts  |    


Main Astra Corsa Insignia Kadett Omega Vectra Zafira Others Articles
Frontera A (1991-1998, petrol) Frontera B (1998-2004) Ascona C (1981-1988) Vivaro A (2001-2014)
  • Main
  • Opel
  • Ascona C
  • Power unit
  • Contact ignition system
  • Capacitor — removal, inspection and installation

Capacitor — removal, inspection and installation (Opel Ascona C)

            0

1. The purpose of the capacitor is to ensure that there is no spark between open contacts, as this leads to unnecessary waste of voltage and premature wear of the contacts.

2. On the Bosch distributor, the capacitor is installed on the outer surface of the distributor housing. If the capacitor is shorted, the ignition system will stop performing its functions, because the contacts will stop opening the low voltage circuit.
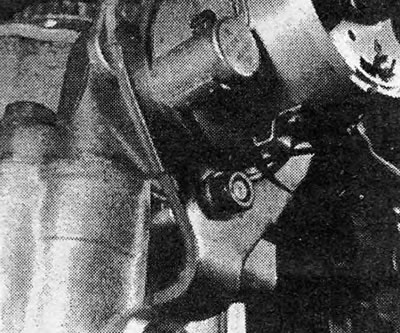
Photo 5.2. Condenser and distributor clamping plate.

Photo 5.2. Condenser and distributor clamping plate.


3. If the engine is difficult to start or begins to misfire after a few miles, and the breaker contacts appear badly burned, the condition of the capacitor should be checked. For further testing, with the ignition on, spread the contacts apart with your hand. If a strong blue spark occurs, then the capacitor is faulty.

4. In the absence of special equipment, the only reliable way to check the capacitor is to test replace it.

5. To remove the capacitor, you need to remove the distributor cap, rotor and plastic plate.

b. Remove the support plates and disconnect the low voltage wire supplying the contacts from the spade connector located inside the distributor housing.


7. Disconnect the low voltage wire from the coil that connects it to the distributor.

8. Remove the screw securing the capacitor and low voltage wire to the distributor housing. Please note that the capacitor comes with a low voltage wire for connecting to the coil, a wire tip and a mounting rubber grommet.

9. The capacitor is installed in the reverse order.


This article is available at russian, bulgarian, belarusian, ukrainian, serbian, croatian, romanian, polish, slovak, hungarian
Checking the article: Kornev Georgy

Share information:

Previous articles
Opel Ascona C: Contact ignition system
Next articles

Breaker contacts — removal and installation
Breaker contacts — adjustment of the gap and angle of the closed state of the contacts
Ignition System — Routine Maintenance
Ignition system with mechanical contact breaker — general description
Ignition system — specification
Distributor — removal and installation
Distributor — disassembly, inspection and assembly
Ignition timing angle — adjustment
Spark plugs and high tension wires — common part
Ignition coil — common part
TDC position sensor


See similar ones from other Opel car manuals:
▶ Checking the capacitor Opel Kadett D (1979-1984)
Link to this page in different formats

Visitor comments


No comments yet


How much will 27 + 37 =


Vivaro A (2001-2014) 
  • General information
  • User manual
  • Power unit
  • Petrol engine F4R
  • Diesel engine F9Q
  • Diesel engine G9U
  • Transmission
  • Clutch and drive shafts
  • Manual gearbox
  • Chassis
  • Front suspension
  • Rear suspension
  • Brake system
  • Body
  • Exterior
  • Interior
  • Electrical equipment
  • Heating and ventilation
  • Air conditioner
  • Equipment and devices
  • Electrical diagrams
Ascona C (1981-1988) 
  • General information
  • Maintenance
  • Power unit
  • Gasoline engines
  • Diesel engines
  • Cooling system
  • Fuel and exhaust system
  • Contact ignition system
  • Contactless ignition system
  • Transmission
  • Clutch
  • Mechanical gearbox
  • Automatic gearbox
  • Drive shafts
  • Chassis
  • Steering
  • Brake system
  • Car suspension
  • Body
  • Exterior
  • Interior
  • Doors and windows
  • Electrical equipment
  • Equipment and devices
  • Power devices
  • Electrical circuits
Frontera B (1998-2004) 
  • General information
  • User manual
  • Maintenance
  • Power unit
  • Petrol engines 2.2 l
  • Petrol engines 3.2 l
  • Diesel engines 2.2 l
  • Cooling system
  • Fuel system (petrol)
  • Fuel system (diesel)
  • Ignition system
  • Transmission
  • Clutch
  • Manual gearbox MUA5C
  • Automatic gearbox 4L30E
  • Chassis
  • Suspension and axles
  • Steering
  • Brake system
  • Body
  • Exterior
  • Interior
  • Doors, locks and windows
  • Heating and air conditioning
  • Electrical equipment
  • Power devices
  • Equipment and devices
  • Lighting and signaling
  • Electrical diagrams
Frontera A (1991-1998, petrol) 
  • General information
  • Introduction to guide
  • User manual
  • Maintenance
  • Power unit
  • Engine repair
  • Lubrication system
  • Cooling system
  • Power and exhaust system
  • Engine electrics
  • Transmission
  • Clutch
  • Mechanical gearbox
  • Cardan shafts
  • Chassis
  • Brake system
  • Front suspension
  • Rear suspension
  • Steering
  • Body
  • Repair and care
  • Electrical equipment
  • Equipment and devices
  • Electrical circuits
OpelBook.ru © 2017–2026 · Mobile version · · Sitemap: EN BG BY UA RS HR RO PL SK HU · Feedback · Site search
Astra F, petrol · Astra G, petrol · Astra G · Astra H · Astra J, petrol · Corsa B · Corsa C, petrol · Corsa C · Insignia A · Kadett D · Kadett E · Omega A · Omega B · Omega B2 · Vectra A, petrol · Vectra A · Vectra B, petrol · Vectra B · Vectra C · Zafira A, petrol · Frontera A, petrol · Frontera B · Ascona C · Vivaro A ·
We want your visit to be comfortable 🤝! We use cookies 🍪 to make that happen.