
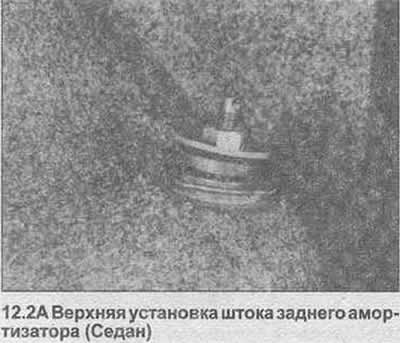
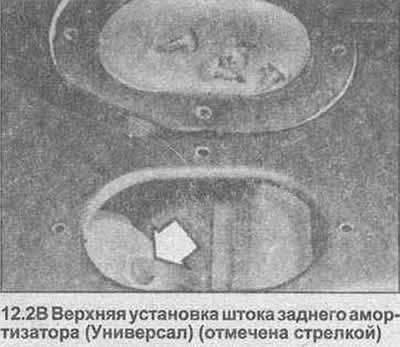
2. On Sedan models, open the trunk lid and remove the rubber cover from the top of the shock absorber rod (photo). On Wagon models, remove the screws and lift the trim over the damper rod (photo).
3. Loosen the top mounting nuts and remove the gasket and rubber pad.
4. On models equipped with the rear sub-valve alignment system, then unfasten the discharge line from the damper rod.
5. Unscrew the bottom mount and remove the shock absorber rod.
6. When installing, first place the damper rod on the diagonal arm and loosely insert the bolts into the lower mount.
7. On models equipped with a rear suspension leveling system, install the pressure line and carefully inflate the damper rod until it protrudes out through the top mount.
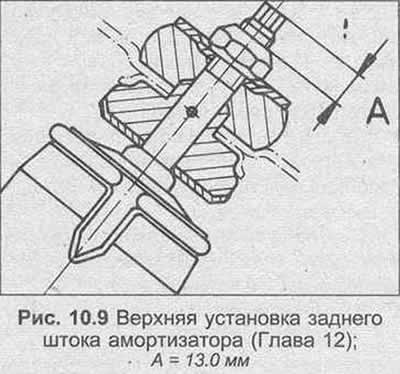
8. Install the top rubber pad and gasket and tighten the nut and locknut to the specified torque specification. The distance between the locknut and the top of the shock rod rod should be 13.0mm.
9. Tighten the lower mounting bolt with a tightening torque regulated specification.
10. Install the cladding (models Universap) or rubber cover (Sedan models).
11. Lower the vehicle to the ground.
12. On models with a rear suspension leveling system, inflate the system to the specified amount.
Visitor comments