
Removing
Automatic rear wheel brake adjustment (from 8.83)
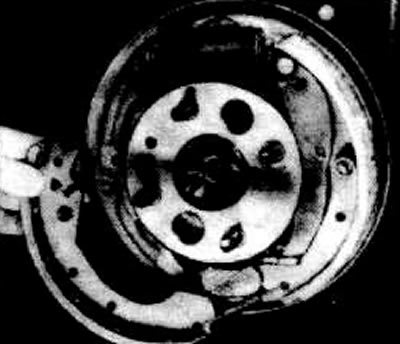
Remove brake drum.
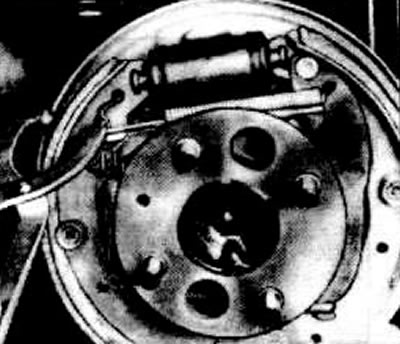
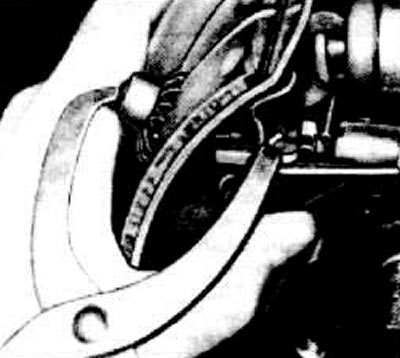
Disconnect the brake shoe return spring from the spring holder using special pliers (e.g. HAZET #797). It can also be removed with pliers. Follow the installation system details.
Pull the recoil spring holder out of the hole in the block with a screwdriver.
Remove the setting lever from the block and disconnect the return spring.

Press the block slightly outward and disconnect the installation system with the spacer bar from the hand brake lever and the brake shoes.
Attention: The mounting position of the thermocouple must first be recorded.
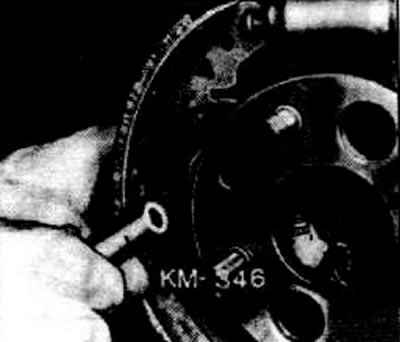
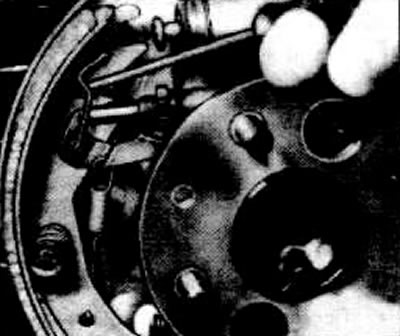
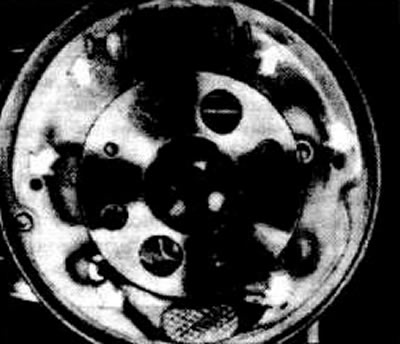
Remove the front brake shoe mount. To do this, press the spring cup with a collet and turn it 90°, while holding the pin from behind. Remove the spring cup, remove the pin. Workshops use the OPEL KM 346 fixture for this, you can also do this with a combined collet.
Disconnect the lower spring.
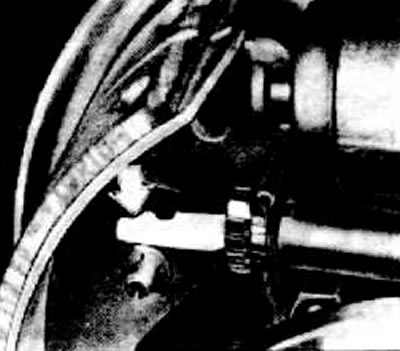
Disconnect the cable from the hand brake lever.
Installation
Use pads of the same quality. It is recommended to use only original pads from OPEL. Wash the brake drum and brake shield with a rag soaked in gasoline. While the brake pads are removed, do not press the brake pedal, because. the piston will fall out of the wheel brake cylinder. If the brake cylinder is leaking, repair it. Turn grooved brake drum.
Before installing the brake pads, cover the brake shield in the places where the pads fit with a thin layer of Plostilube (OPEL ET №1942586/90166282).
Check the ease of movement of the gear and setting lever. Otherwise, disassemble the installation system and clean it.
Coat the threaded rod of the installation system with silicone grease 1970206 (OPEL ET №90167353). Screw the adjusting gear up to the stop.
Attention: The left and right threaded rods have left and right threads respectively and are marked L and R so as not to be confused during installation. In addition, the setting gear -4- (pic. B8358), the setting lever -3- and the return spring retainer are marked with different colors to avoid incorrect setting. Named parts for left side black, right side silver.
Connect the cable to the handbrake lever. Attach the bottom spring to the block.
Install the brake pads on the brake shield.
To do this, insert a pin from behind and put on a spring with a cup and crush it with a collet, then turn the springs by 90°while simultaneously holding the pin from behind.
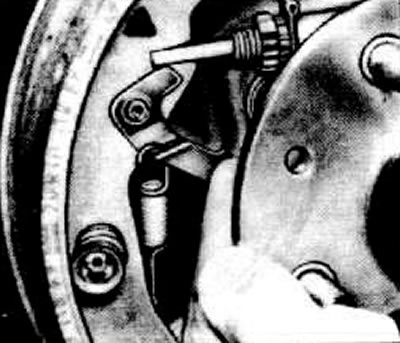
Install the adjustment system between the pads. When doing so, observe installation position -arrow-.
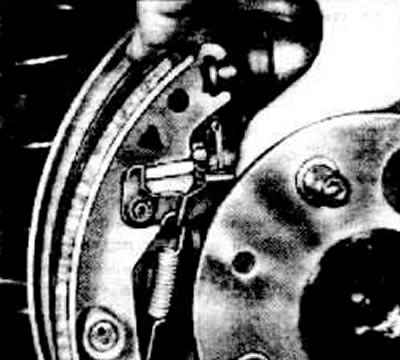
Connect the return spring for the adjusting block to the adjusting lever and the brake shoe.
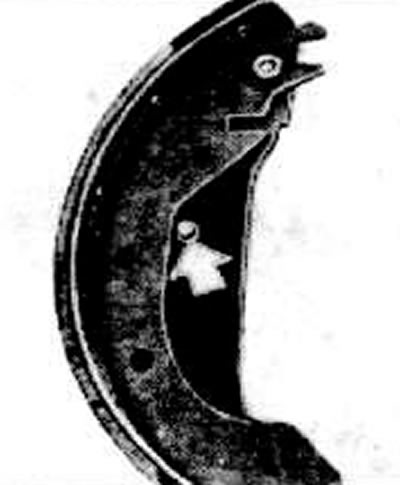
Install the adjusting lever onto the brake shoe fixing pin.
Attention: Do not forget the spring washer for the fixing pin.
Install the holder for the return spring by connecting it to the retainer, pin and brake shoe.
Using a spring collet, fix the return spring of the brake pad child in the holder. At the same time, press the adjusting lever at the top against the adjusting gear.
Attention: Make sure that the thermocouple fits correctly. The figures show the elements for MANTA-B and REKORD-E. The thermocouple in KADETT D has a different mounting position.
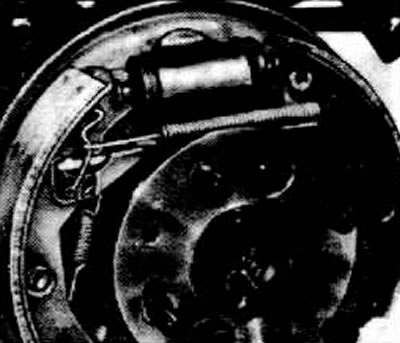
Check that the brake pads are properly seated on the wheel brake cylinder.
The cam -arrow- of the handbrake lever must not come into contact with the brake shoe.
Attention: If the cam rests on the brake shoe, the consequence of this is that when the handbrake is first applied, the lever assumes its intended position. The brake in this case does not have an air gap and can become hot or blocked.
Install the brake drum.
Adjust the rear wheel brake.
Screw on the rear wheels.
Lower the vehicle and tighten the rear wheel bolts to 90 Nm.
Visitor comments