
OpelBook.ru
Cars AvtoVAZ Cars Mitsubishi Cars BMW Cars Mercedes Cars Nissan Cars Toyota Cars Chevrolet
English Русский
Български
Беларускі
Український
Српски
Hrvatski
Română
Polski
Slovenský
Magyar
 |  Sitemap  |  Contacts  |    


Main Astra Corsa Insignia Kadett Omega Vectra Zafira Others Articles
Kadett D (1979-1984) Kadett E (1984-1995)
  • Main
  • Kadett
  • Kadett D
  • Chassis
  • Brake system
  • Removal and installation the handbrake cable

Removal and installation the handbrake cable (Opel Kadett D)

            0

Contents: Removal ⬇ Installation ⬇

Removal


Mark the rear wheels and hubs with chalk so that you can later install the wheels in their original position. Loosen the wheel fastenings.

Place the handbrake lever in the third ratchet groove.

Raise the car.

Remove the wheels.
Remove the wheels.


Remove the brake drums, see item 16.8.

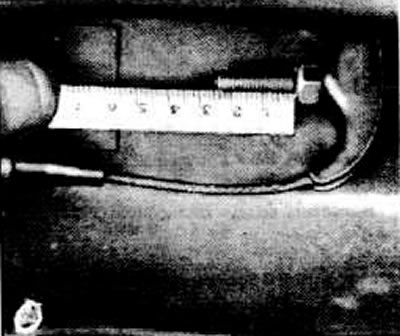
Measure the length of the free thread of the rod, record the value

Unscrew the nut so that the handbrake cable can be removed from the equalizer.
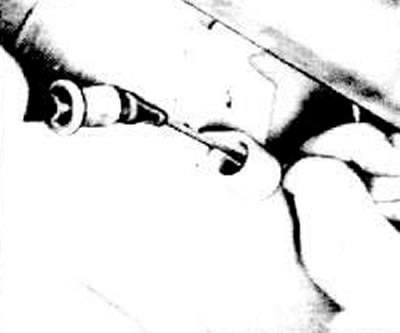
Unscrew the nut so that the handbrake cable can be removed from the equalizer.


Remove the cable from the guides in the traction tunnel.
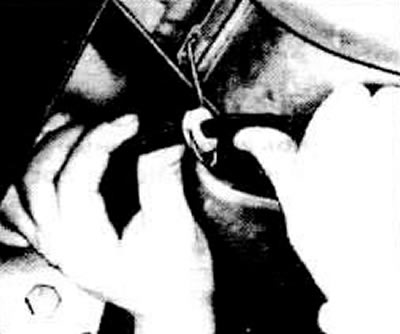
Remove the cable from the guides in the traction tunnel.


Disconnect the polymer guides from the holders on the gas tank. For Caravan models, remove the cable from the guide on the body.
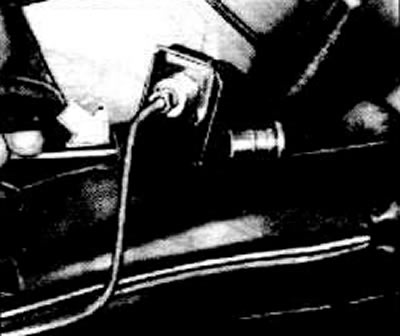


Disconnect the polymer guides from the holders on the gas tank. For Caravan models, remove the…


Disconnect the cable from the guides on the rear suspension.
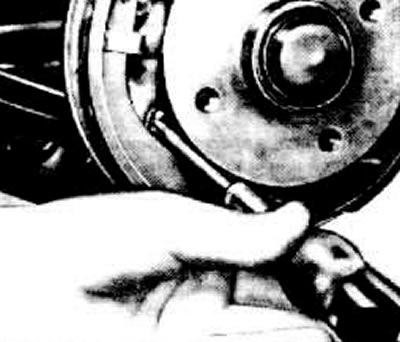
Disconnect the cable from the guides on the rear suspension.


Use something sharp to remove the handbrake cable stopper from the polymer bushing.

Disconnect the handbrake cable from the pads and remove it from the brake shield.

Installation


Insert the handbrake cable into the brake shield and attach it to the brake shoes.
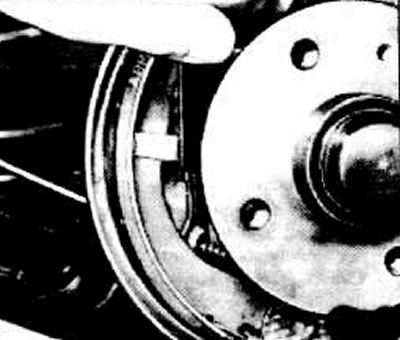
Insert the handbrake cable into the brake shield and attach it to the brake shoes.


Insert the polymer bushing into the brake shield and press in the retaining ring with a screwdriver.


Caution: If the handbrake shoe lever was released before removing the brake drum, it should be returned to its original position and the brakes should be adjusted. The installation system should be unscrewed back, see item 16.10.

Install the brake drum, see item 16.8.

Insert the handbrake cable into the guides in the traction tunnel.

In this case, take into account that the black guide is installed higher.

Connect the equalizer and the locking plate to the cable and secure it to the rod.

Tighten the nut to the previously measured value.

Caution: If the handbrake shoe lever was released before removing the brake drum, the brakes must be adjusted.


Install the wheels taking into account the marks.

Lower the vehicle and tighten the wheel bolts crosswise to 90 Nm.


This article is available at russian, bulgarian, belarusian, ukrainian, serbian, croatian, romanian, polish, slovak, hungarian
Checking the article: Kornev Georgy

Share information:

Previous articles
Opel Kadett D: Brake system
Next articles

Bleeding the brake system
Brake fluid expansion tank
Checking and adjusting the brake system regulator
Repair of the brake wheel cylinder
Removal and installation the wheel brake cylinder
Replacing friction linings
Adjusting the handbrake
Checking the brake booster
Brake system malfunctions


See similar ones from other Opel car manuals:
▶ Handbrake cable — removal and installation Opel Omega A (1986-1993)
▶ Handbrake cable — removal and installation Opel Vectra A (1988-1995, petrol)
▶ Throttle Cable — Removal, Installation and Adjustment Opel Astra F (1991-1998, petrol)
▶ Replacing and adjusting the throttle cable Opel Corsa B (1993-2000)
▶ Adjusting the selector lever cable Opel Insignia A (2008-2017)
Link to this page in different formats

Visitor comments


No comments yet


How much will 40 + 38 =


Kadett E (1984-1995) 
  • General information
  • Vehicle description
  • Operation and maintenance
  • OHV power unit
  • Engine design
  • Check and repair
  • Engine work
  • OHC power unit
  • Engine design
  • Engine repair
  • Ignition system
  • Cooling and lubrication
  • Supply system
  • Fuel injection «LE-Jetronic»
  • Fuel injection «LE3-Jetronic»
  • Motronic ML4.1 system
  • Motronic M1.5 system
  • Motronic M2.5 system
  • Transmission
  • Clutch
  • Gearbox F10 and F13
  • Gearbox F16 and F20
  • Automatic gearbox
  • Drive shafts
  • Chassis
  • Front suspension
  • Rear suspension
  • Steering
  • Brake system
  • Electrical equipment
  • Equipment and devices
  • Electrical circuits
Kadett D (1979-1984) 
  • General information
  • Car care
  • Maintenance
  • Power unit
  • Gasoline engines
  • Lubrication system
  • Cooling system
  • Power system (gasoline)
  • Carburetor Solex 35 PDSI
  • Carburetor Varajet II
  • Carburetor 1B1
  • Fuel injection (gasoline)
  • Diesel engines
  • Fuel system (diesel)
  • Transmission
  • Clutch
  • Manual gearbox
  • Chassis
  • Front suspension
  • Rear suspension
  • Steering
  • Brake system
  • Wheels and tires
  • Body
  • Body elements
  • Doors and windows
  • Electrical equipment
  • Equipment and devices
  • Lighting system
  • Power devices
  • Ignition system
  • Electrical circuits
OpelBook.ru © 2017–2026 · Mobile version · · Sitemap: EN BG BY UA RS HR RO PL SK HU · Feedback · Site search
Astra F, petrol · Astra G, petrol · Astra G · Astra H · Astra J, petrol · Corsa B · Corsa C, petrol · Corsa C · Insignia A · Kadett D · Kadett E · Omega A · Omega B · Omega B2 · Vectra A, petrol · Vectra A · Vectra B, petrol · Vectra B · Vectra C · Zafira A, petrol · Frontera A, petrol · Frontera B · Ascona C · Vivaro A ·
We want your visit to be comfortable 🤝! We use cookies 🍪 to make that happen.