
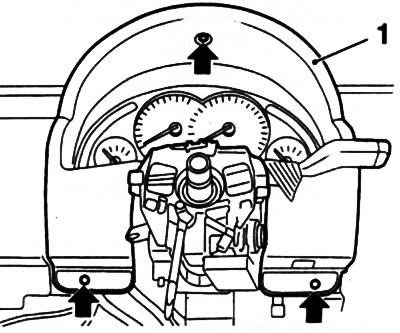
2. Remove the lower decorative cover of the instrument panel under the steering column (see chapter 11).
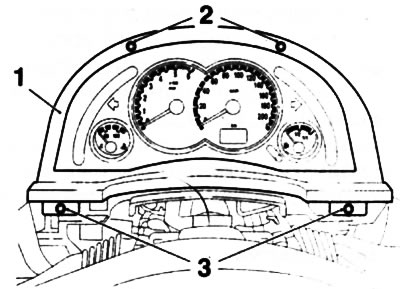
3. On Corsa models, remove the 3 screws and remove the instrument cluster trim panel (see resist. illustration).
22.3. screws (indicated by arrows) panel fixings (1) instrument cluster finishes (Corsa models)
Note: The steering wheel is not shown in the illustration for a better view and does not need to be removed for this operation.
4. On Meriva models, to remove the trim panel of the instrument cluster, remove the 4 fixing screws (see illustration 22.4a) and remove the trim panel as shown in illustration 22.4b.
22.4a. Upper (2) and lower (3) panel fixing screws (1) instrument cluster trim (Meriva models)
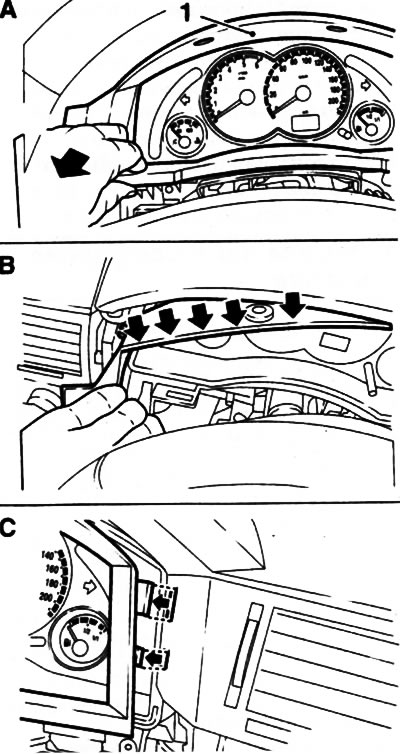
22.4b. Procedure for removing the trim panel of the instrument cluster (Meriva models)
5. Remove the 2 bottom fixing screws (see resist. illustration), release the instrument cluster from the upper holder and remove it from the mounting socket.
22.5. bottom screws (indicated by arrows) and top holder (1) instrument clusters
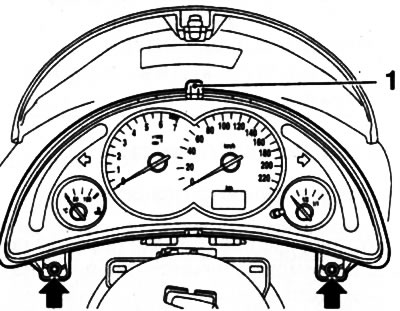
6. Disunite a socket of electroconducting from a reverse side of a combination of devices.
7. If necessary, remove the failed lamps from the instrument cluster (see resist. illustration) and replace them with new ones.
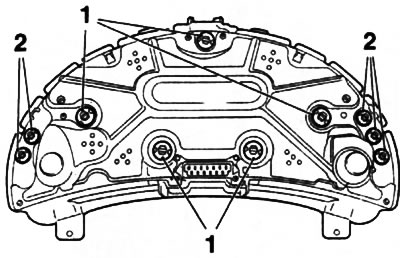
22.7. Instrument cluster lamps: instrument illumination - 1 and control lamps - 2
8. Installation is made in an order, the return to an order of removal. When replacing the instrument cluster, it is necessary to make the appropriate setting of the maintenance interval counter in the conditions of a service station (see chapter 1). Switch on the ignition and check that the indicator lamps and other components of the combination are working properly.
Visitor comments