
Corsa models
1. Disconnect the wire from the negative terminal of the battery (see chapter 5).
2. Remove the lower decorative cover of the instrument panel under the steering column (see chapter 11).
3. With a plastic wedge (e.g. Hazet 1965-20) release the spring clips (see resist. illustration) outdoor lighting switch panels.
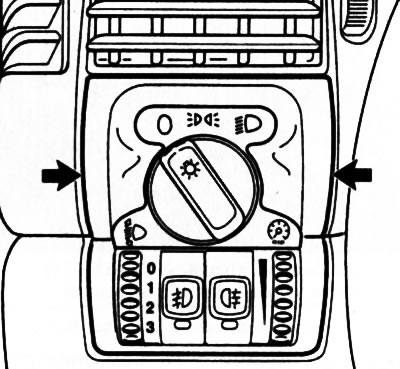
25.3. Using a plastic wedge, press the latches on the outdoor lighting switch panel at the points indicated by the arrows (Corsa models)
4. Remove the switch panel from the instrument panel (see resist. illustration) and disconnect the wiring connector from the back of the panel.
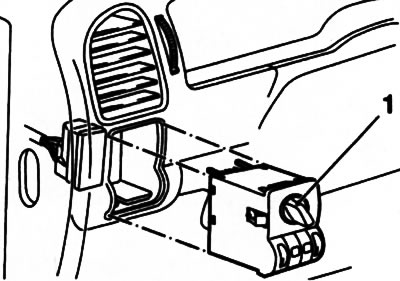
25.4. Switch panel for exterior/instrument lighting (Corsa models)
5. If necessary, unscrew the backlight from the back of the switch block and replace it.
6. Installation is carried out in the reverse order.
Meriva Models
Removing
7. Disconnect the wire from the negative terminal of the battery (see chapter 5).
8. Turn the rotary switch for outdoor lighting to position «ABOUT» (see chapter «Controls and methods of operation», Section 17).
9. Push in the knob of the rotary switch and turn it to the center position (see resist. illustration). Remove the switch panel from the instrument panel.

25.9. Press the switch handle (1) to position 3 (Meriva)
10. Disconnect the wiring connector from the back of the panel.
Installation
11. Connect the wiring connector to the switch panel.
12. Press the rotary switch handle and turn it to the right until the latches (up and down) (see resist. illustration) the switch panels will not fully sink into the recesses.
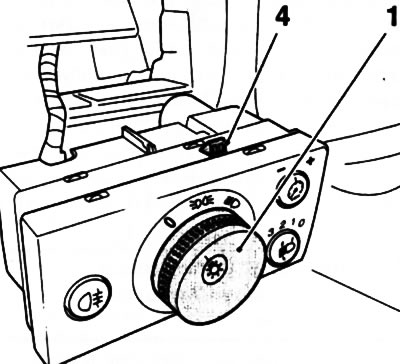
25.12. Upper (4) and lower switch panel latches move up or down when the knob is turned (1) rotary switch
13. While holding the handle in this position, insert the panel into the slot, and turn the knob to the left until the panel locks into place.
14. Connect the storage battery and check up serviceability of functioning of the switch in all provisions and reliability of fastening of the panel.
Visitor comments