
Note: When installing the thermostat, use a new O-ring.
Models 1.4 and 1.6 l (except C16 NZ2)
Removing
1. Partially drain the cooling system as described in Chapter 2.
2. Remove the toothed drive belt and camshaft sprocket as described in Sections 2A or 2B (depending on the model).
3. Loosen and remove the two upper bolts securing the rear timing belt cover to the cylinder head and the lower right bolt securing the cover to the cylinder block.
4. Disconnect the hose from the thermostat housing.
5. Remove the rear cover of the toothed drive belt from the cylinder head (forward), to access the two thermostat housing clamp bolts.
6. Unscrew the two clamping bolts of the thermostat casing and remove the casing (see illustration).

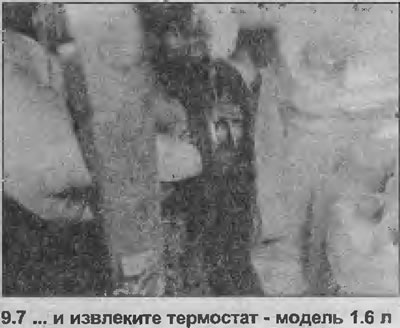
7. Remove the thermostat from the cylinder head. Keep in mind that coolant may come out of the lower radiator hose (see illustration).
8. Remove the O-ring from the thermostat.
9. If required, the operation of the thermostat can be checked as described in Chapter 10.
Installation
10. Installation is carried out in the reverse order, paying attention to the following.
11. Install the camshaft sprocket and toothed drive belt and tighten the toothed drive belt as described in Sections 2A or 2B.
12. Fill the cooling system (Chapter 4).
Models C16 NZ2, 1.8 and 2.0 l
Removing
13. Remove the lower engine protection plate, if equipped. Partially add fluid from the cooling system as described in Chapter 2.
14. Disconnect the upper radiator hose from the thermostat cover.
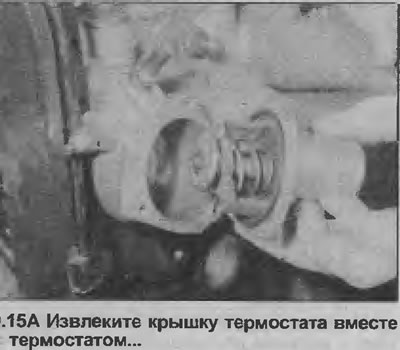
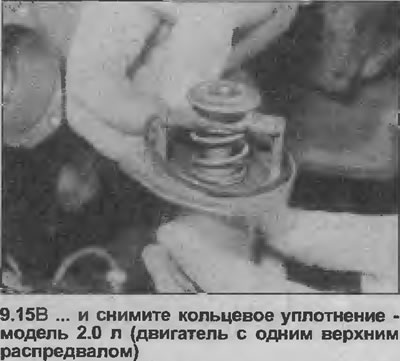
15. Unscrew and remove the clamping bolts of the thermostat cover and remove the cover together with the thermostat. Remove the O-ring (see illustrations).
16. If required, the operation of the thermostat can be checked as described in Chapter 10.
17. Please note that the thermostat must be replaced with a cover assembly, since it is impossible to separate them.
Installation
18. Installation is carried out in the reverse order. Use a new O-ring and finally fill the cooling system as described in Chapter 4.
Visitor comments