


Contents: Removal ⬇ Installation ⬇
Removal
Attention! It is necessary to replace all brake pads on one axle at the same time, even if only one of them is oily or worn out.
Remove the brake drum.
Caution! Before removing the brake pads, it is recommended to mark the position of the return springs, expansion bar and installation device. This will make it easier to assemble the brakes.
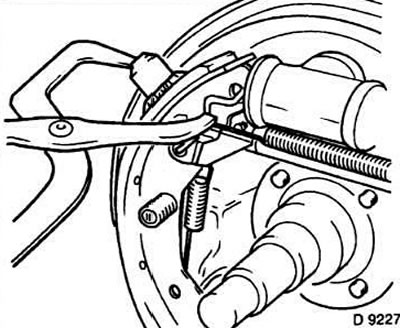
Unhook the upper return spring using special pliers, such as the Hazet 897. This can also be done with another suitable tool.
Remove the return spring retainer from the shoe hole using a screwdriver.
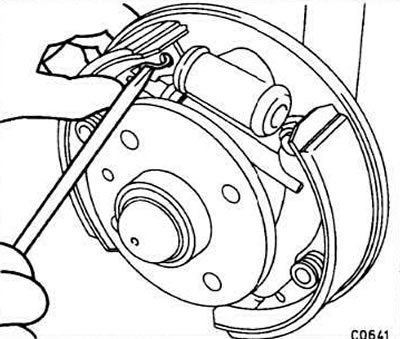
Remove the adjusting lever from the brake shoe and release the lever return spring.
Slightly loosen the brake shoes and remove the installation mechanism with the parking brake lever release plate and the shoe.
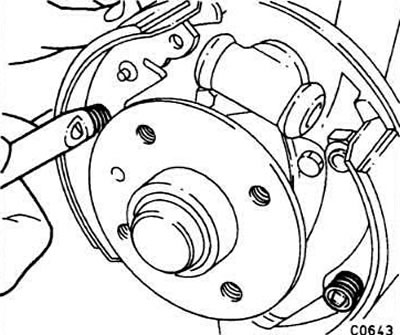
Remove the retaining pin of the front brake shoe. To do this, press the spring plate with pliers and turn it 90°, while holding the pin at the back. Remove the plate and spring, pull out the retaining pin. In workshops, the Opel KM-346 device is used to compress the spring, but this can also be done with pliers.
Remove the rear brake shoe mounting pin in the same manner.
Unhook the lower return spring.
Remove the brake pads by disconnecting the cable from the parking brake lever.
Installation
Be sure to replace all four brake pads. It is recommended to use only genuine Opel brake pads. Wash the brake drum and brake shield with alcohol. Do not press the brake pedal when the pads are removed; otherwise, the brake pistons will come out of the wheel brake cylinders. If the cylinder is covered with brake fluid, it should be replaced. Clean and lightly lubricate the threads of the expansion bar.
Lubricate the bearings in the area where the brake pads are in contact with a special paste, for example Opel 1942586 (90166282).
Check the ease of movement of the gear engagement. If necessary, disassemble and clean the installation mechanism.
Lubricate the thread of the installation mechanism with silicone grease, for example, Opel 1970206 (90167353). Turn the installation gear back until it stops.
Note! The left and right racks have left and right threads respectively and are marked with the letters "L" and "R" to avoid confusion during assembly. In addition, the adjusting gear, adjusting lever and return spring holder are marked with paint: the left part is black, and the right part is silver.
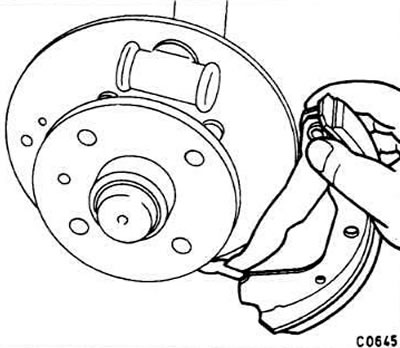
Connect the brake shoe lever to the parking brake lever. Make sure the parking brake cable is routed correctly.
Install the lower spring.
Install the shoe on the brake shield. To do this, insert the pin from behind and install the spring. Compress the spring, then turn its plate 90°, thereby securing it. At the same time, hold the pin from behind.
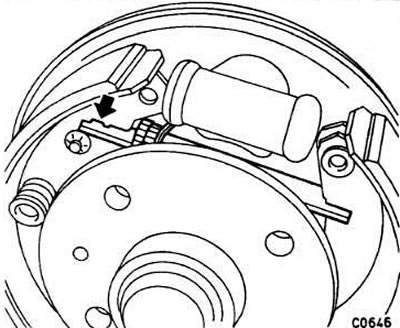
Install the installation mechanism from above between the brake pads, paying attention to the correct installation (see arrow in fig.).
Attention! When installing new pads, do not forget to install the spring plate of the installation lever.
Install the adjusting lever with the spring onto the pin.
Use pliers to hook the end of the return spring of the setting lever onto the brake shoe.
Insert the upper return spring retainer into the pin and press it into the hole in the brake shoe.
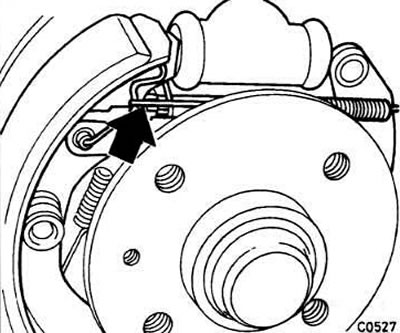
Hook the upper brake shoe return spring onto the holder.
Move the setting mechanism back to the stop, making sure that the gear wheel does not lock at the stop.
Install the brake drum.
Visitor comments