
2. Remove the bolts and remove the camshaft belt cover. On injection models, the air cleaner should also be removed to improve access (see chapter 5).
3. Place the wrench on the crankshaft pulley bolt and turn it so that piston No. 1 begins to rise to the top dead center. on the compression stroke. (To check that this is indeed a compression cycle, you should either remove the spark plug on the Nin cylinder and close the hole with your finger to check that pressure will be created in the cylinder, or remove the distributor cap and check that the slider is aligned with electrode N 1 (for candle N 1) on the lid). The notch on the rim of the crankshaft pulley should align with the pointer, which gives the ignition timing at the given degrees to TDC. The mark on the camshaft sprocket should align with the mark on the rear guard (see photo).
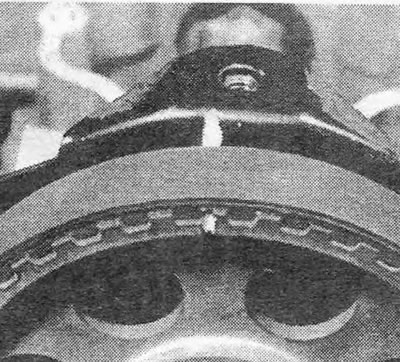
Photo 5.3. Fitting marks on the camshaft sprocket.
4. On 1.3 engines, remove the crankshaft pulley bolt, being careful not to change the previously set position of the crankshaft. On engines 1.6 and 1.8, unscrew and remove the 4 cylindrical head bolts securing the pulley to the crankshaft drive sprocket. To prevent the crankshaft from turning while removing the bolts, you should either put the car in gear and fully apply the handbrake, or remove the lower flywheel housing cover and block the flywheel ring gear using a suitable tool. Remove the pulley from the crankshaft or drive sprocket (depending on design) (see photo).
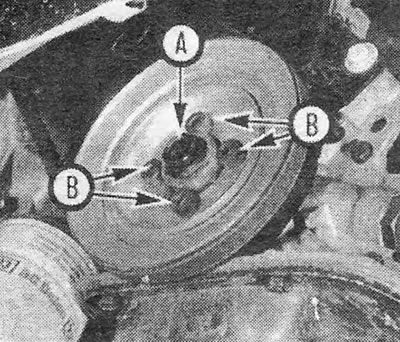
Photo 5.4. Crankshaft pulley on 1.6 engine: A. Torsional vibration damper and sprocket mounting bolt; B. Crankshaft pulley mounting bolts (with cylindrical heads).
5. Drain the coolant.
6. Loosen the water pump mounting bolts enough to allow the pump to be rotated and the tension to be removed from the timing belt. The pump housing behind the sprocket is specially chamfered and can be turned with a large thin screwdriver if desired. Alternatively, the pump can be turned from under the car by gently tapping it with a hammer through a long bit.
7. If you are not going to change the timing belt, you should pay attention to the direction of its movement before removing it.
8. Remove the old belt from the sprockets and install a new one, making sure that the position of the camshaft or crankshaft does not change.
9. Place the new belt on the sprockets and tighten it slightly by turning the water pump.
10. Reinstall the crankshaft pulley and check that the mark on the pulley is still aligned with the pointer, and that the mark on the camshaft sprocket is aligned with the groove on the shield behind it. If this is not the case, loosen the belt tension and adjust the position of the sprockets as necessary.
11. If you do not have a special tool, the belt tension can be adjusted as follows. Slightly loosen the water pump clamp screws and, grasping the belt with your thumb and forefinger, twist it 90 degrees. If, with medium force, the belt either twists too easily or cannot be twisted the full 90 degrees, tighten or loosen the belt a little by moving the water pump. If you tighten the belt too much, it will make a noise when the engine is running. After completing the adjustment, tighten the water pump bolts (see photos).
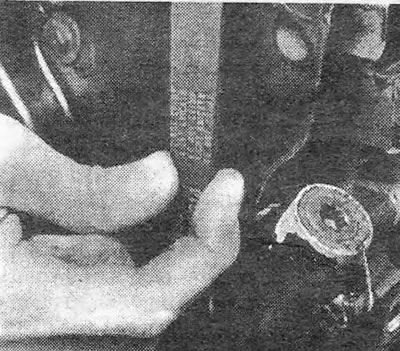
Photo 5.11A. Checking the camshaft belt tension.
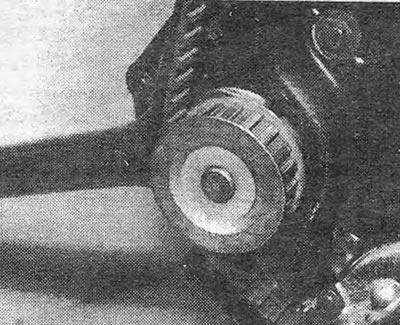
Photo 5.11B. Adjusting the camshaft belt tension.
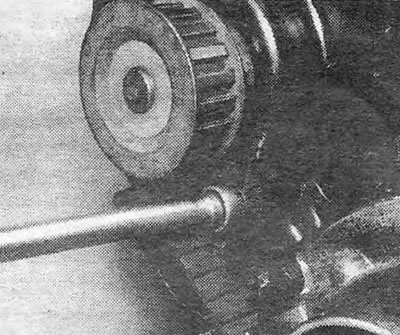
Photo 5.11C. Tightening the water pump bolt after adjusting the camshaft belt tension.
12. Remove the crankshaft pulley and replace the camshaft belt cover.
13. Reinstall the crankshaft pulley.
14. Reinstall the generator drive belt and adjust its tension (see chapter 2).
Visitor comments