
2. Loosen the nuts and bolts securing the generator, turn it towards the engine and remove the drive belt.
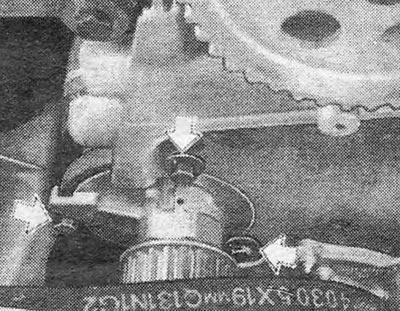
Pic. 2.1. Water pump mounting bolts (shown by arrows)
3. Unscrew the mounting bolts and remove the camshaft timing belt. Turn the crankshaft so that the mark on the camshaft sprocket aligns with the mark on its crankcase (behind the sprocket), and the notch on the rim of the crankshaft pulley is aligned with the pointer.
4. Loosen the 3 bolts securing the pump to the cylinder block. The pump shaft is eccentric with respect to its housing, so that by turning the pump housing, the tension can be relieved from the camshaft timing belt. Rotate the pump housing inward to relieve tension on the belt and remove the belt from the pump pulley. The pump housing behind the pulley has special chamfers that allow you to turn the housing using a large, thin wrench. Alternatively, the pump can be rotated from below (from under the car), tapping it with a hammer through a long beard. Check that when removing the belt, the position of the crankshaft and camshaft does not change, because This can not only disrupt the valve timing, but also lead to damage to the pistons or valves. Remove the bolts and remove the rear camshaft belt guard. Pull the pump out of the cylinder block (see photos).
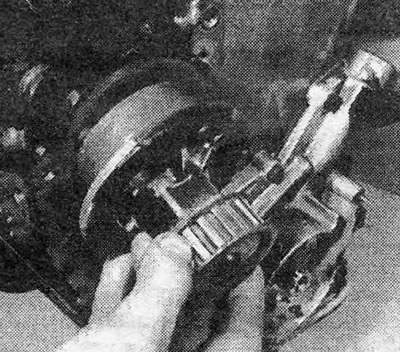
Photo 9.4A. Removing the water pump.
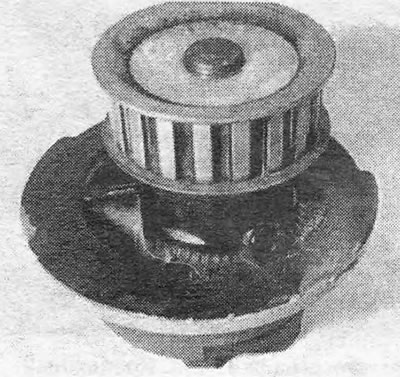
Photo 9.4B. Water pump - drive sprocket visible.
5. Although in principle the pump can be rebuilt, this requires a press and special tools. Therefore, we recommend simply replacing the faulty pump.
6. Before installing the pump, clean its seat in the cylinder block and install a new O-ring on the pump body. Apply silicone grease to the ring and sealing surface of the cylinder block. Place the pump in place and secure it with bolts and washers, at this stage tightening them manually (see photos). The cutout in the pump flange must be placed as shown in the photographs, because... it acts as a stop when you turn the pump housings in order to tension the timing belt. Reinstall the rear belt guard.
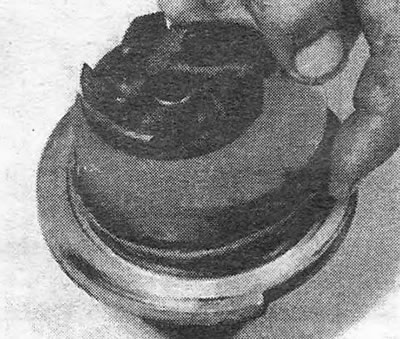
Photo 9.6A. Water pump O-ring.
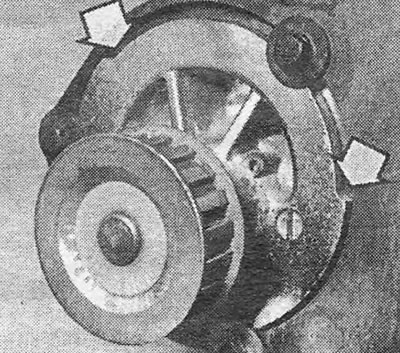
Photo 9.6B. Correctly installed water pump. Anti-rotation stops on the flange are shown by arrows.
7. Place the timing belt on the pump pulley and tighten it (see chapter 1). Tighten the 3 bolts securing the pump to the required torque.
8. Replace the belt cover and place the generator drive belt on the generator and crankshaft pulleys. Tension the belt and secure the generator (see section 10).
9. Fill the system with coolant (see section 6). Start the engine, bring it to normal operating temperature and check the pump for leaks.
Visitor comments