
Brake pads need to be replaced when the pads are worn (the minimum allowable thickness of the friction linings is 2.0 mm), loose connection of linings with the base, oiling of working surfaces, in the presence of deep grooves or chips.
Attention!
- Replace the brake pads of the rear brake mechanisms only as a set - 4 pcs. (two on each side).
- Before replacing the brake pads, check the brake fluid level in the master cylinder reservoir. If the level is close to the mark «MAX», it is necessary to pump out part of the liquid (for example, a medical syringe or a rubber bulb), because after replacing worn pads with new ones, the level will rise.
You will need: keys «at 13», «at 18», pliers with thin jaws, wrench for wheel nuts.
1. Remove the rear wheel from the side to be replaced.
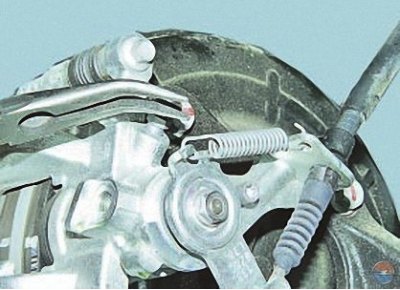
2. Disconnect the return spring from the parking brake lever..
3.... and from the bracket, then remove the spring.
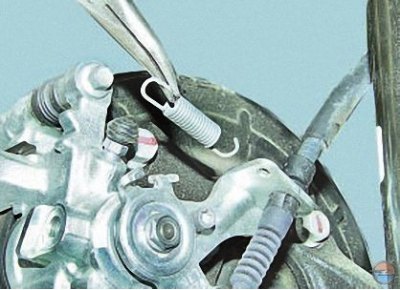
4. Disconnect the tip of the rear parking brake cable from the lever of the drive mechanism by removing the tip from the slot in the lever.
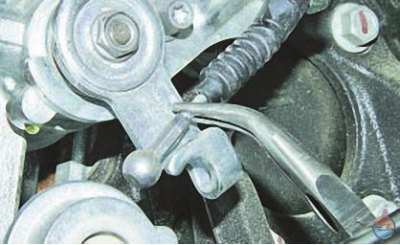
5. Squeeze the two clamps of the parking brake cable sheath stop with pliers..
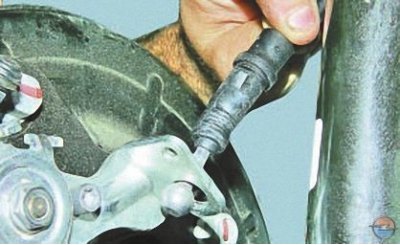
6.... and remove the cable from the hole in the parking brake actuator bracket.
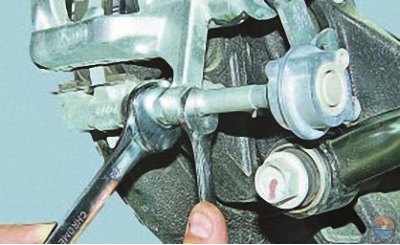
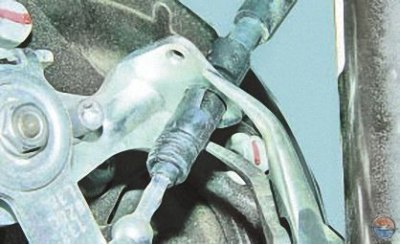
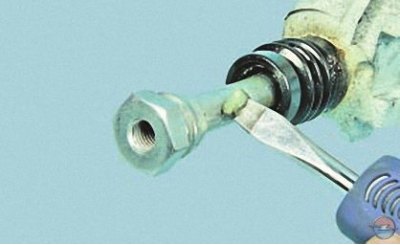
7. Loosen the caliper lower guide pin fastening strut, holding the finger from turning with the second key..
8.... and unscrew the rack.
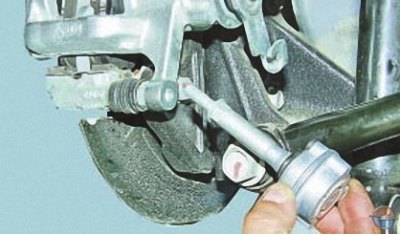
9. Raise the caliper up..
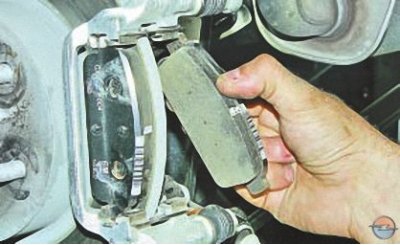
10.... and remove the inner..
11.... and outer brake pads.

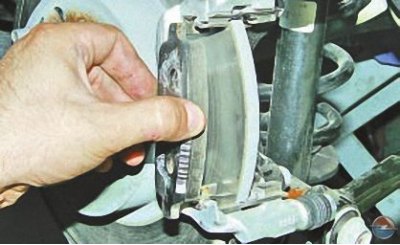
Note. This is what the rear brake pads look like. They are the same in shape, but slightly different in design (an audible wear limit indicator is installed on the inner pad, shown by an arrow in the photo) and have different part numbers.
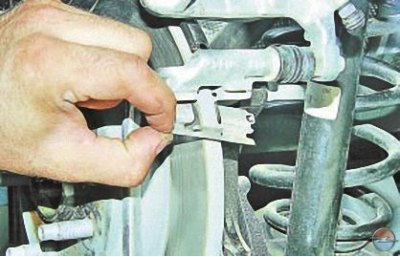
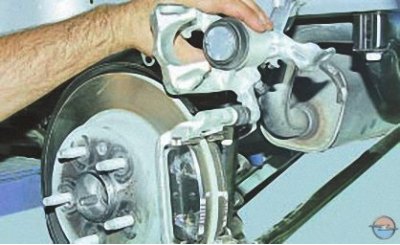
12. Remove both pressure pad springs and inspect them.
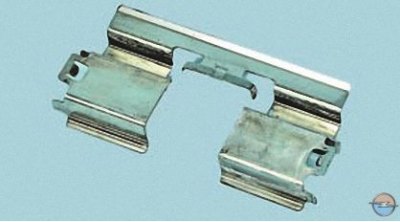
Note. Replace deformed or badly corroded springs.
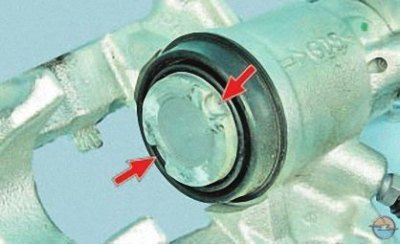
Whenever you replace the brake pads, be sure to check the condition of the protective rubber boots of the guide pin and the movement of the caliper relative to the brake pad guide.
If movement is difficult, lubricate the caliper guide pins with grease.
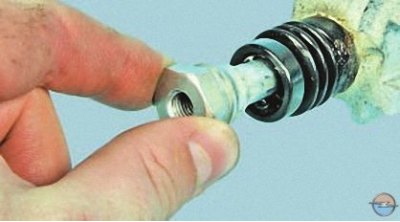
To do this, remove the guide pin..
..lubricate it with grease and then grease the pin guard. Lubricate the second guide pin and its boot in the same way.
Install the guide pins in the reverse order of removal.
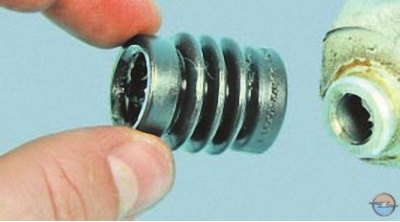
Replace the guide pin guards if they are hardened, deformed, or torn.
13. Install new rear brake pads in the reverse order of removal.
Note. Since new brake pads are thicker, the caliper piston must be sunk into the cylinder.
For this, two grooves are made at the end of the piston.
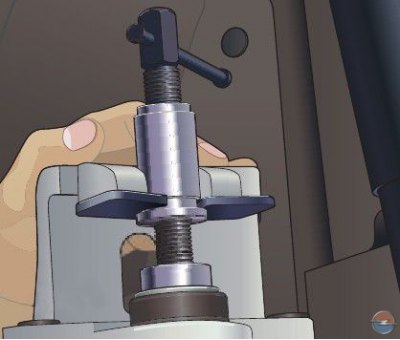
14. Install special tool (see below) into the caliper, as shown in the photo, while the two cylindrical protrusions on the washer of the fixture must enter the grooves on the end of the piston.
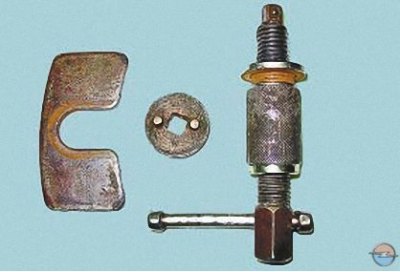
Note. This is how the details of the device for recessing the rear wheel brake piston look like.
15. Rotating the worm of the fixture, sink the piston into the caliper cylinder.
16. Install the parts in the reverse order of removal.
17. To prevent self-loosening of the caliper guide pins, lubricate their threads before installation with an anaerobic thread locker.
18. Press the brake pedal several times to bring the brake pads to the disc.
19. Install the wheel.
20. Similarly, replace the brake pads of the brake mechanism of the right rear wheel.
21. Check up and if necessary restore level of a brake liquid in a tank of the main brake cylinder.
Helpful Hints
After replacing worn out brake pads with new ones, do not rush to immediately go to busy highways. It is possible that at the very first intensive braking you will be unpleasantly surprised by the low efficiency of the brakes, although the pads are branded. Brake discs also wear out, and new pads only touch them at the edges, with little to no braking.
Choose a quiet street or passage without cars and slow down gently several times so that the pads get used and begin to fit the entire surface. At the same time, evaluate the effectiveness of the brakes.
Try not to brake sharply for at least the first 100 km. With strong heating of unused pads, the top layer of their linings burns and the brakes will not be as effective as possible for a long time.
Visitor comments