
Note. Brake line nuts are usually very tight. When you try to unscrew them with an ordinary wrench, the edges of the nuts are crushed, so we recommend using special wrenches for brake pipes.
1. Disconnect the wire from the terminal «minus» battery.

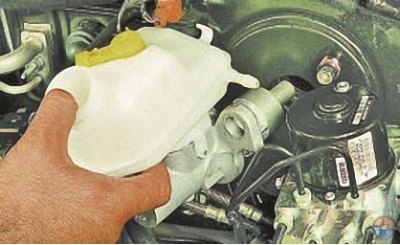
2. Disconnect from the mount and move the expansion tank to the side without disconnecting the hoses from it and without draining the coolant (see Replacing the reservoir of the main brake cylinder).
Note. Removing the expansion tank is necessary to gain access to the clutch master cylinder supply hose and the right brake master cylinder nut.
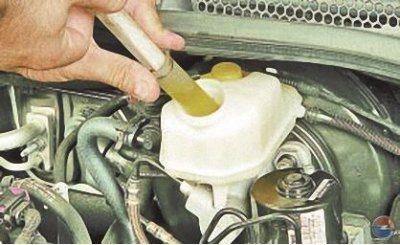
3. Turn away a stopper of a reservoir of the main brake cylinder and pump out a brake liquid from a reservoir, for example, the big medical syringe. Install a plug to keep dirt out of the master cylinder reservoir.
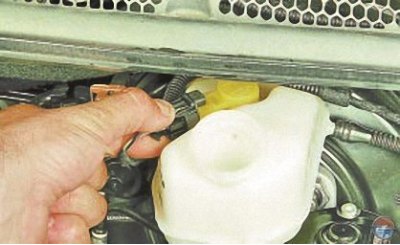
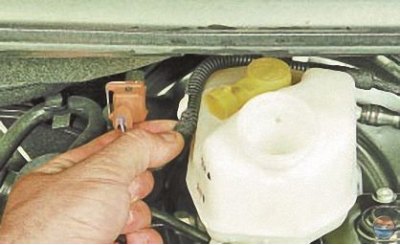
4. Squeezing the clamps of the wiring harness block of the brake fluid level sensor..
5.... disconnect the wiring harness block from the sensor.
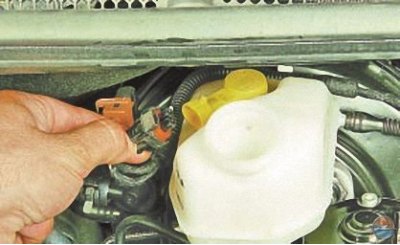
6. Pulling up the brake fluid level sensor harness..
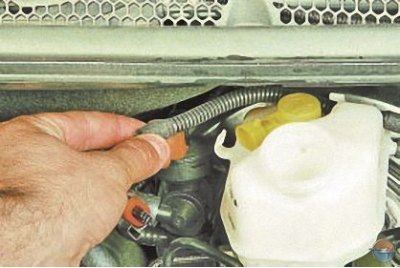
7.... disconnect the harness from the tank.
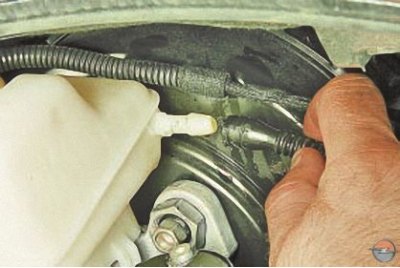
8. Disconnect from a tank a hose to the main cylinder of deenergizing of coupling.
Note. Immediately after disconnecting the hose from the tank, plug its hole without lowering the hose down. A little working fluid will remain in the hose; after installing the tank and connecting the hose to it, it will not be necessary to remove air from the clutch release hydraulic drive.
Note.
- On a vehicle with an automatic transmission, a spring-loaded plug is installed on the union of the master cylinder reservoir instead of the hose end.
- You don't need to take it off unless you need to.
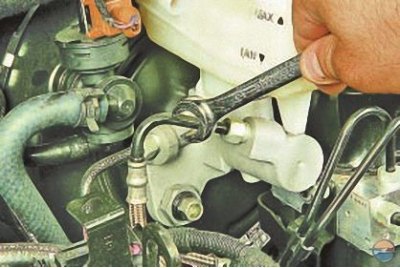
9. Turn away nuts of fastening to the cylinder of two pipelines …
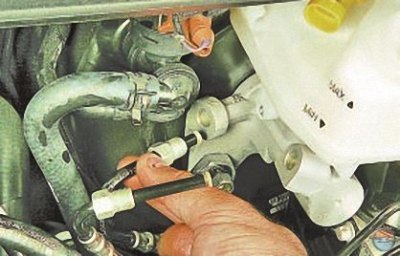
10.... and take the pipelines aside.
Note. Plug the pipelines in any way possible (for example, by putting protective caps on the ends of the valves to release air), to prevent leakage of brake fluid.
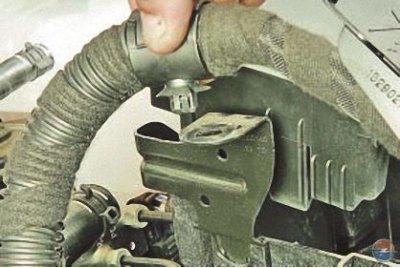
11. Disconnect the wiring harness from the battery mounting shelf and take it aside (see Removal and installation of the shelf of fastening of the rechargeable battery).
Note. It is necessary to disconnect the wiring harness because it makes it difficult to access the right nut securing the brake master cylinder.
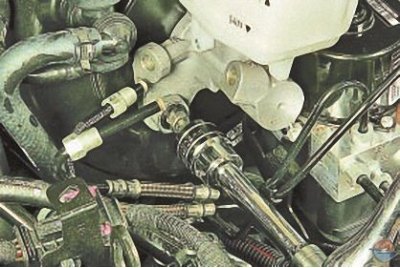
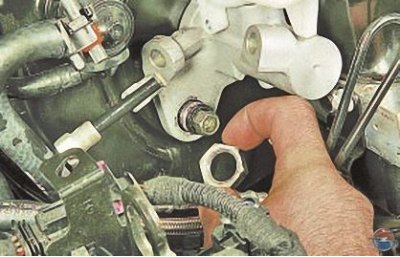
12. Unscrew the left..
13.... and the right nut for attaching the master brake cylinder to the vacuum booster...
14.... remove the nuts from the bolts of the vacuum brake booster..
15.... and remove the master brake cylinder assembly with the reservoir.
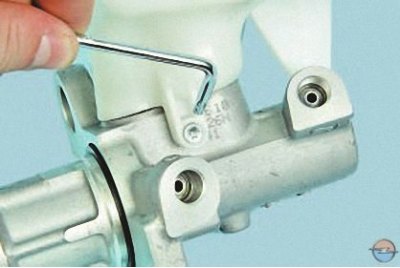
16. If there is no reservoir on the new master brake cylinder or if it becomes necessary to replace the rubber connecting sleeves of the reservoir, remove the reservoir by unscrewing its fastening screw and removing its branch pipes from the connecting sleeves (see Replacing the reservoir of the main brake cylinder).
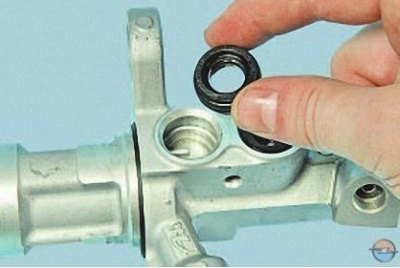
17. If during operation there was a leakage of brake fluid through the connecting sleeves, remove the sleeves from the openings of the cylinder body.
Attention! Reuse of connecting sleeves is not allowed, replace them with new ones.
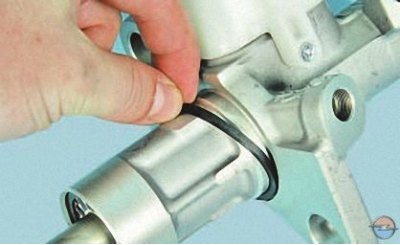
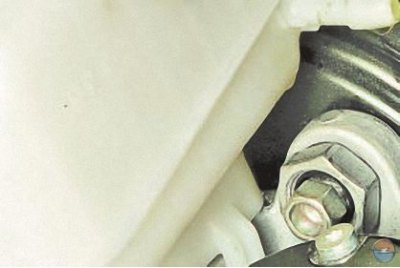
18. Remove a rubber sealing ring from the case of the main brake cylinder.
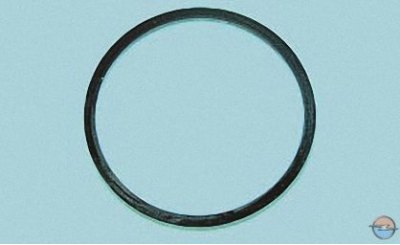
Attention! Replace the sealing ring of the master brake cylinder with a new one each time the connection is disassembled.

19. If during operation there was a failure of the brake fluid level sensor, to replace it, turn the sensor clockwise until it stops..
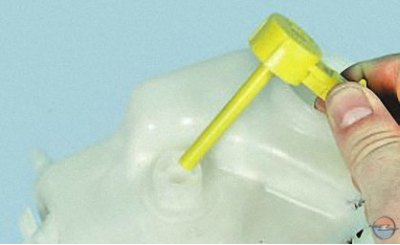
20.... and remove the sensor from the tank.
21. Install the brake master cylinder and all removed parts in the reverse order of removal, fill in the brake fluid and bleed the system (see Bleeding the hydraulic drive of the brake system).
Visitor comments