


Manual transmission F13 and F17+
1. Adjustment of the gearshift drive is not a routine procedure for current vehicle maintenance and is only necessary after removing the gearshift mechanism. If gearshift clarity is impaired, the drive can be checked for proper operation and, if necessary, appropriate adjustments can be made.
2. Adjustment is carried out using the bolt of the clamp securing the gear selection rod to the shift rod (see Section 10). The bolt is located under the power unit, just in front of the rear bulkhead of the engine compartment. On most models, the screw can be accessed from above, for which it is necessary to first remove the battery with the tray (see Chapter 5).
3. Loosen up (but don't give it all away) bolt of the clamp for fastening the gear selector rod.
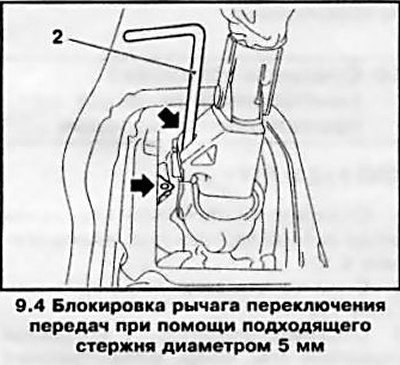
4. In the car interior, release the gearshift lever boot from the clamps and turn it up. Secure the lever using the special device KM-527-A (see accompanying illustration) or another suitable tool, threaded through the clamp on the left side of the base of the lever and inserted into a special fixing hole.
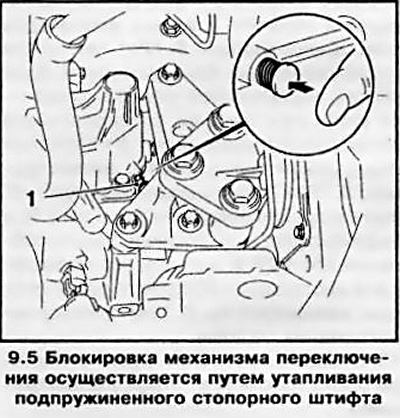
5. With the shift mechanism in neutral, turn the selector shaft against the spring resistance and lock the mechanism in this position by pressing the spring-loaded locking pin into the cover located on top of the transmission housing (See accompanying illustration).
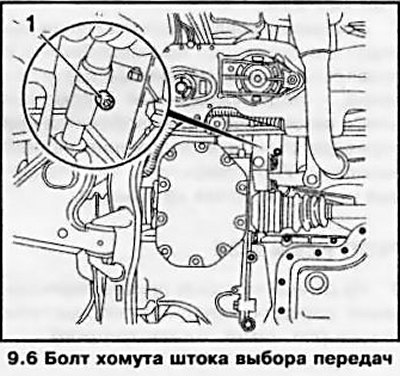
6. Make sure that the lever and the shift mechanism are locked securely. Tighten the gear selector rod clamp bolt (see accompanying illustration) with a force of 12 Nm, and then pull it to an angle of 180-225.
7. Remove the locking device from the gearshift lever and check the operation of the shift mechanism - the spring-loaded locking pin will automatically release when the lever is moved to the reverse position. Make sure that the locking pin pops out of the cover.
Manual transmission F23 and M32
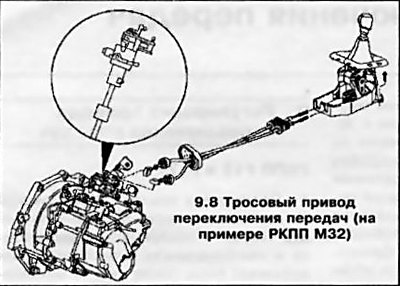
8. On these boxes, the gear shift drive is carried out by means of cables (see accompanying illustration).
9. Remove the center console cover and gearshift lever boot (see Chapter 11).
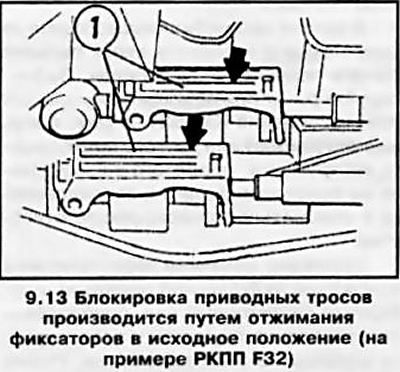
10. Using a small screwdriver, gently pry up and release both drive cable latches (see accompanying illustration).
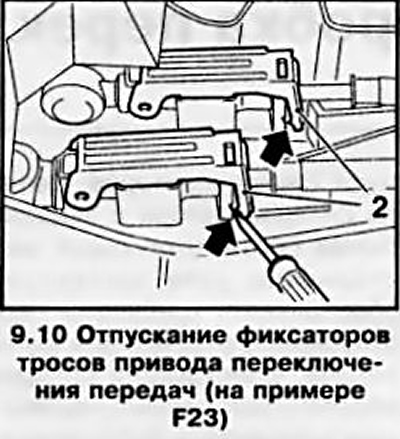
Caution: Be careful when pressing the clamps, excessive force may cause them to break!
11. On the F23 manual transmission, set the transmission to the "neutral" position in the engine compartment, then move the gearshift lever in the car to the neutral position and lock it with the lock (see accompanying illustration)
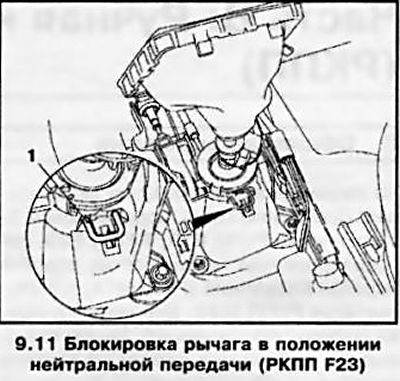
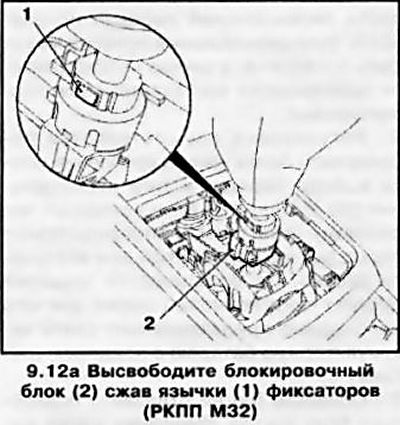
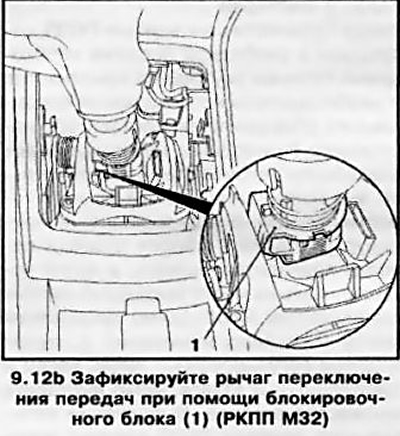
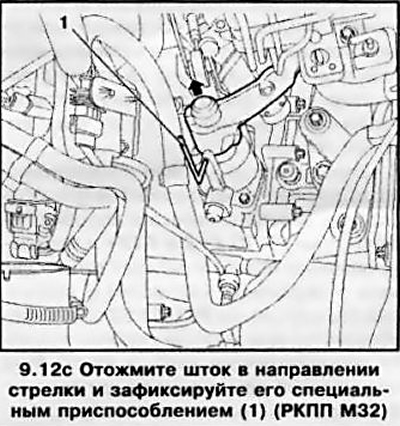
12. On the F32 manual transmission, pull the reverse gear lock latch up and squeeze the 2 tabs of the locks (see illustration 9.12a) so that the spring-loaded locking block of the gearshift lever drops down. Using the locking block, lock the lever in the neutral position (see illustration 9.12b) Then remove the battery with the tray (see Chapter 5) and fix the actuator rod using the KM-527-A device or another suitable tool (see illustration 9.12c) gear shift drive.
13. Press back and lock the locks of both cables (see accompanying illustration).
14. Reinstall all removed components, then check the proper functioning of the shift mechanism.
Visitor comments